

Members Synchronization
Okta
Set up automatic member sync with Okta using SCIM. Version ≥ v2.7.0
This guide shows you how to connect Okta to Dify Enterprise Edition’s SCIM service for automatic member synchronization.
Create and Configure Your Okta Application
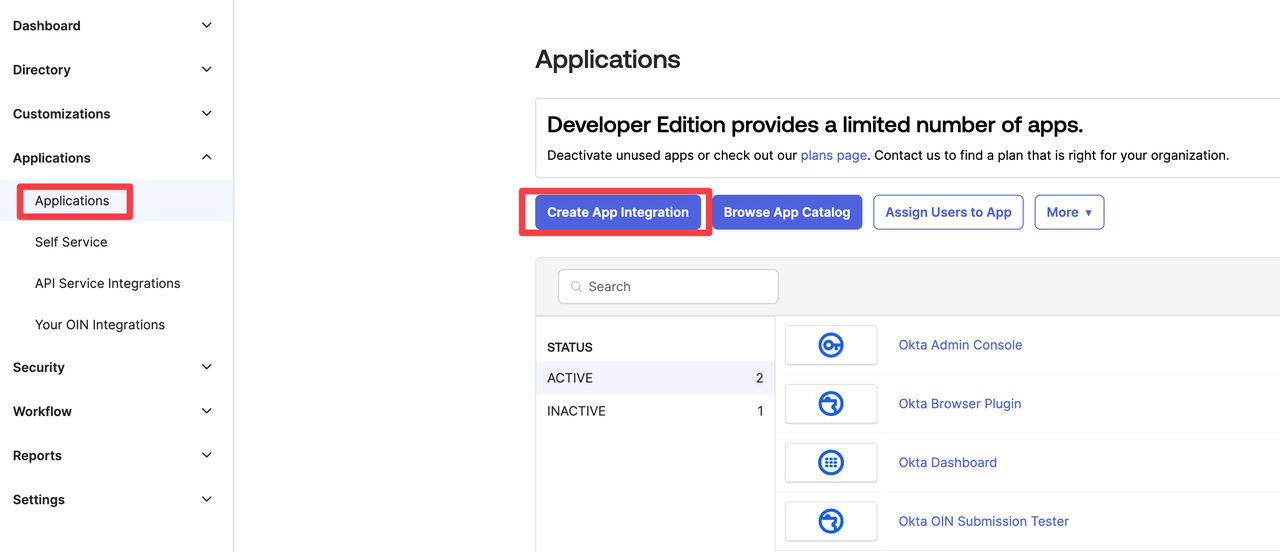
1. Log into Okta Admin Console
Go to your Okta admin portal and navigate to Applications → Create App Integration.
2. Create the App Integration
- Click Create App Integration
- Configure the app:
- Platform: Web Application
- Sign-on method: SAML 2.0
- Click Create
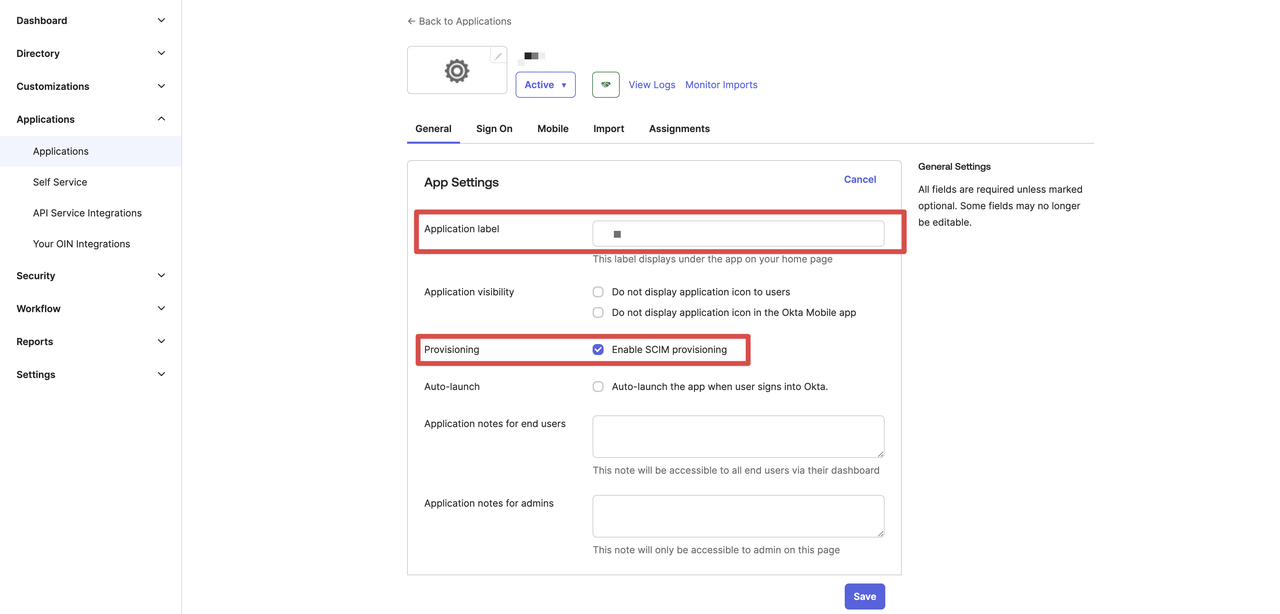
- Enable SCIM:
- In the General tab, find App Settings
- Click Edit
- Update the Application label if needed
- Enable SCIM provisioning
- Click Save
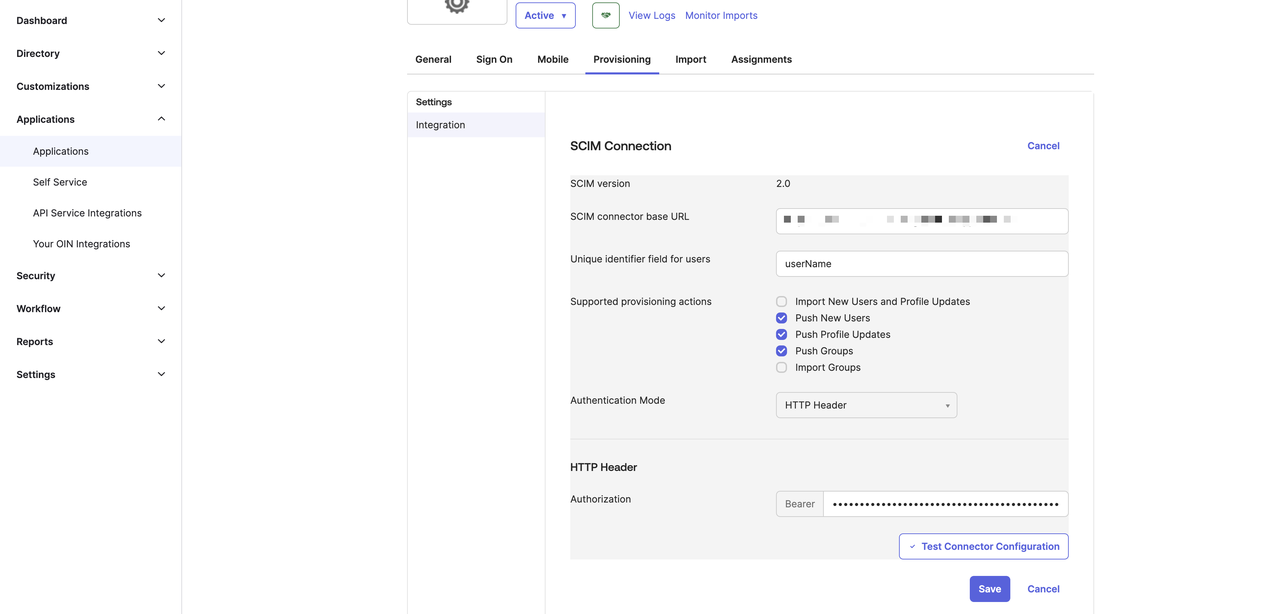
3. Set Up SCIM Connection
- Go to the Provisioning tab
- Click Configure API Integration
- Check Enable API integration
- Enter your SCIM details:
- SCIM 2.0 base URL: Your SCIM endpoint URL
- OAuth Bearer Token: Your SCIM authentication token
- Enable Import User and Import Group based on your needs
- Click Test API Credentials
- After a successful test, click Save
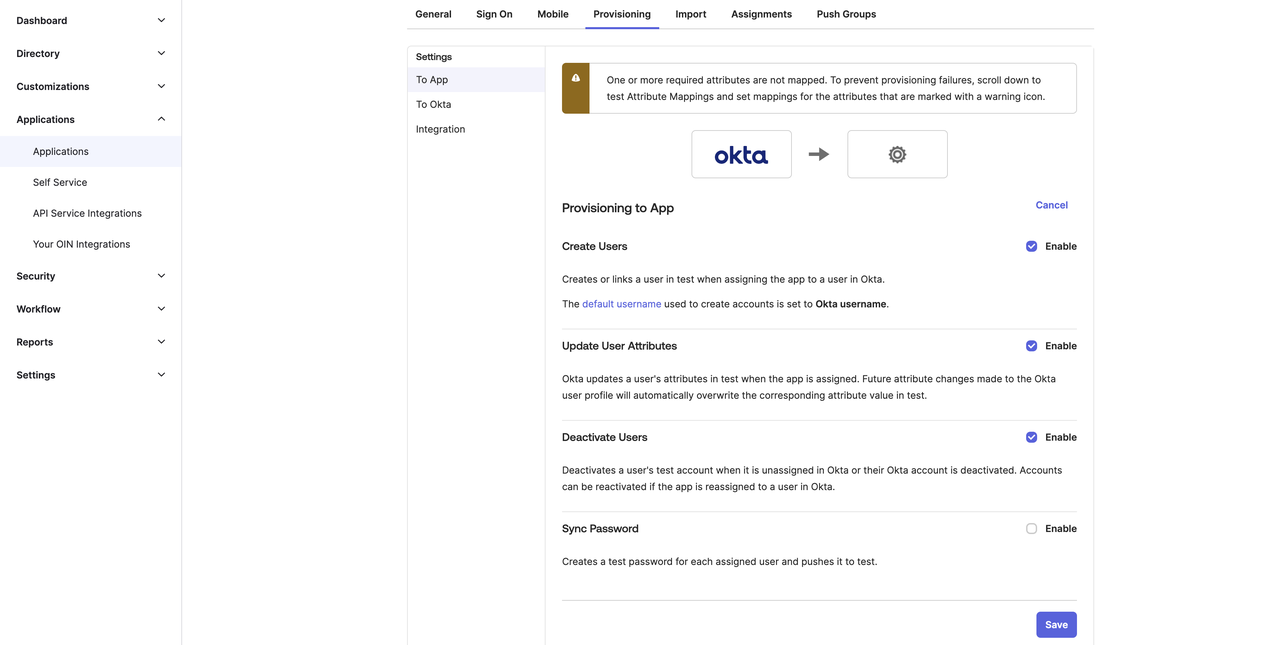
4. Configure Provisioning Options
- In the Provisioning tab, find the “To App” section and click Edit
- Enable these features as needed:
- Create Users: Adds new Dify users when assigned in Okta
- Update User Attributes: Keeps user info synchronized
- Deactivate Users: Sets user status to “disabled” in Dify when deactivated in Okta
- Click Save
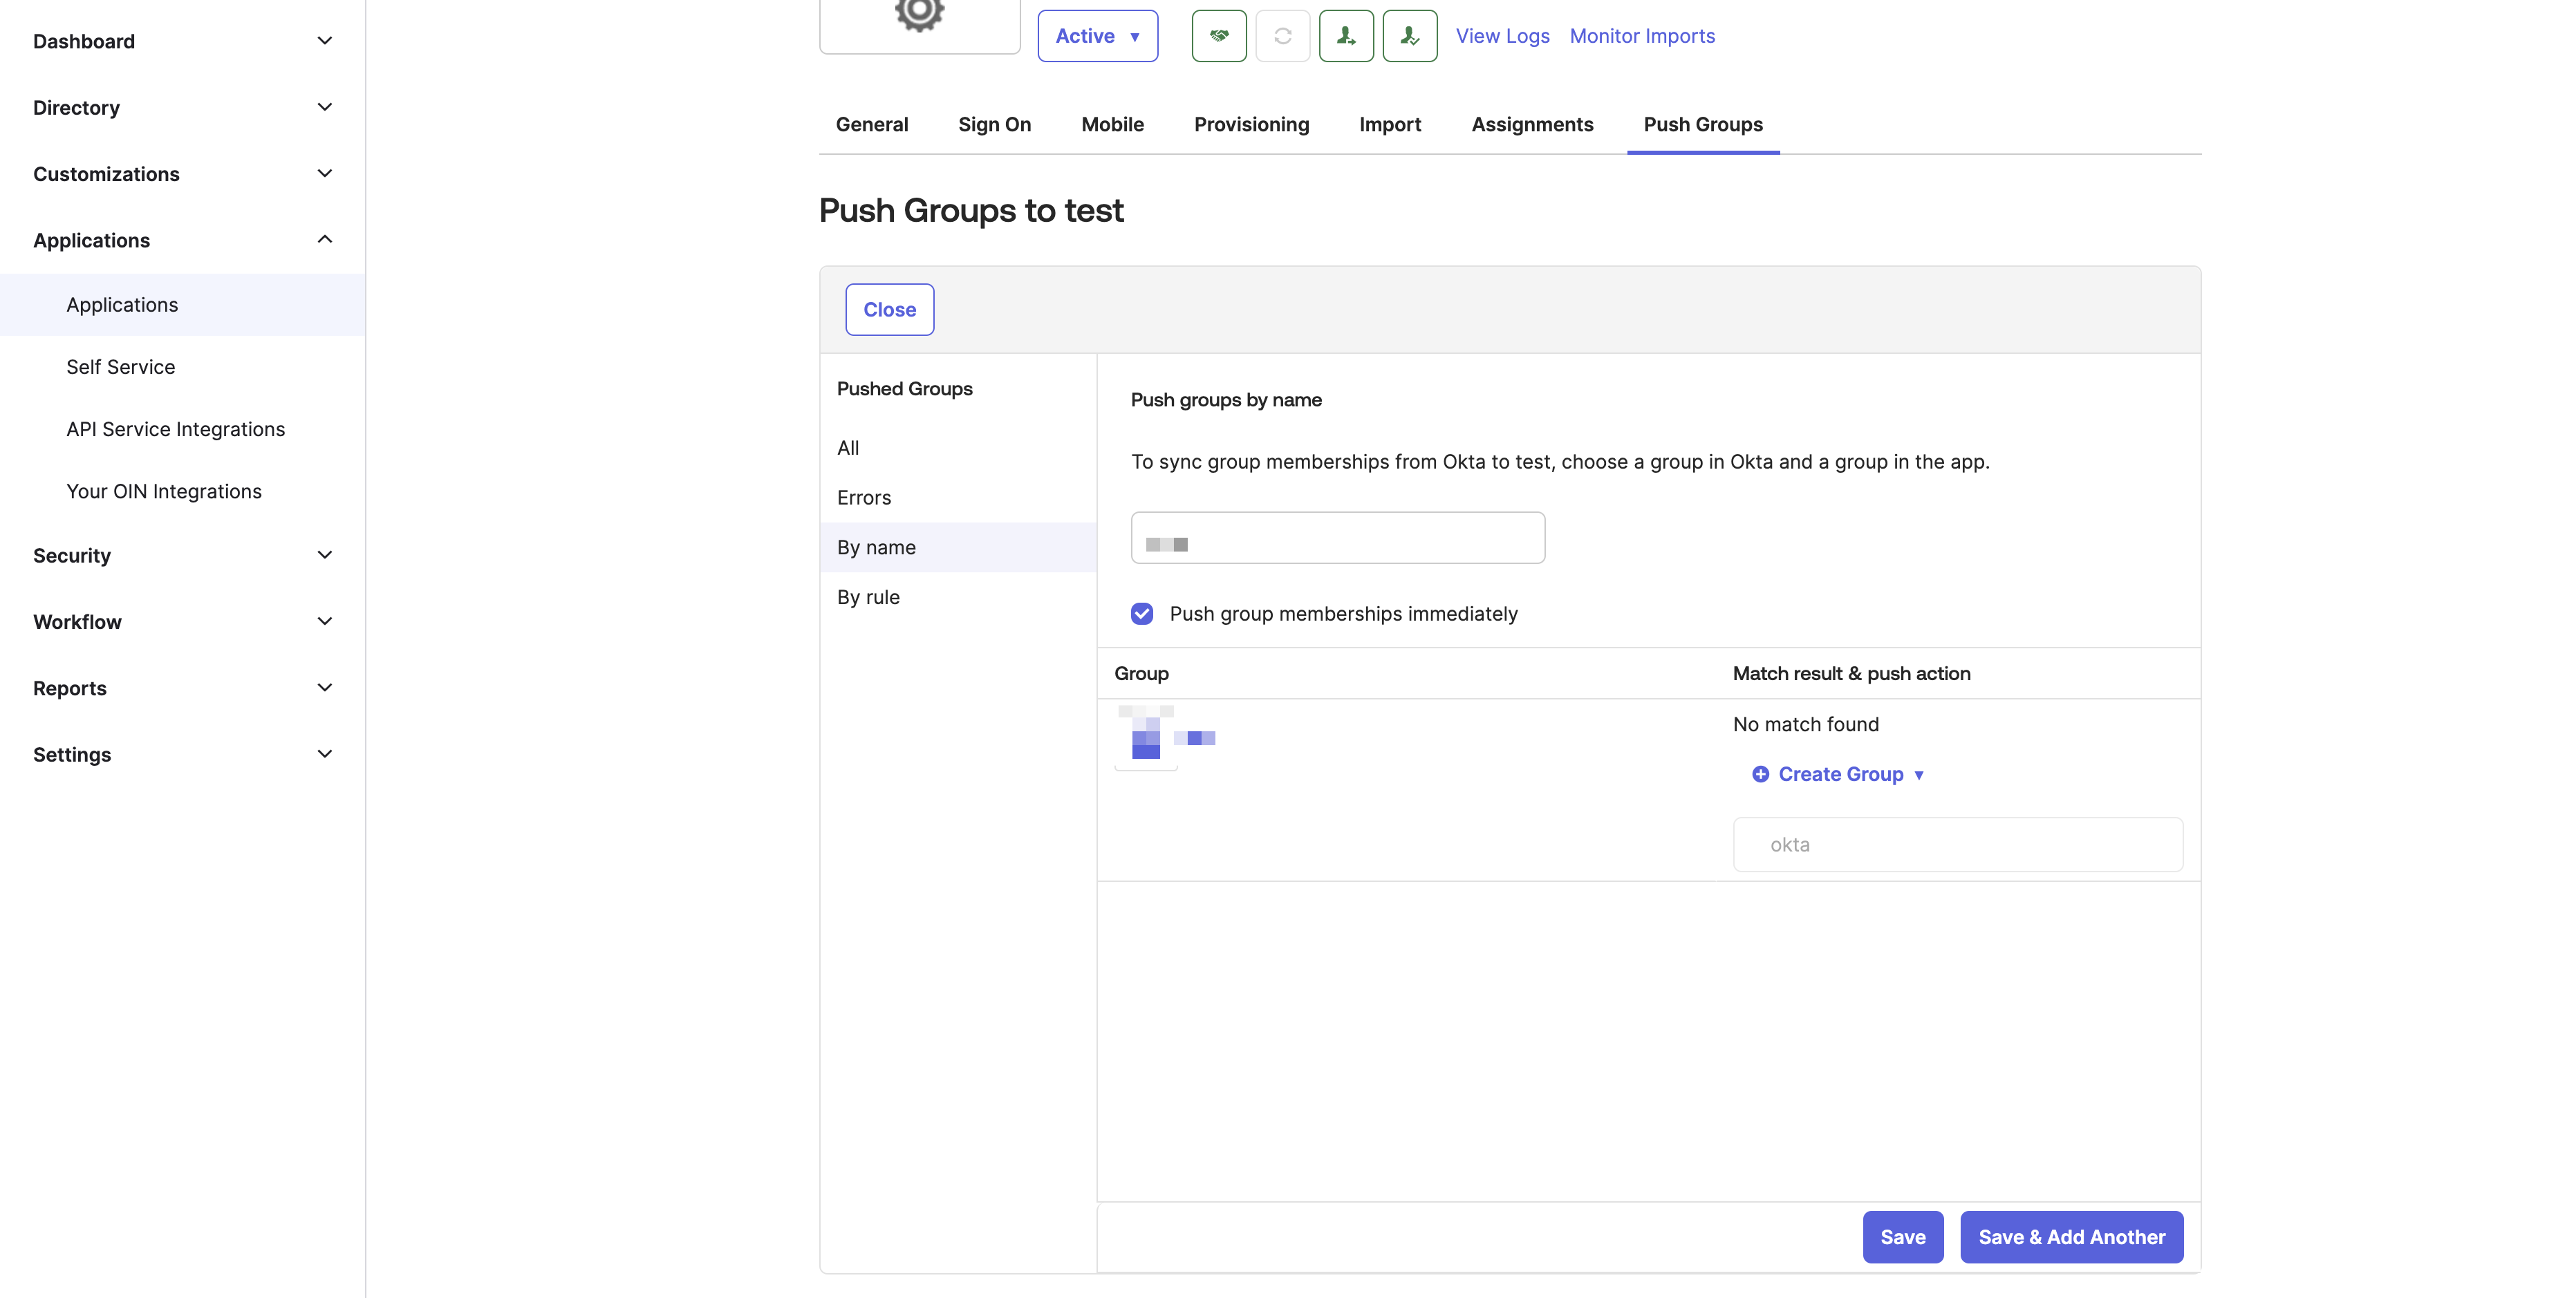
5. Assign Users and Groups
To assign users:- Go to the Assignments tab
- Click Assign and choose users or groups to sync with Dify Enterprise
- Click Save
- Click Push Groups
- Select the groups you want to sync to Dify Enterprise
- Click Save
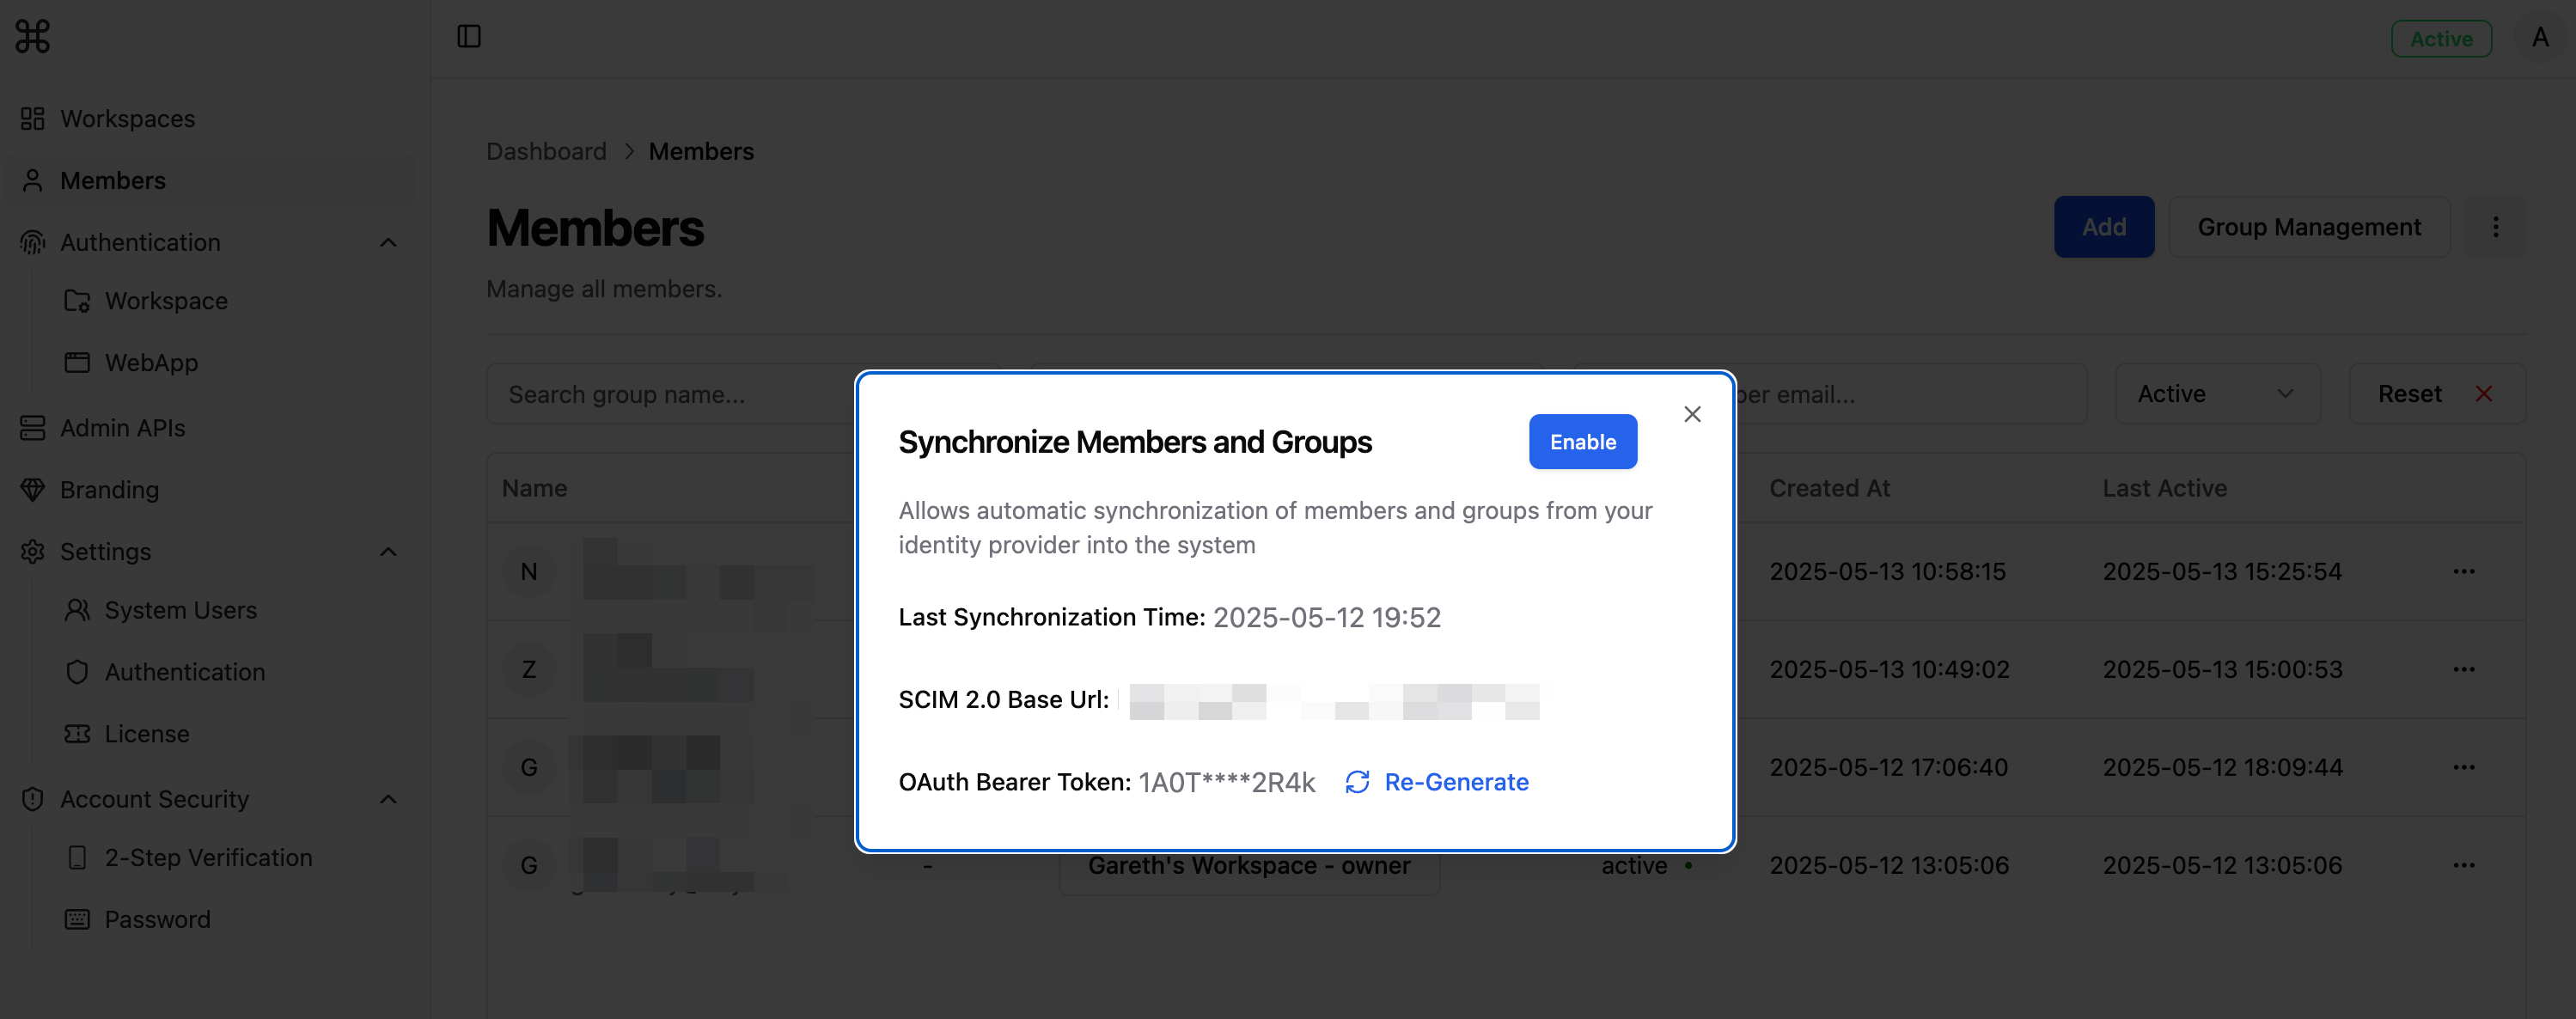
Enable SCIM in Dify
Once Okta is configured:- Go to the Dify admin dashboard
- Navigate to Members → click the menu button → Automatic synchronization → Enable
Sync isn’t instant. Okta controls the sync schedule. Check your provisioning logs in Okta for sync history.