

Managing Members
Manual Management
Add New Members to Your Team
If your team doesn’t use SSO authentication, members can log in with username and password. Click the Add button in the top right corner, then enter the username and email. The system displays the default login password when adding a member for the first time. To add administrators to your team, see System Administrator Settings.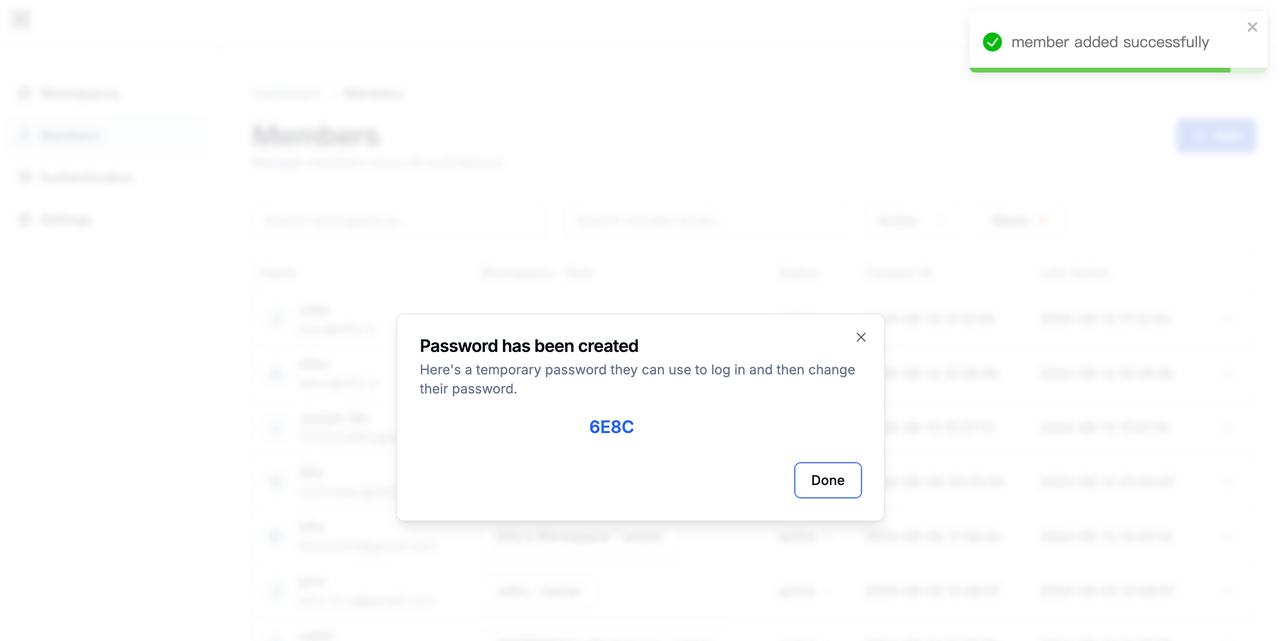
Add New Members to Workspaces
To add members to a specific workspace, check out Workspace Management.Disable Members
Disabling members is better than deleting them—it preserves their data while denying access. Click the menu button next to a member and switch their Status to “banned” to disable them.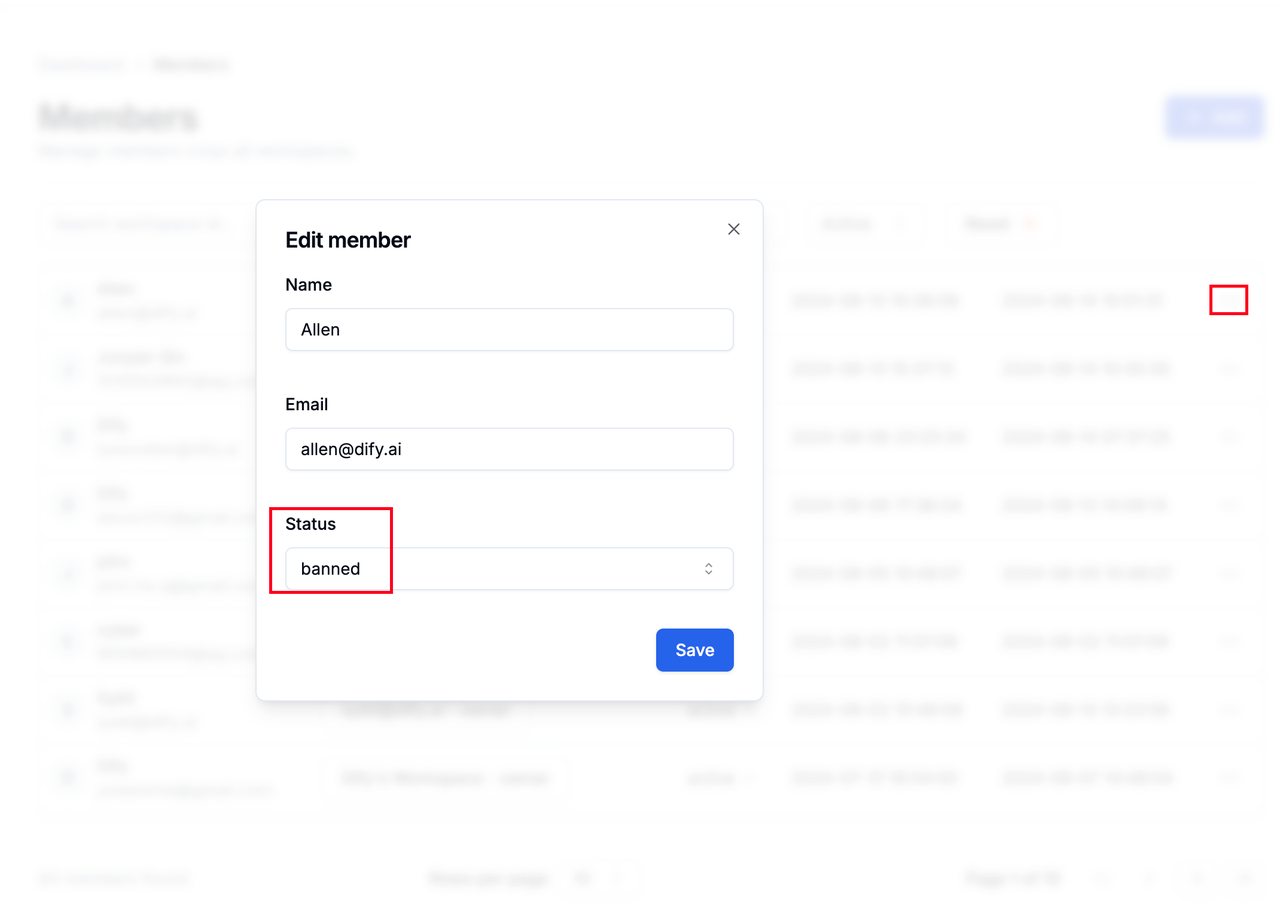
Reset Member Passwords
When members forget their passwords, system administrators need to send password reset emails manually. Click the menu button next to a member and select Reset Password.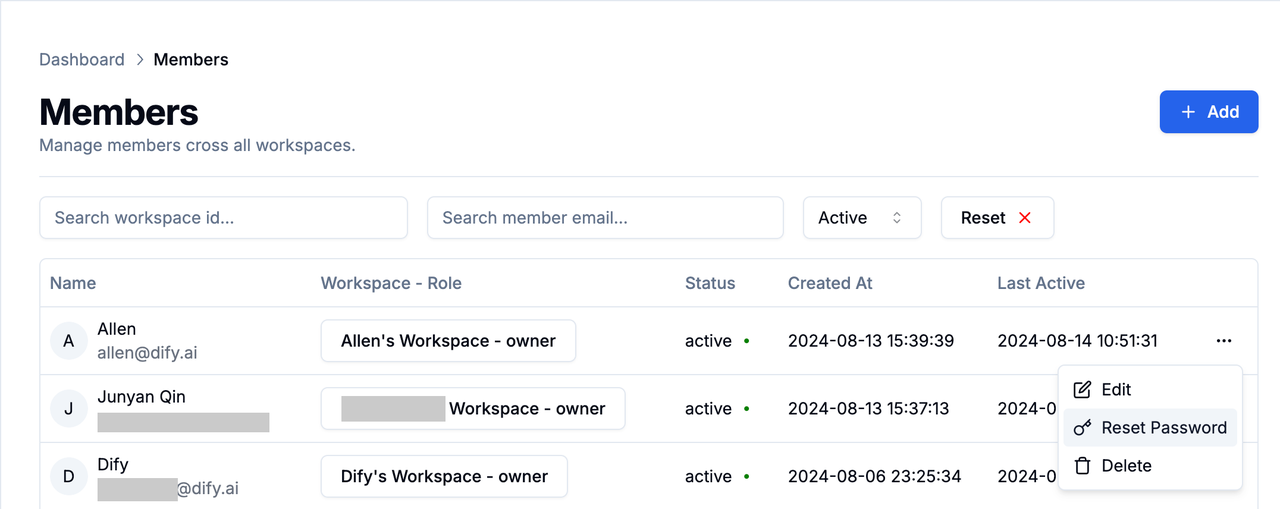
Delete Members
⚠️ Warning: Deleting a member removes all their applications and usage data. Be careful with this action. Click the menu button next to a member and select Delete to remove them. Note: Once added to a workspace, members can’t be removed from it. Clicking Delete on the Members page removes them from the entire team.
Search for Members
Administrators can search for users by workspace ID or email address, and filter by user status.
Automatic Management
Automatic member sync requires Dify Enterprise Edition version ≥v2.7.0.
Automatic Member Sync
Automatically sync organization members through the SCIM standard.
Permission Management
Each member has permissions at both the team level and workspace level. Team administrators can add regular members, invite new system administrators, and assign workspace permissions to members.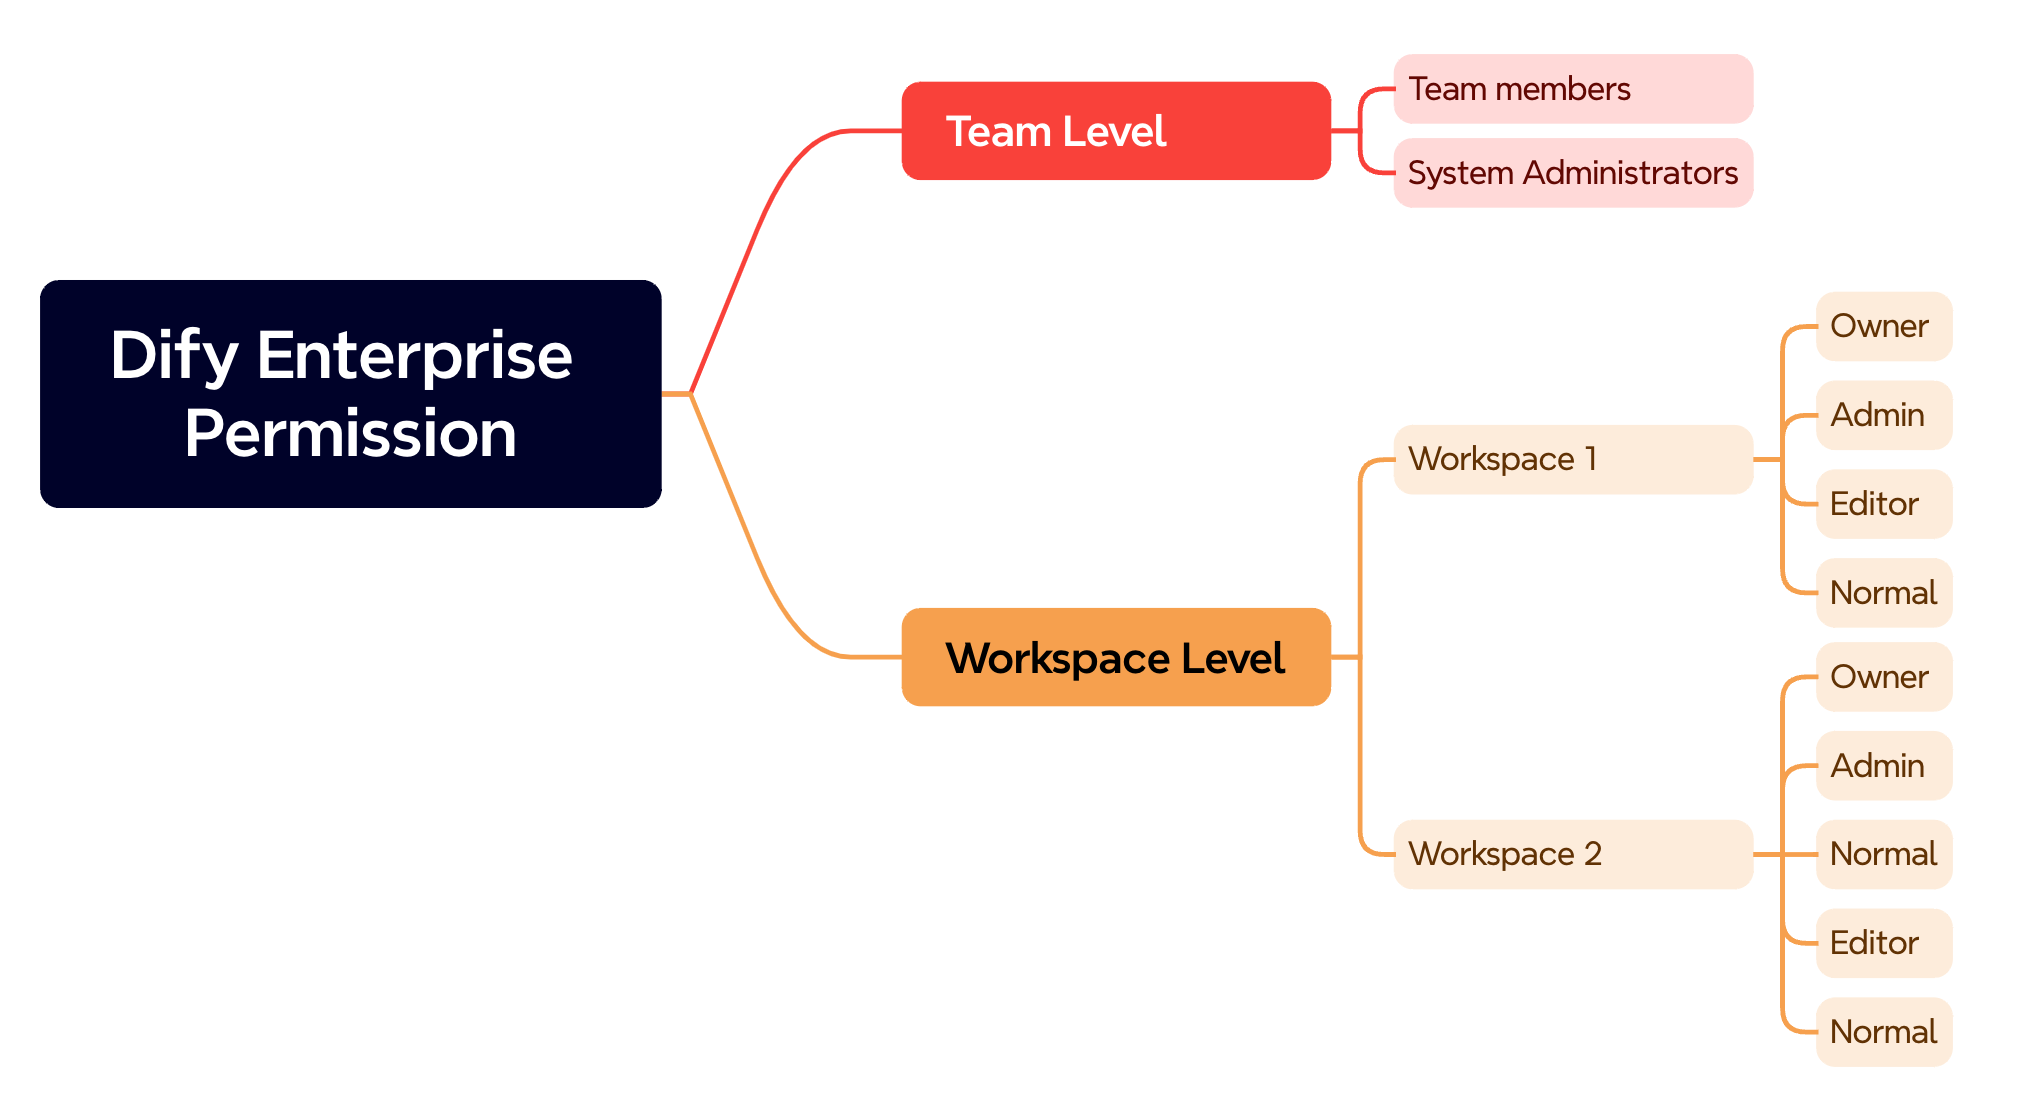
Team-Level Permissions
- Team Members
 These members can:
- Log in and use Dify Enterprise Edition
- System Administrators
 These members can:
- Access the enterprise management dashboard
- Add, delete, or disable team members
- Add members to workspaces and assign permissions
Workspace-Level Permissions
Workspaces have five permission groups: Owner, Admin, Editor, Normal.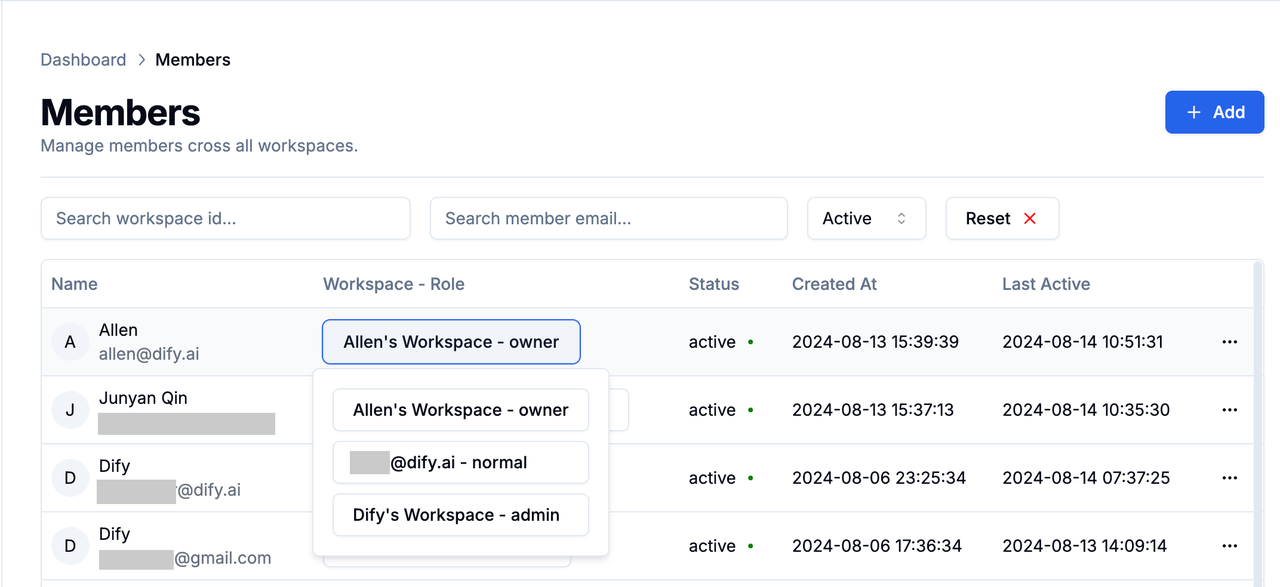
- Owner
- Admin
- Editor
- Normal
Group Management
This feature requires Dify Enterprise Edition version ≥v2.6.0.
Manual Sync Groups
Create Groups
Click Group Management in the top right corner of the Members page, enter a group name to create it. Group names must be unique.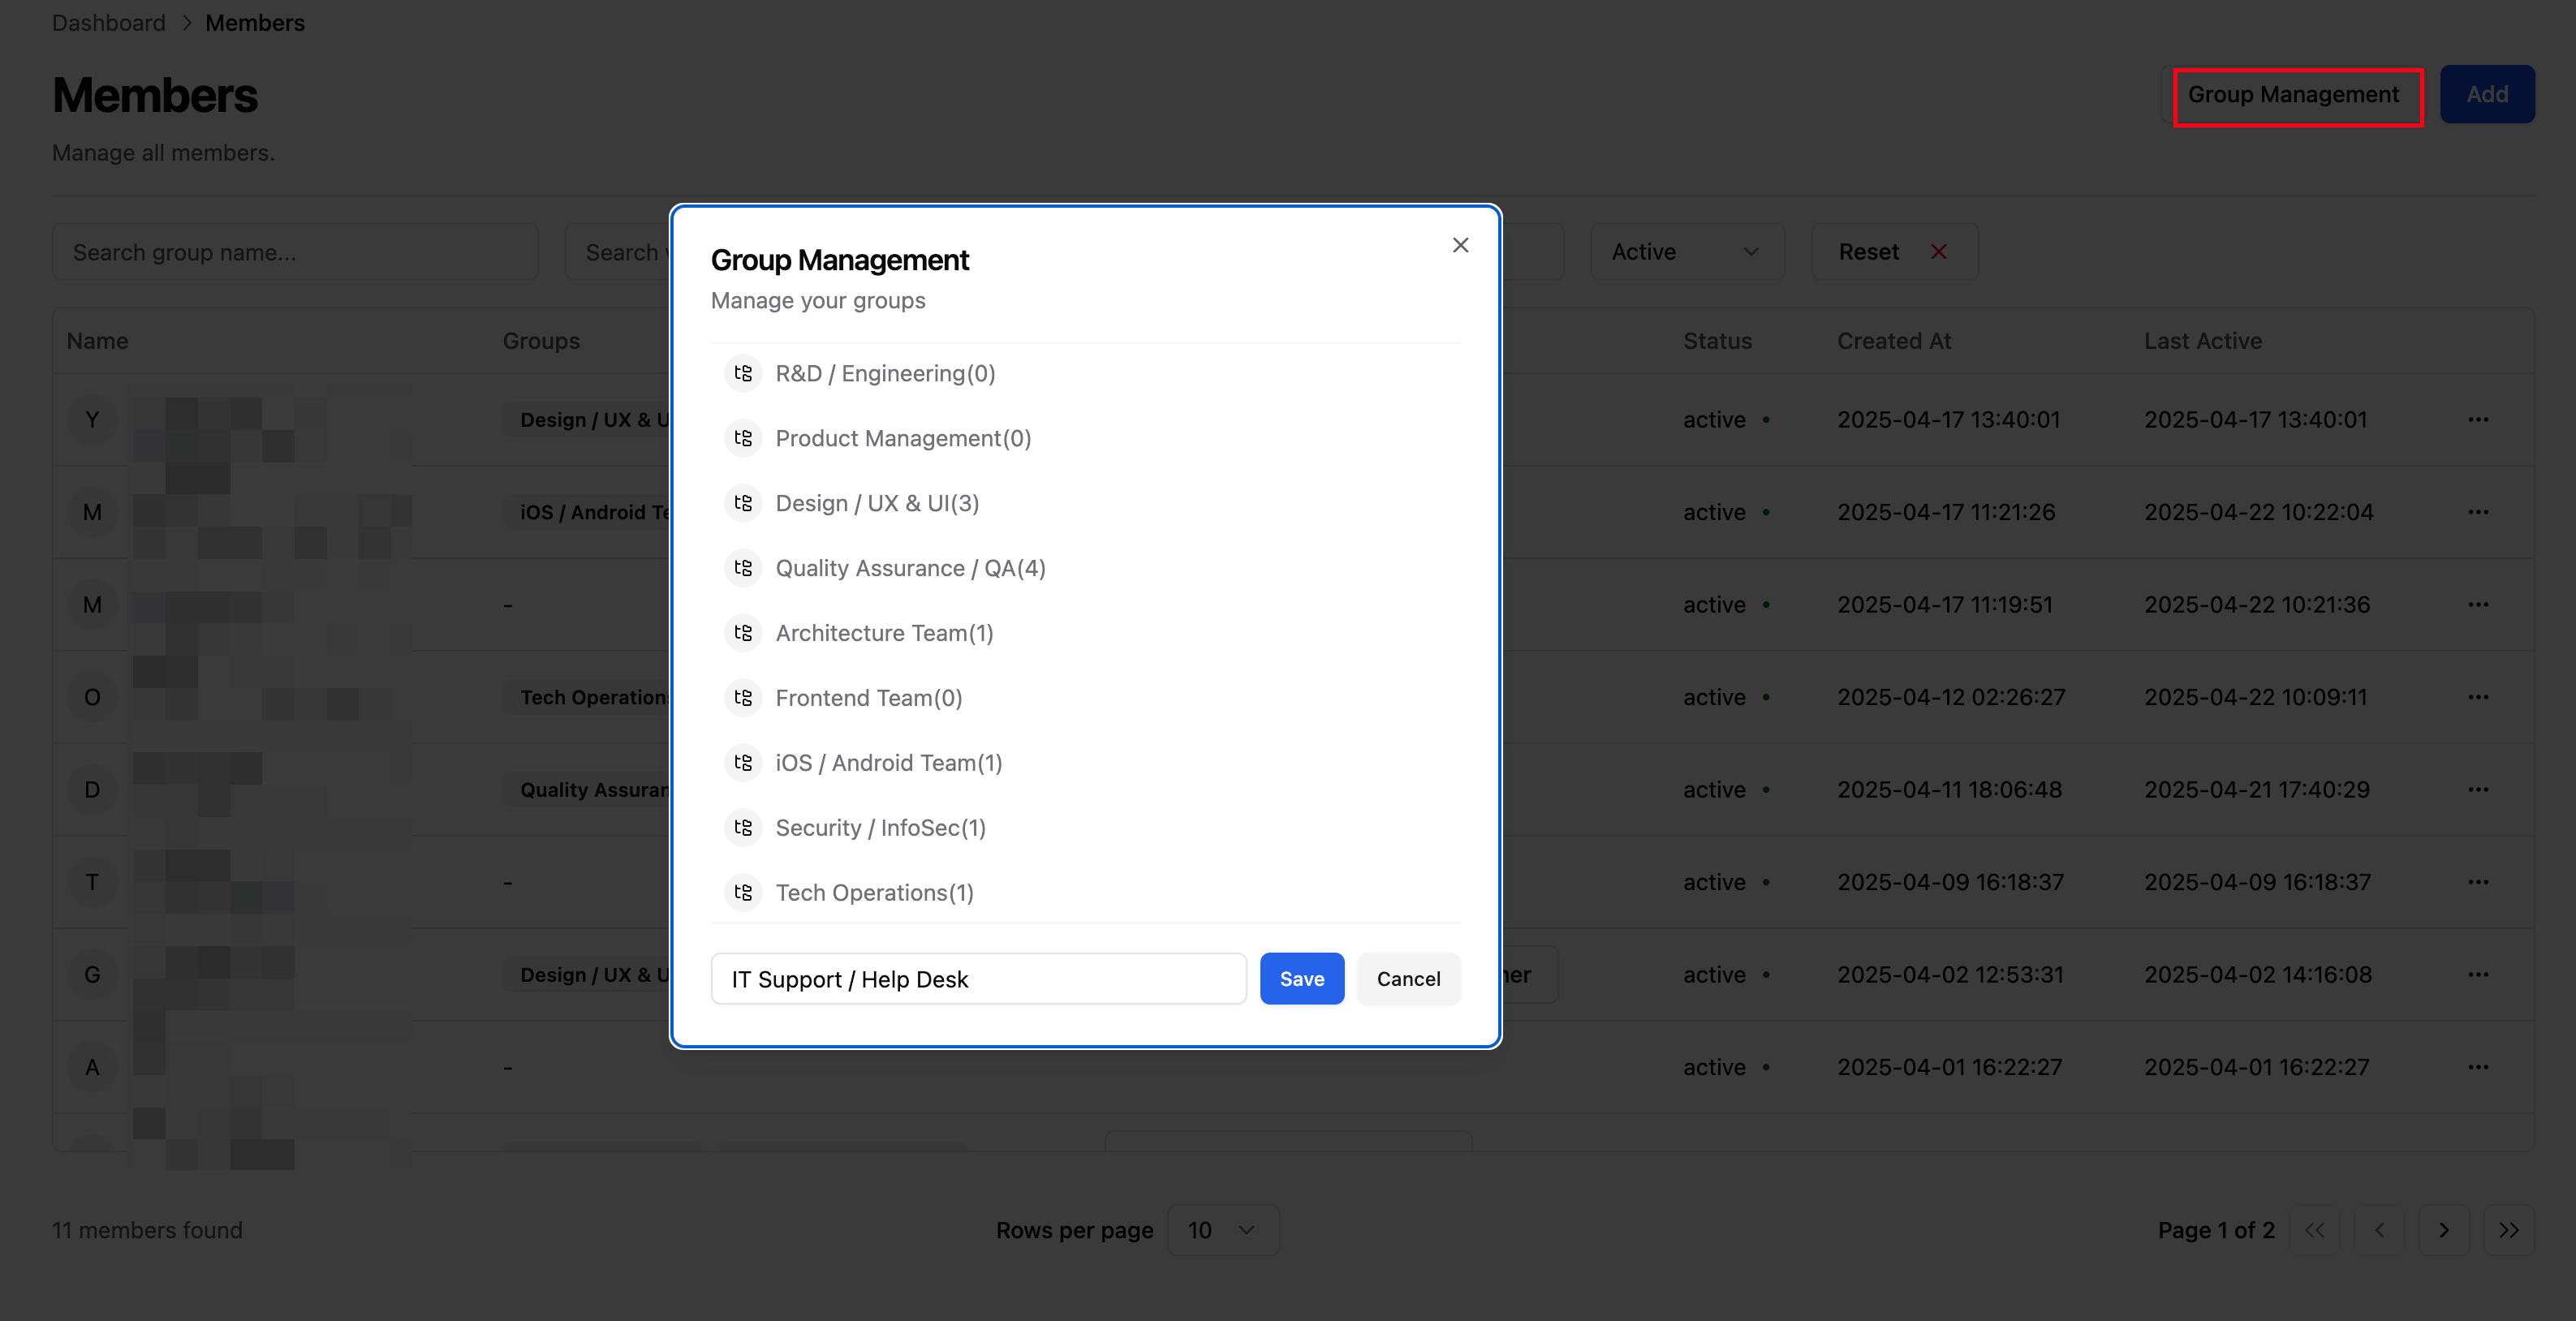
Edit Groups
Groups support renaming and reordering by dragging. Click the Edit button next to a group name to rename it. Names cannot duplicate existing groups.Assign Users to Groups
Click the menu button next to a member → Edit Groups, then select the groups they should join. Each user can belong to multiple groups.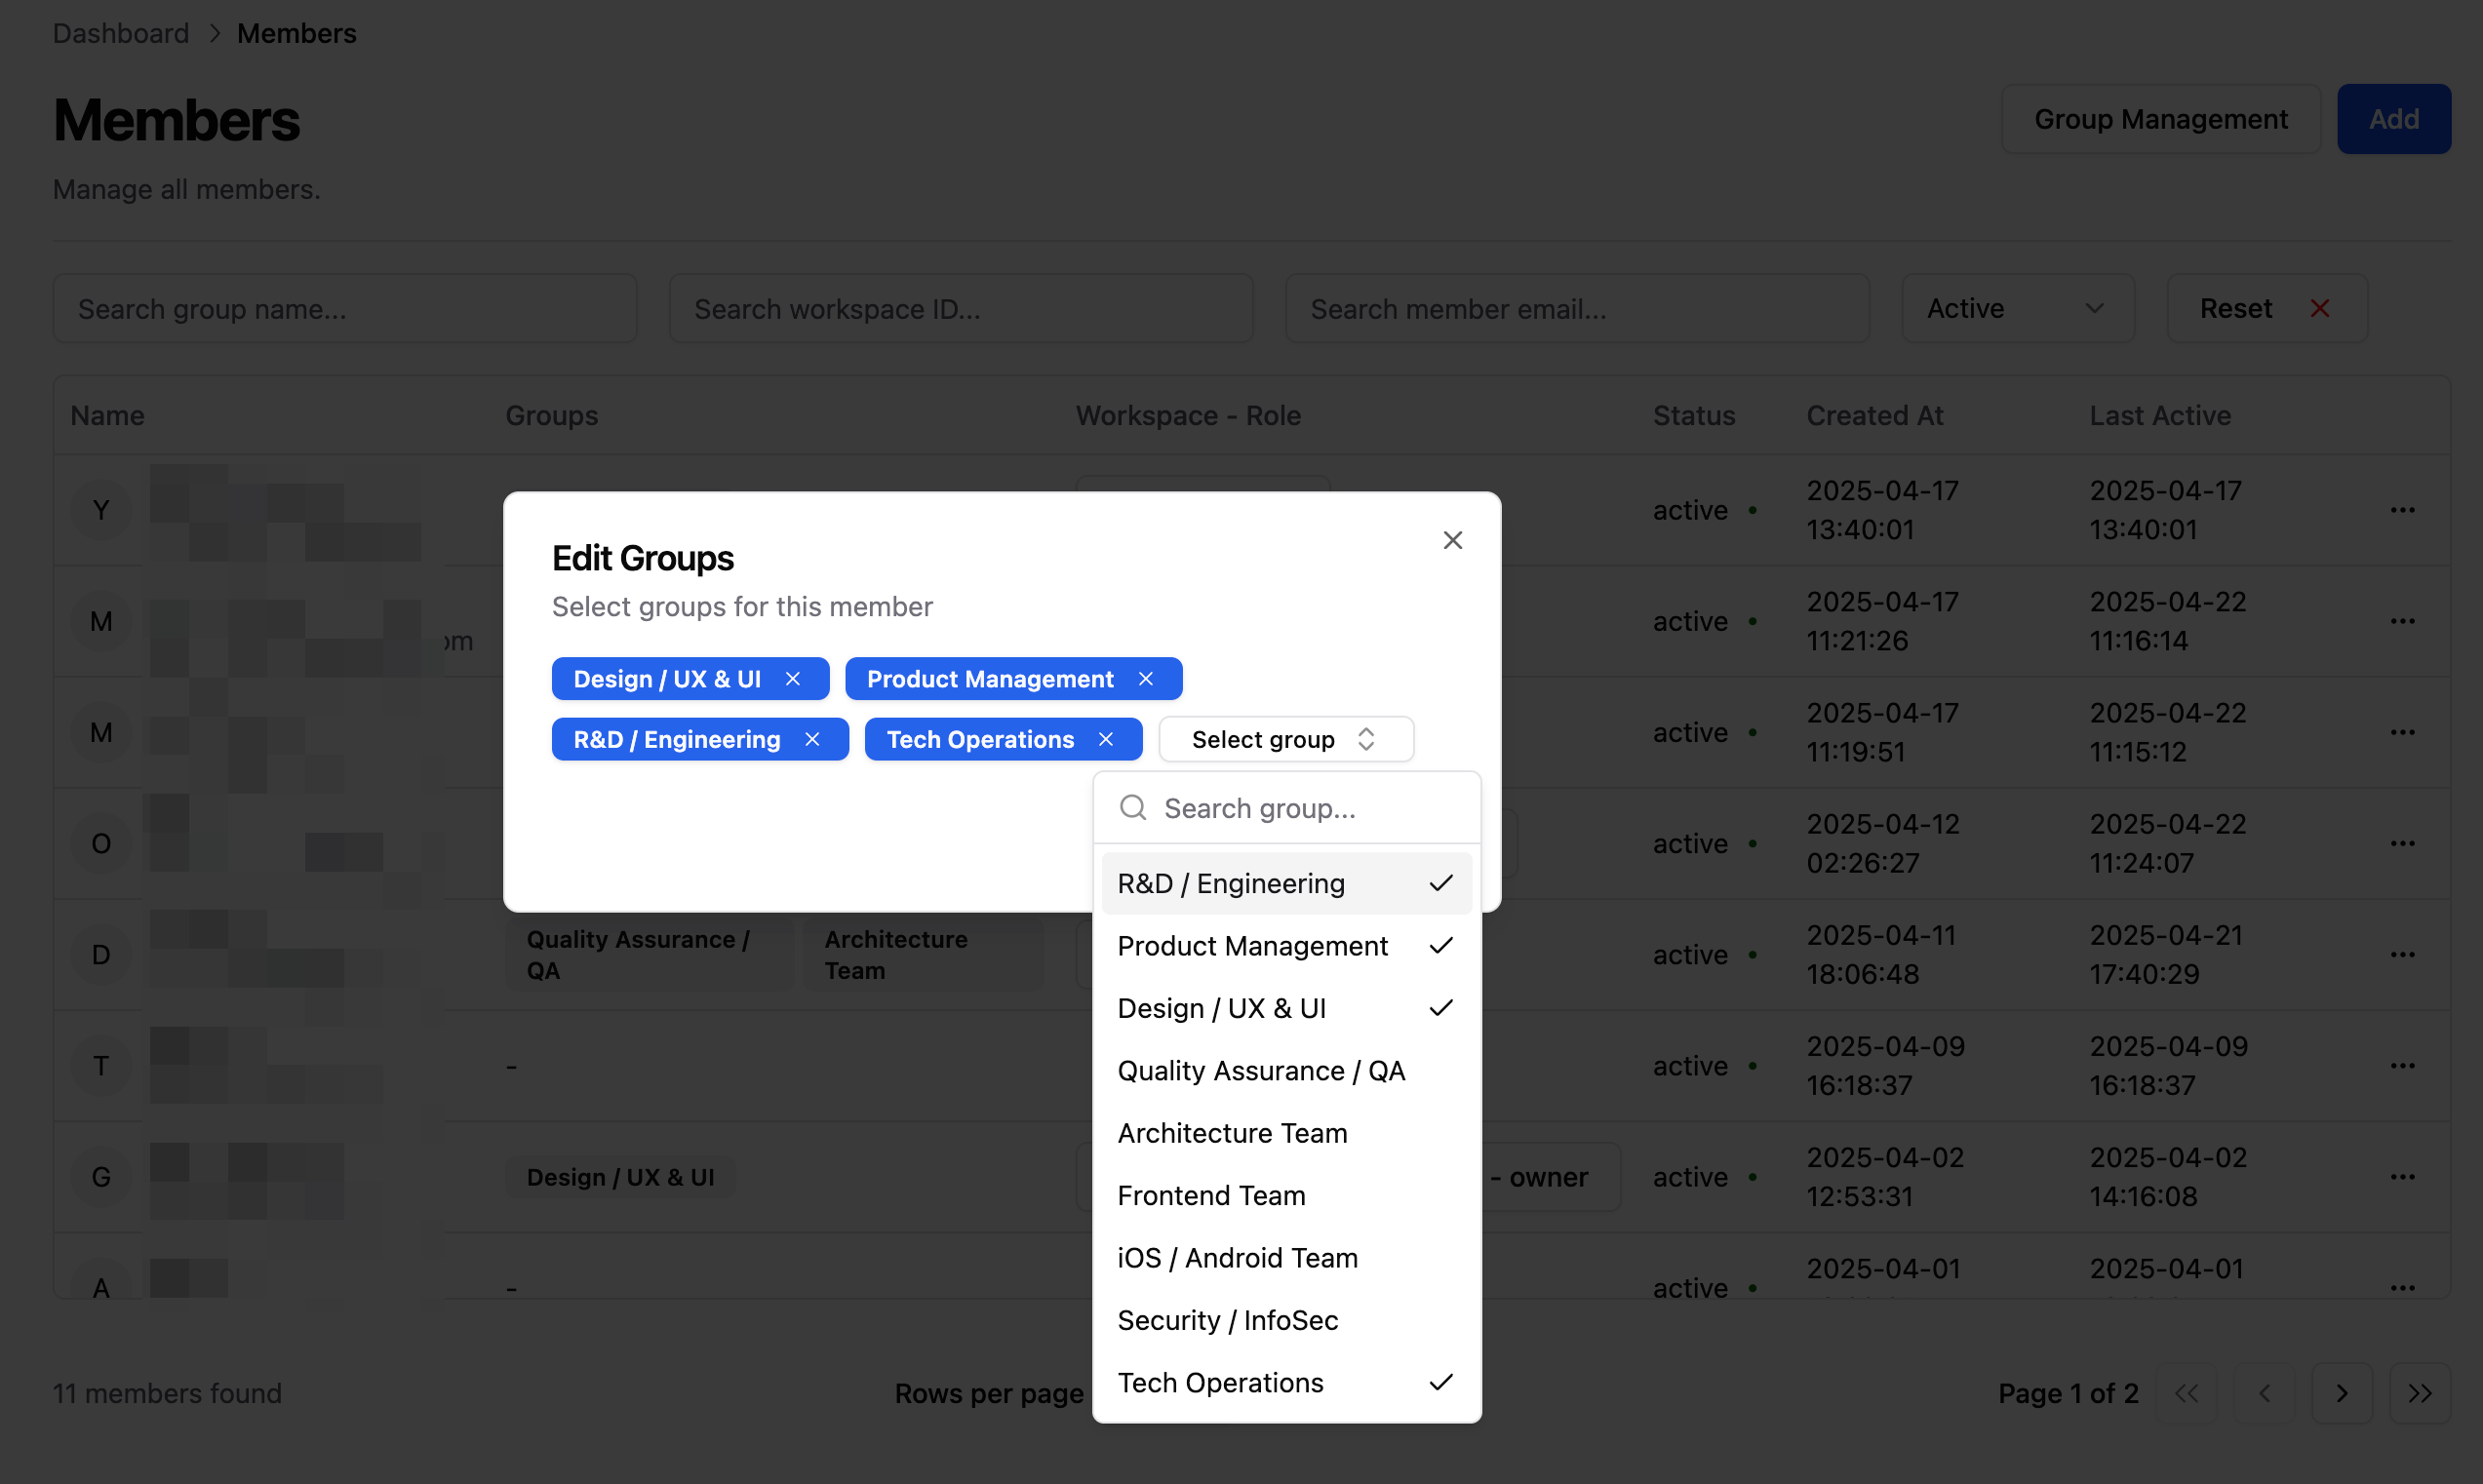 After assigning users to groups, see Application Publishing: Access Permission Management to learn how to control Web App access permissions.
Automatic Sync Group
Automatic department synchronization requires Dify Enterprise Edition version ≥v2.6.0.
Azure
Automatically sync user groups through Azure.
Okta
Automatically sync user groups through Okta.