

Members Synchronization
Azure
Set up automatic member sync with Azure AD using SCIM. Version ≥ v2.7.0
This guide shows you how to connect Azure Entra ID to Dify Enterprise Edition’s SCIM service for automatic member synchronization.
 Select Create your own application, give it a name (e.g., “dify”), choose Integrate any other application you don’t find in the gallery (Non-gallery), then click Create.
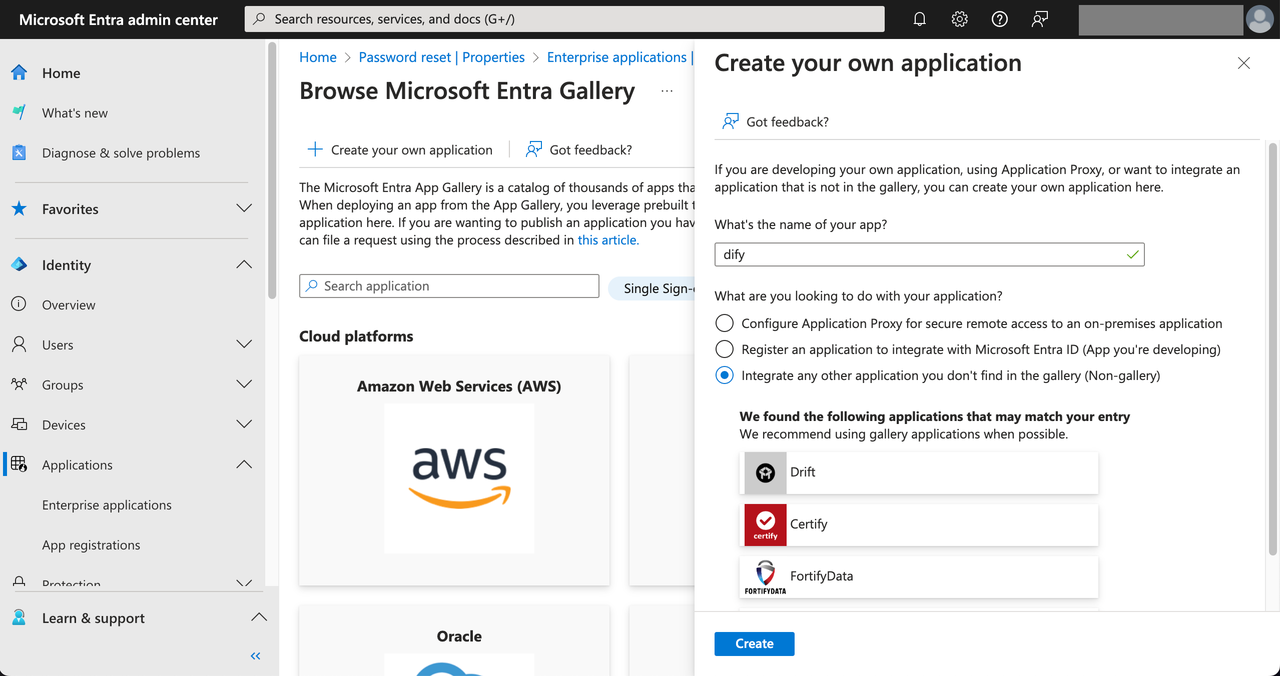
Set Up Your Azure Application
1. Create a New Application
In the Azure admin portal, go to Applications and click New application.
Select Create your own application, give it a name (e.g., “dify”), choose Integrate any other application you don’t find in the gallery (Non-gallery), then click Create.
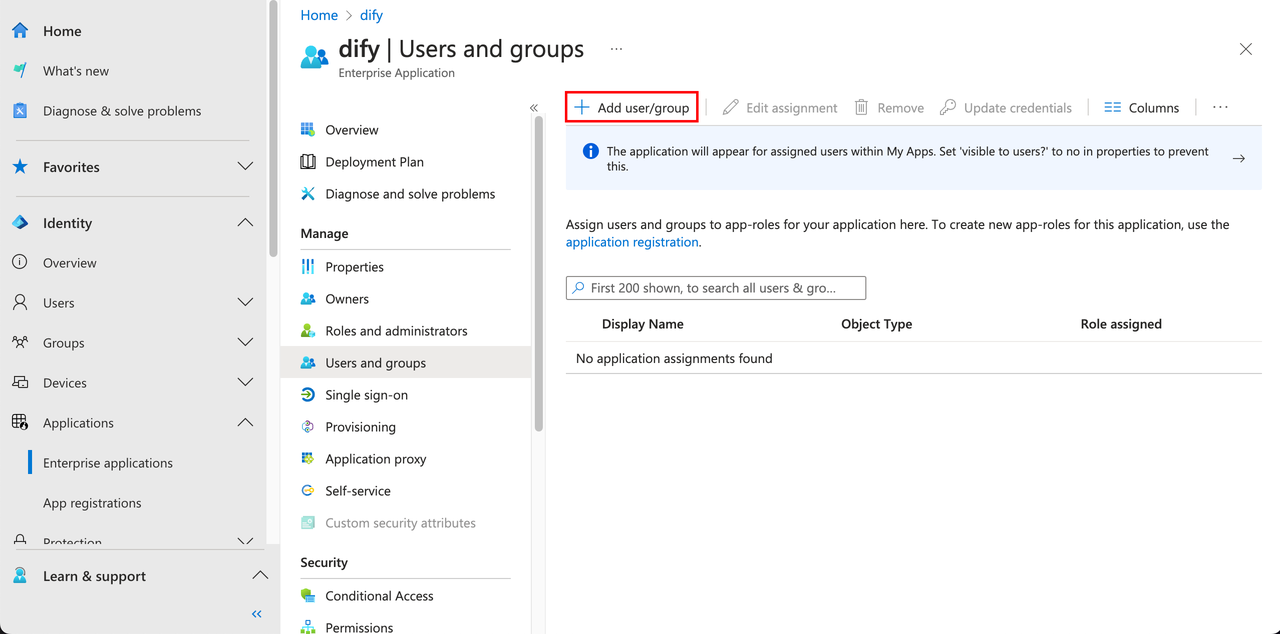
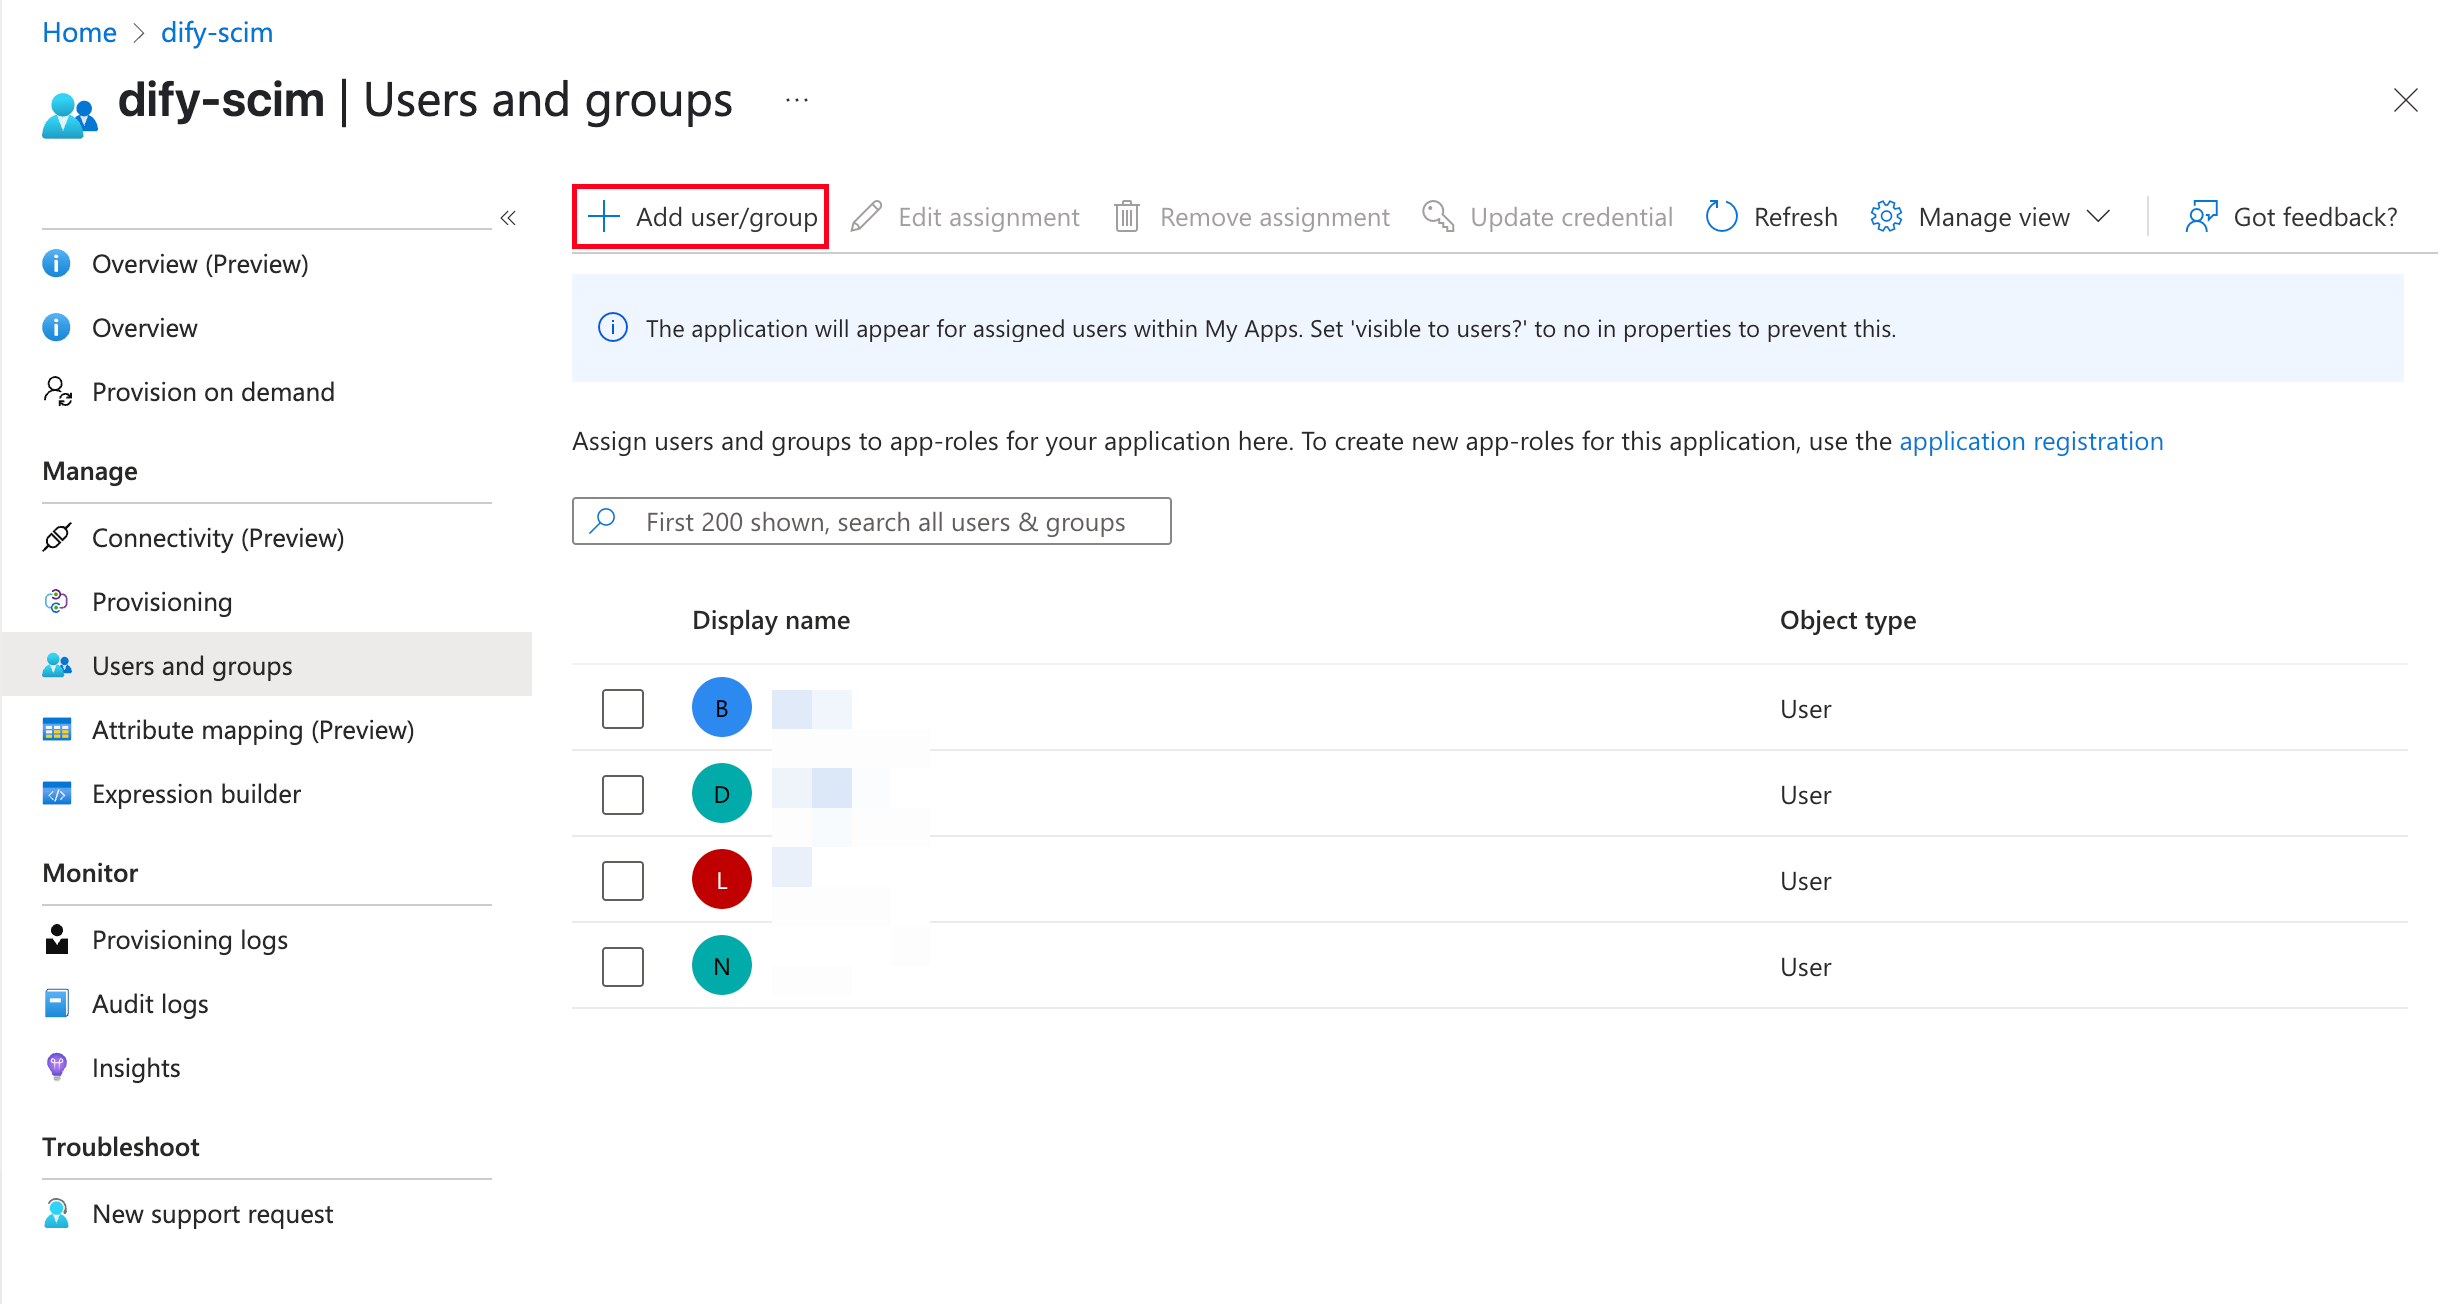
2. Assign Users and Groups
From the application’s left menu, select Users and groups, then click Add user/group.
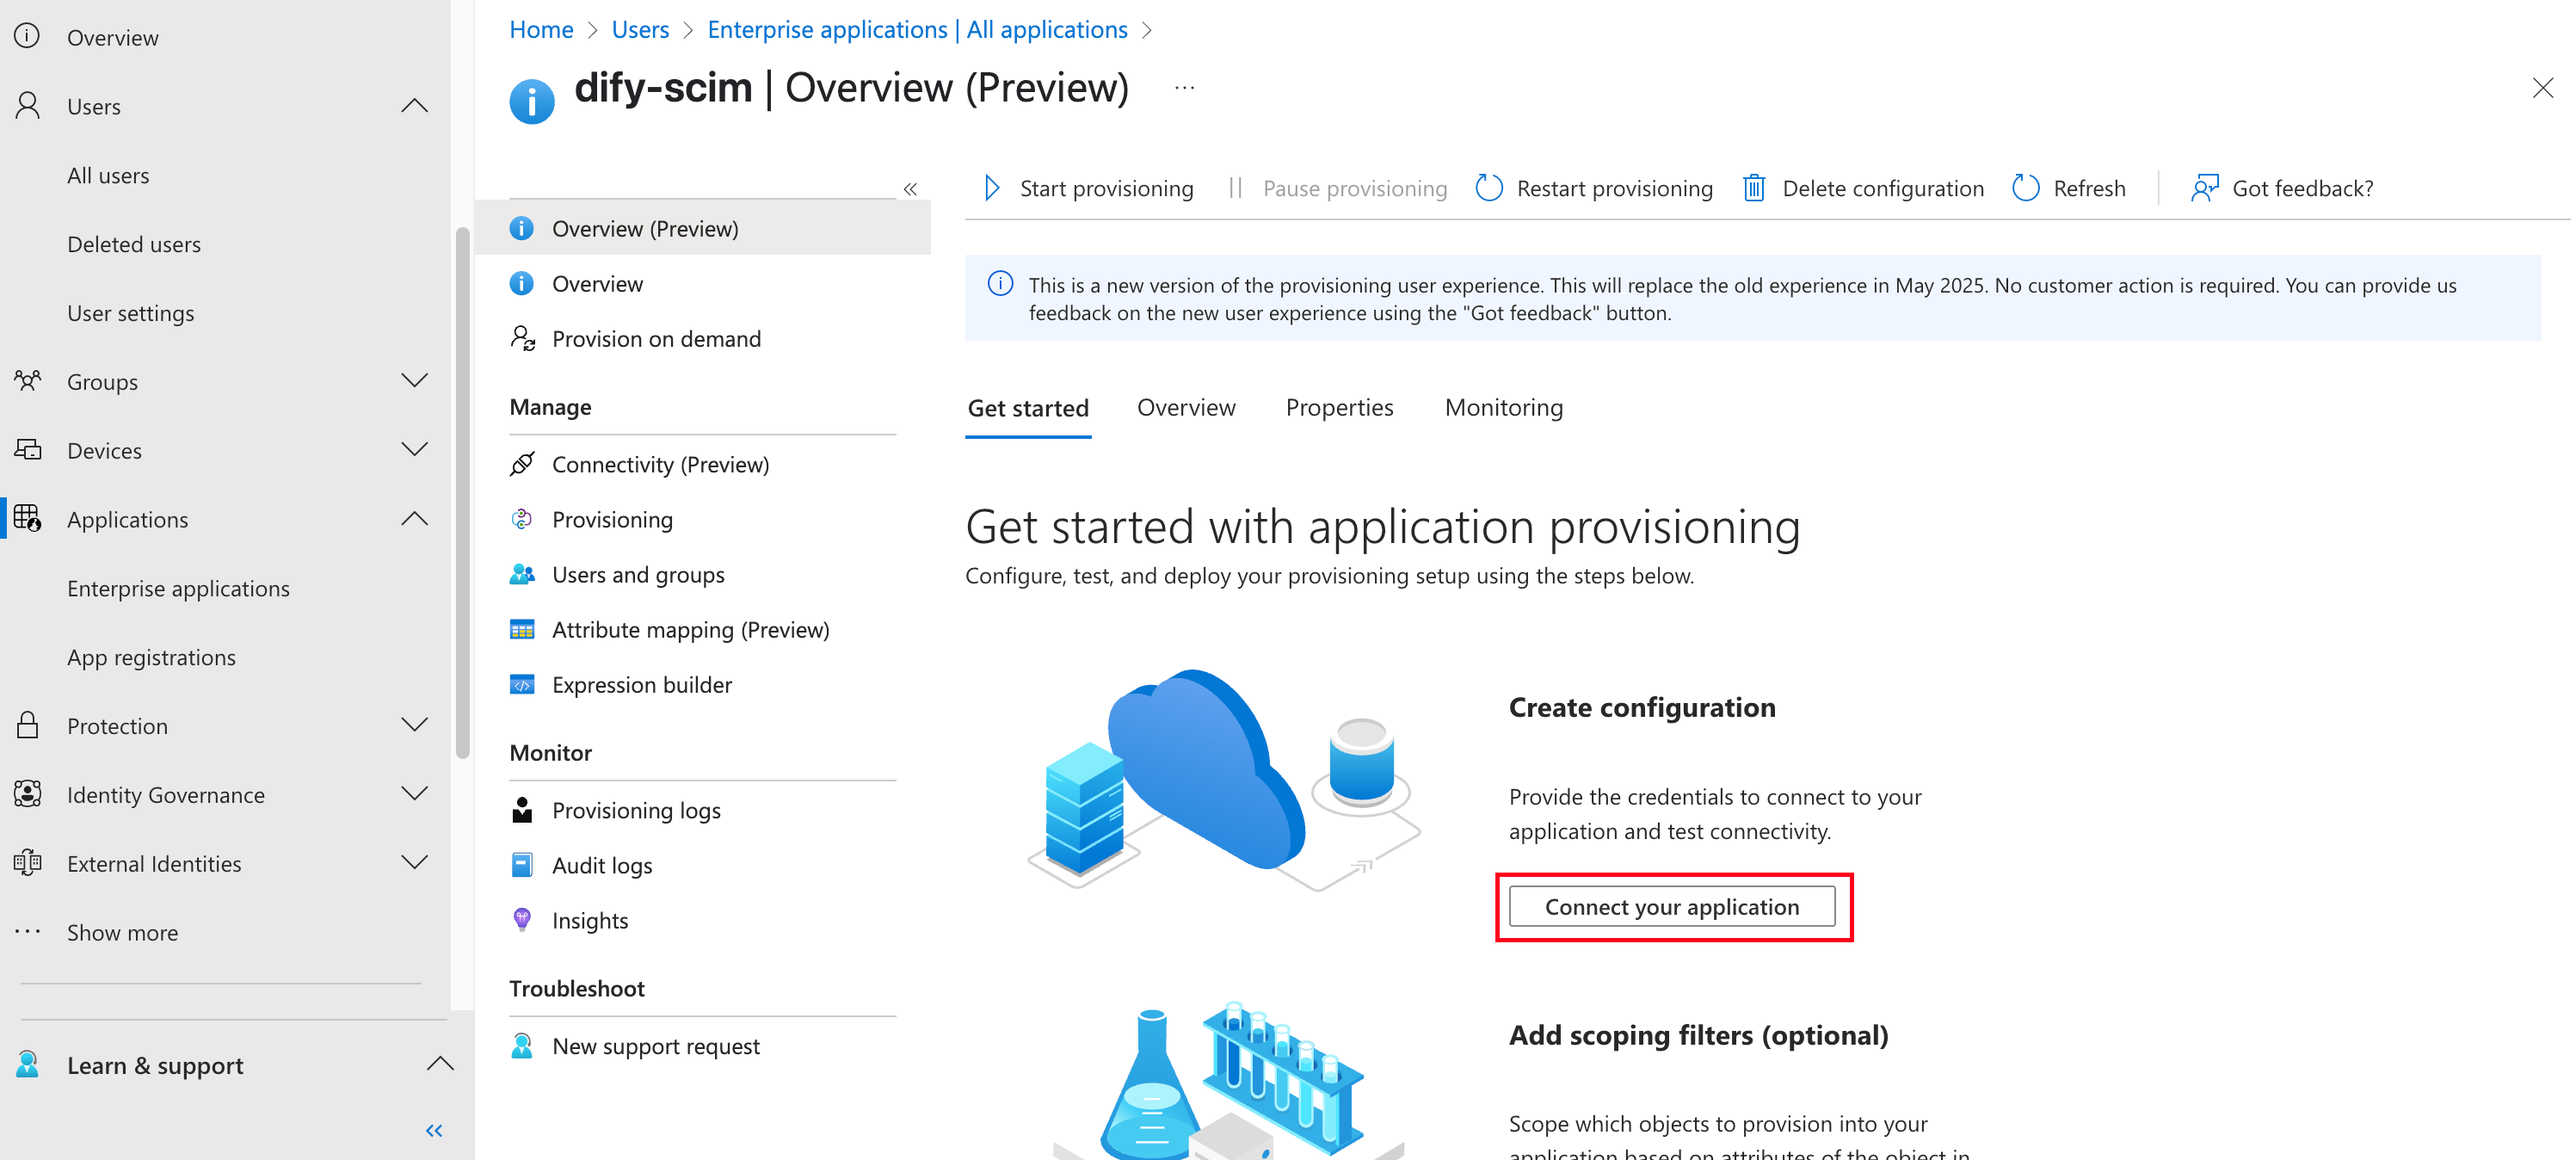
3. Set Up Provisioning
- In the left menu, go to Provision → Get started → Connect your application.
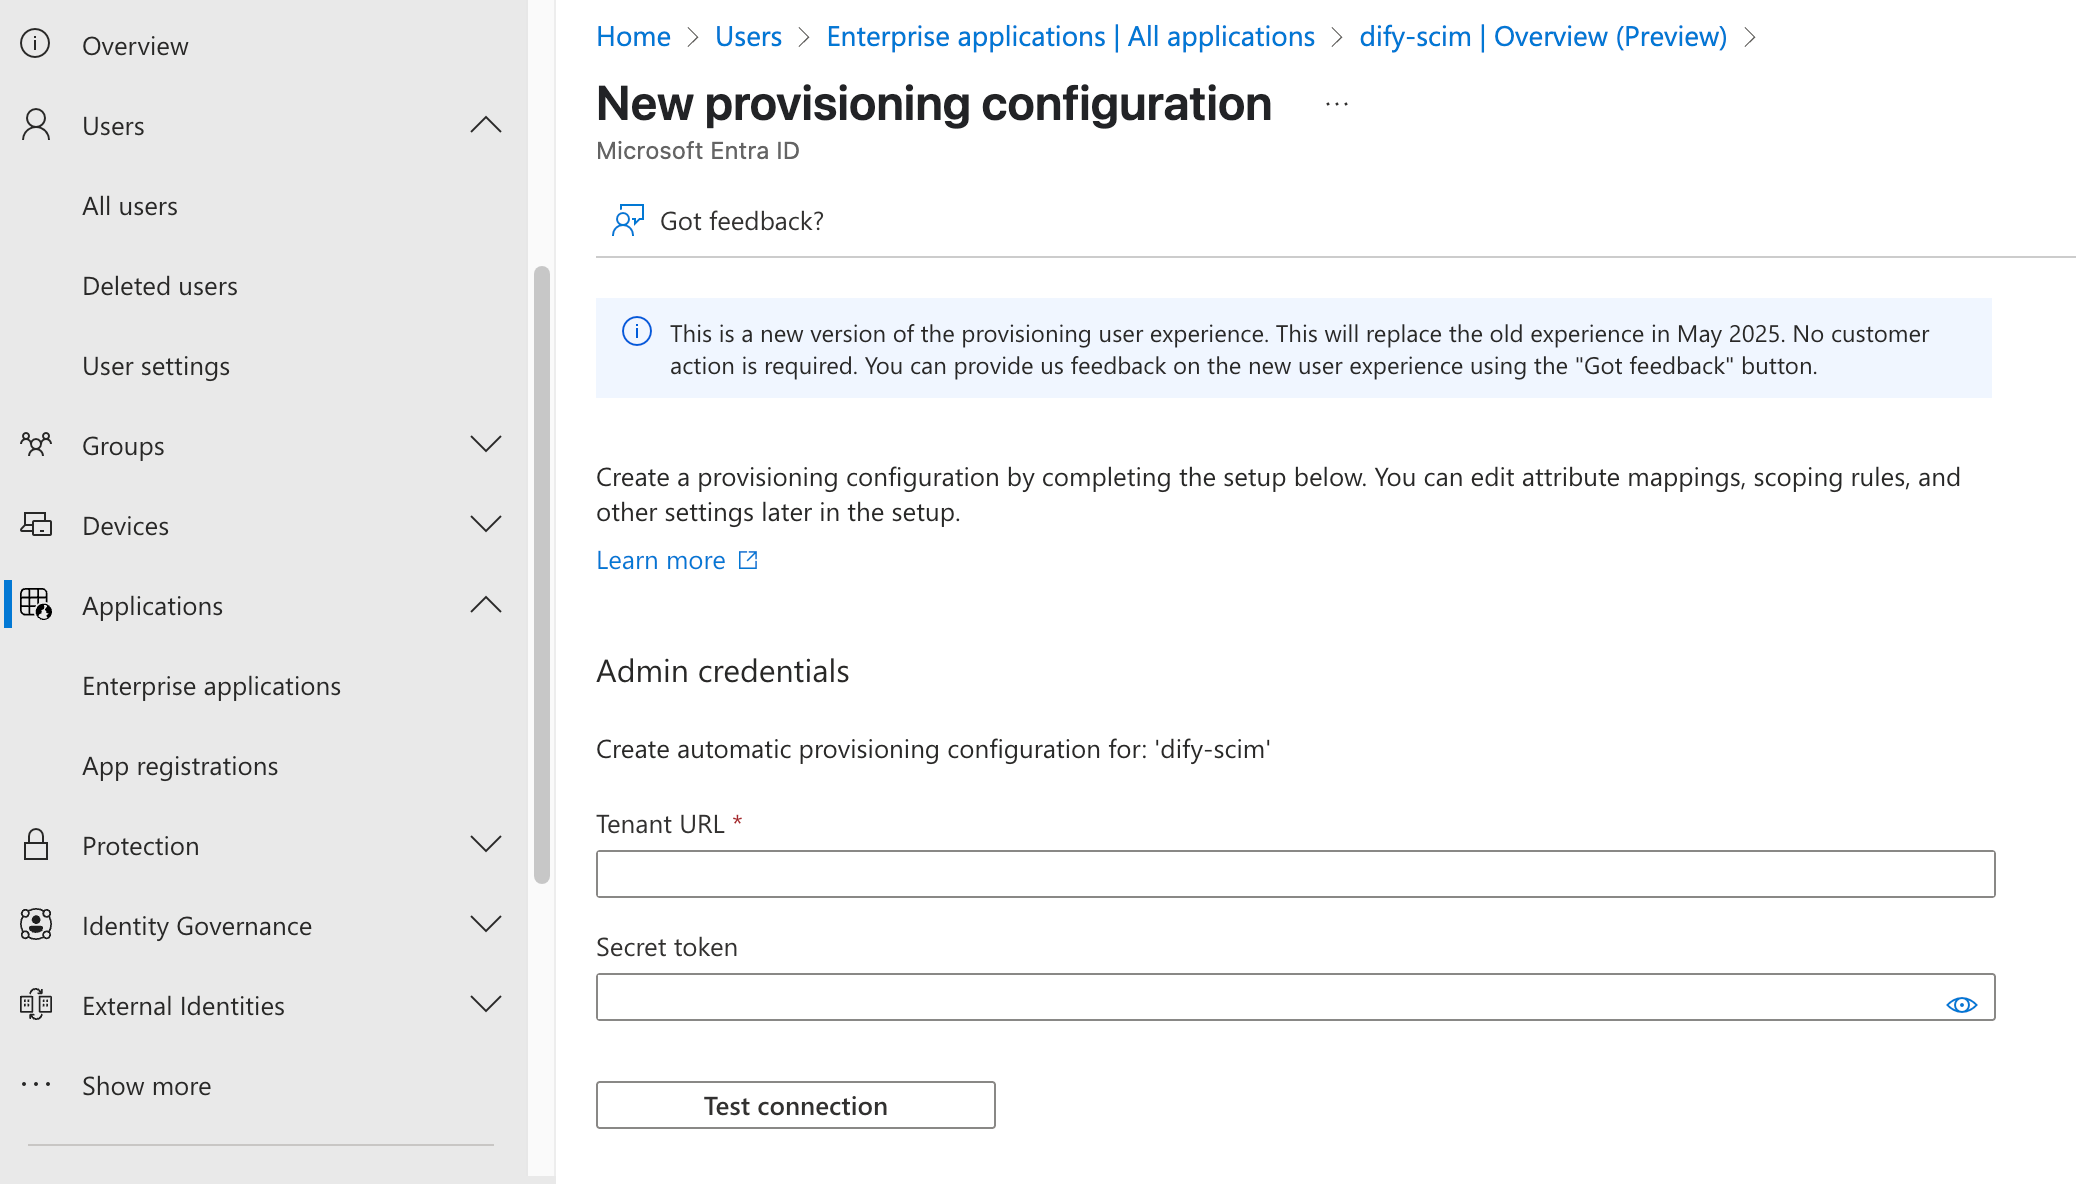
- Under Admin credentials, enter:
- Tenant URL: Your SCIM endpoint URL
- Secret token: Your SCIM authentication token
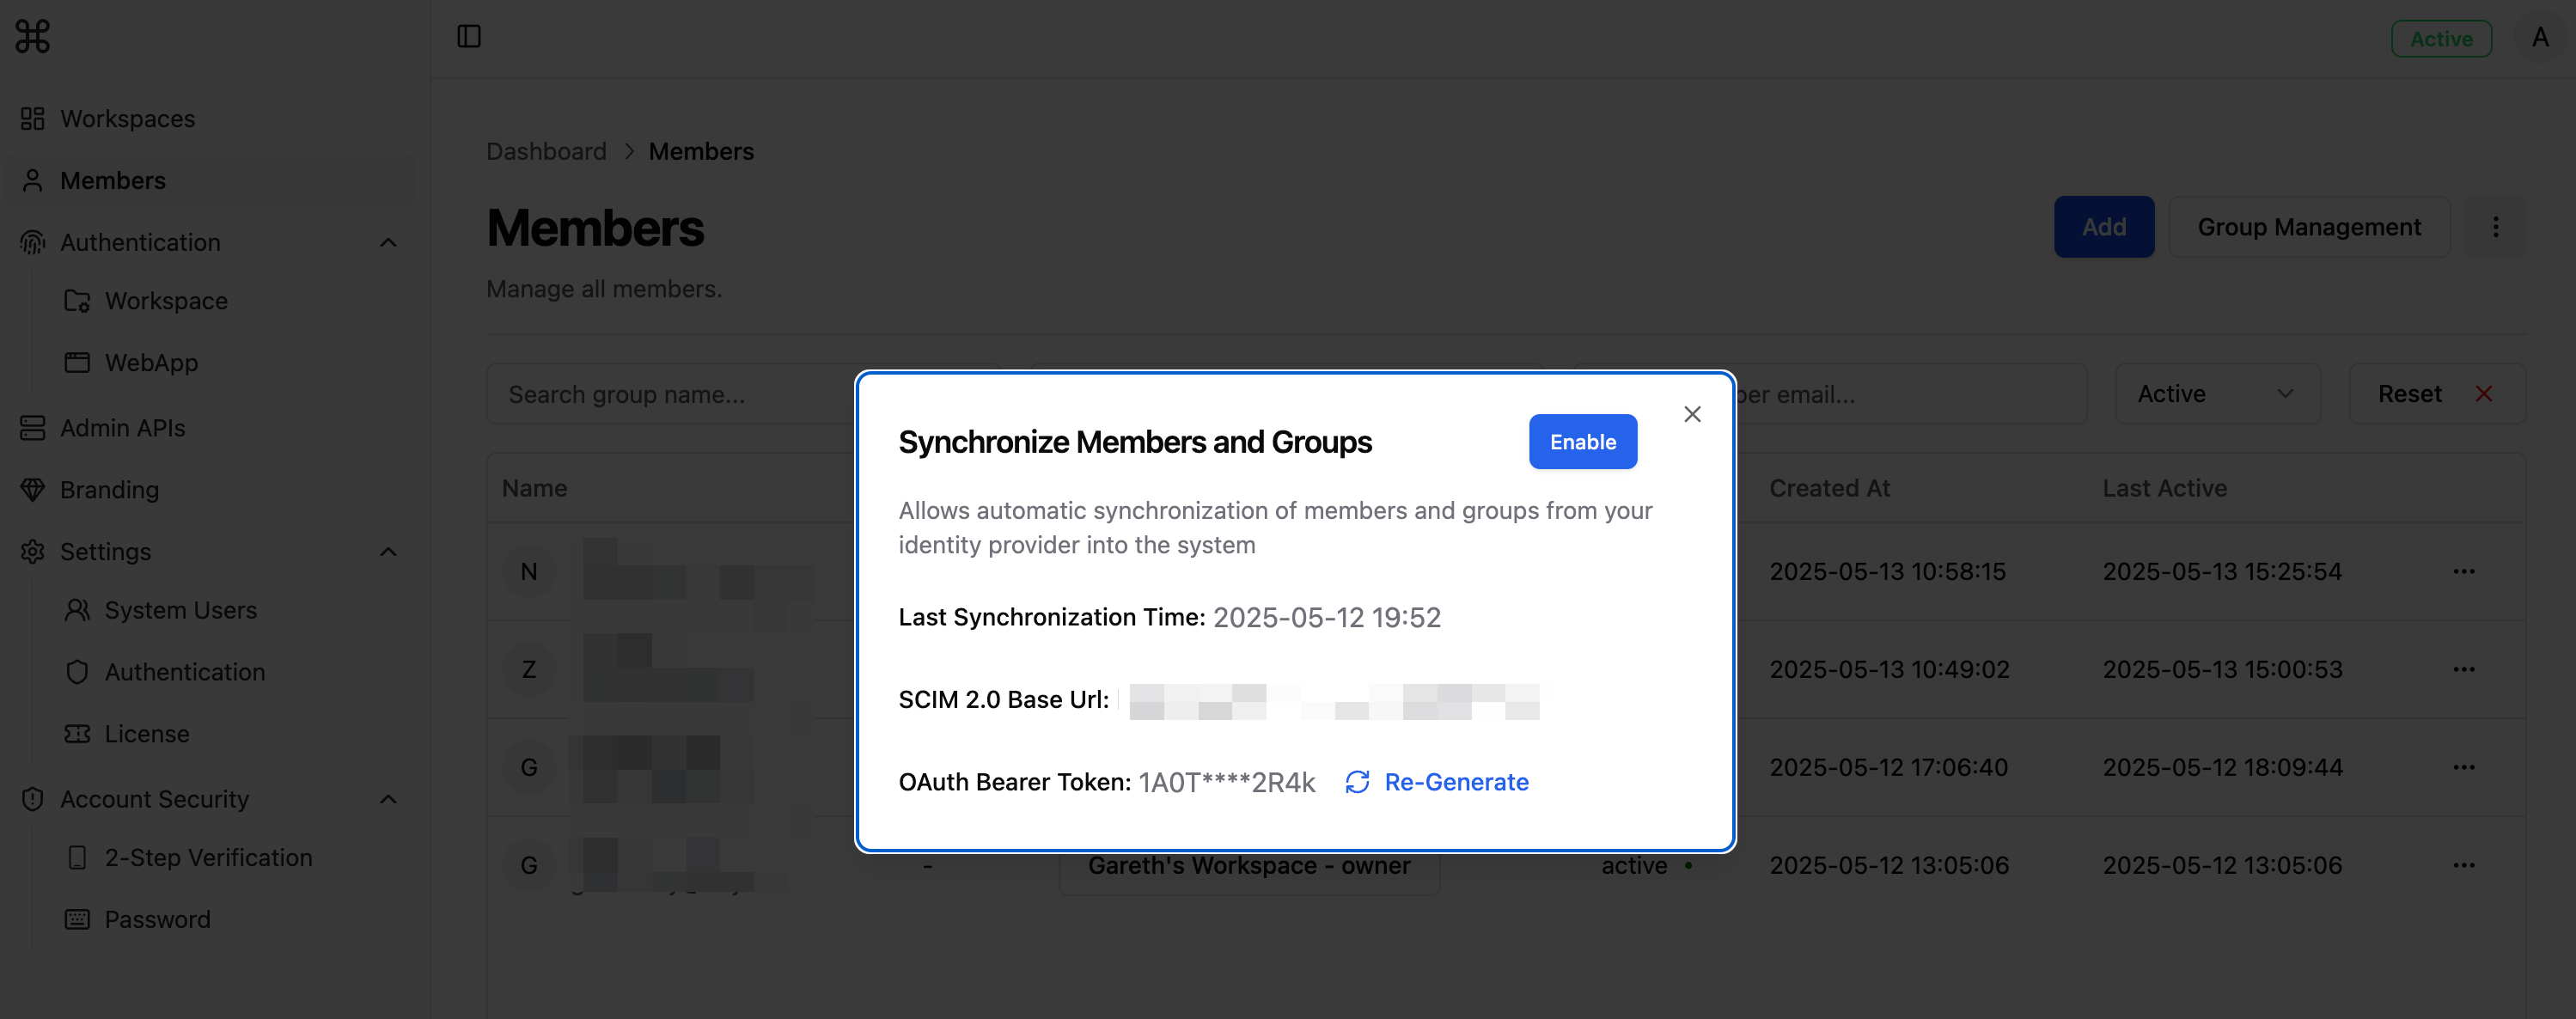
Get these values from Sync Members.
- Click Test Connection to verify your setup.
- If the test passes, click Save.
4. Configure Attribute Mappings
- On the provisioning page, click Mappings. You’ll see two default mappings:
Provision Microsoft Entra ID Users- for syncing usersProvision Microsoft Entra ID Groups- for syncing groups
- Click each mapping and keep only these attributes:
- Provision Microsoft Entra ID Users
| customappsso Attribute | Microsoft Entra ID Attribute |
|---|---|
| userName | userPrincipalName |
| active | Switch([IsSoftDeleted], , “False”, “True”, “True”, “False”) |
| displayName | displayName |
- Provision Microsoft Entra ID Groups
| customappsso Attribute | Microsoft Entra ID Attribute |
|---|---|
| displayName | displayName |
| members | members |
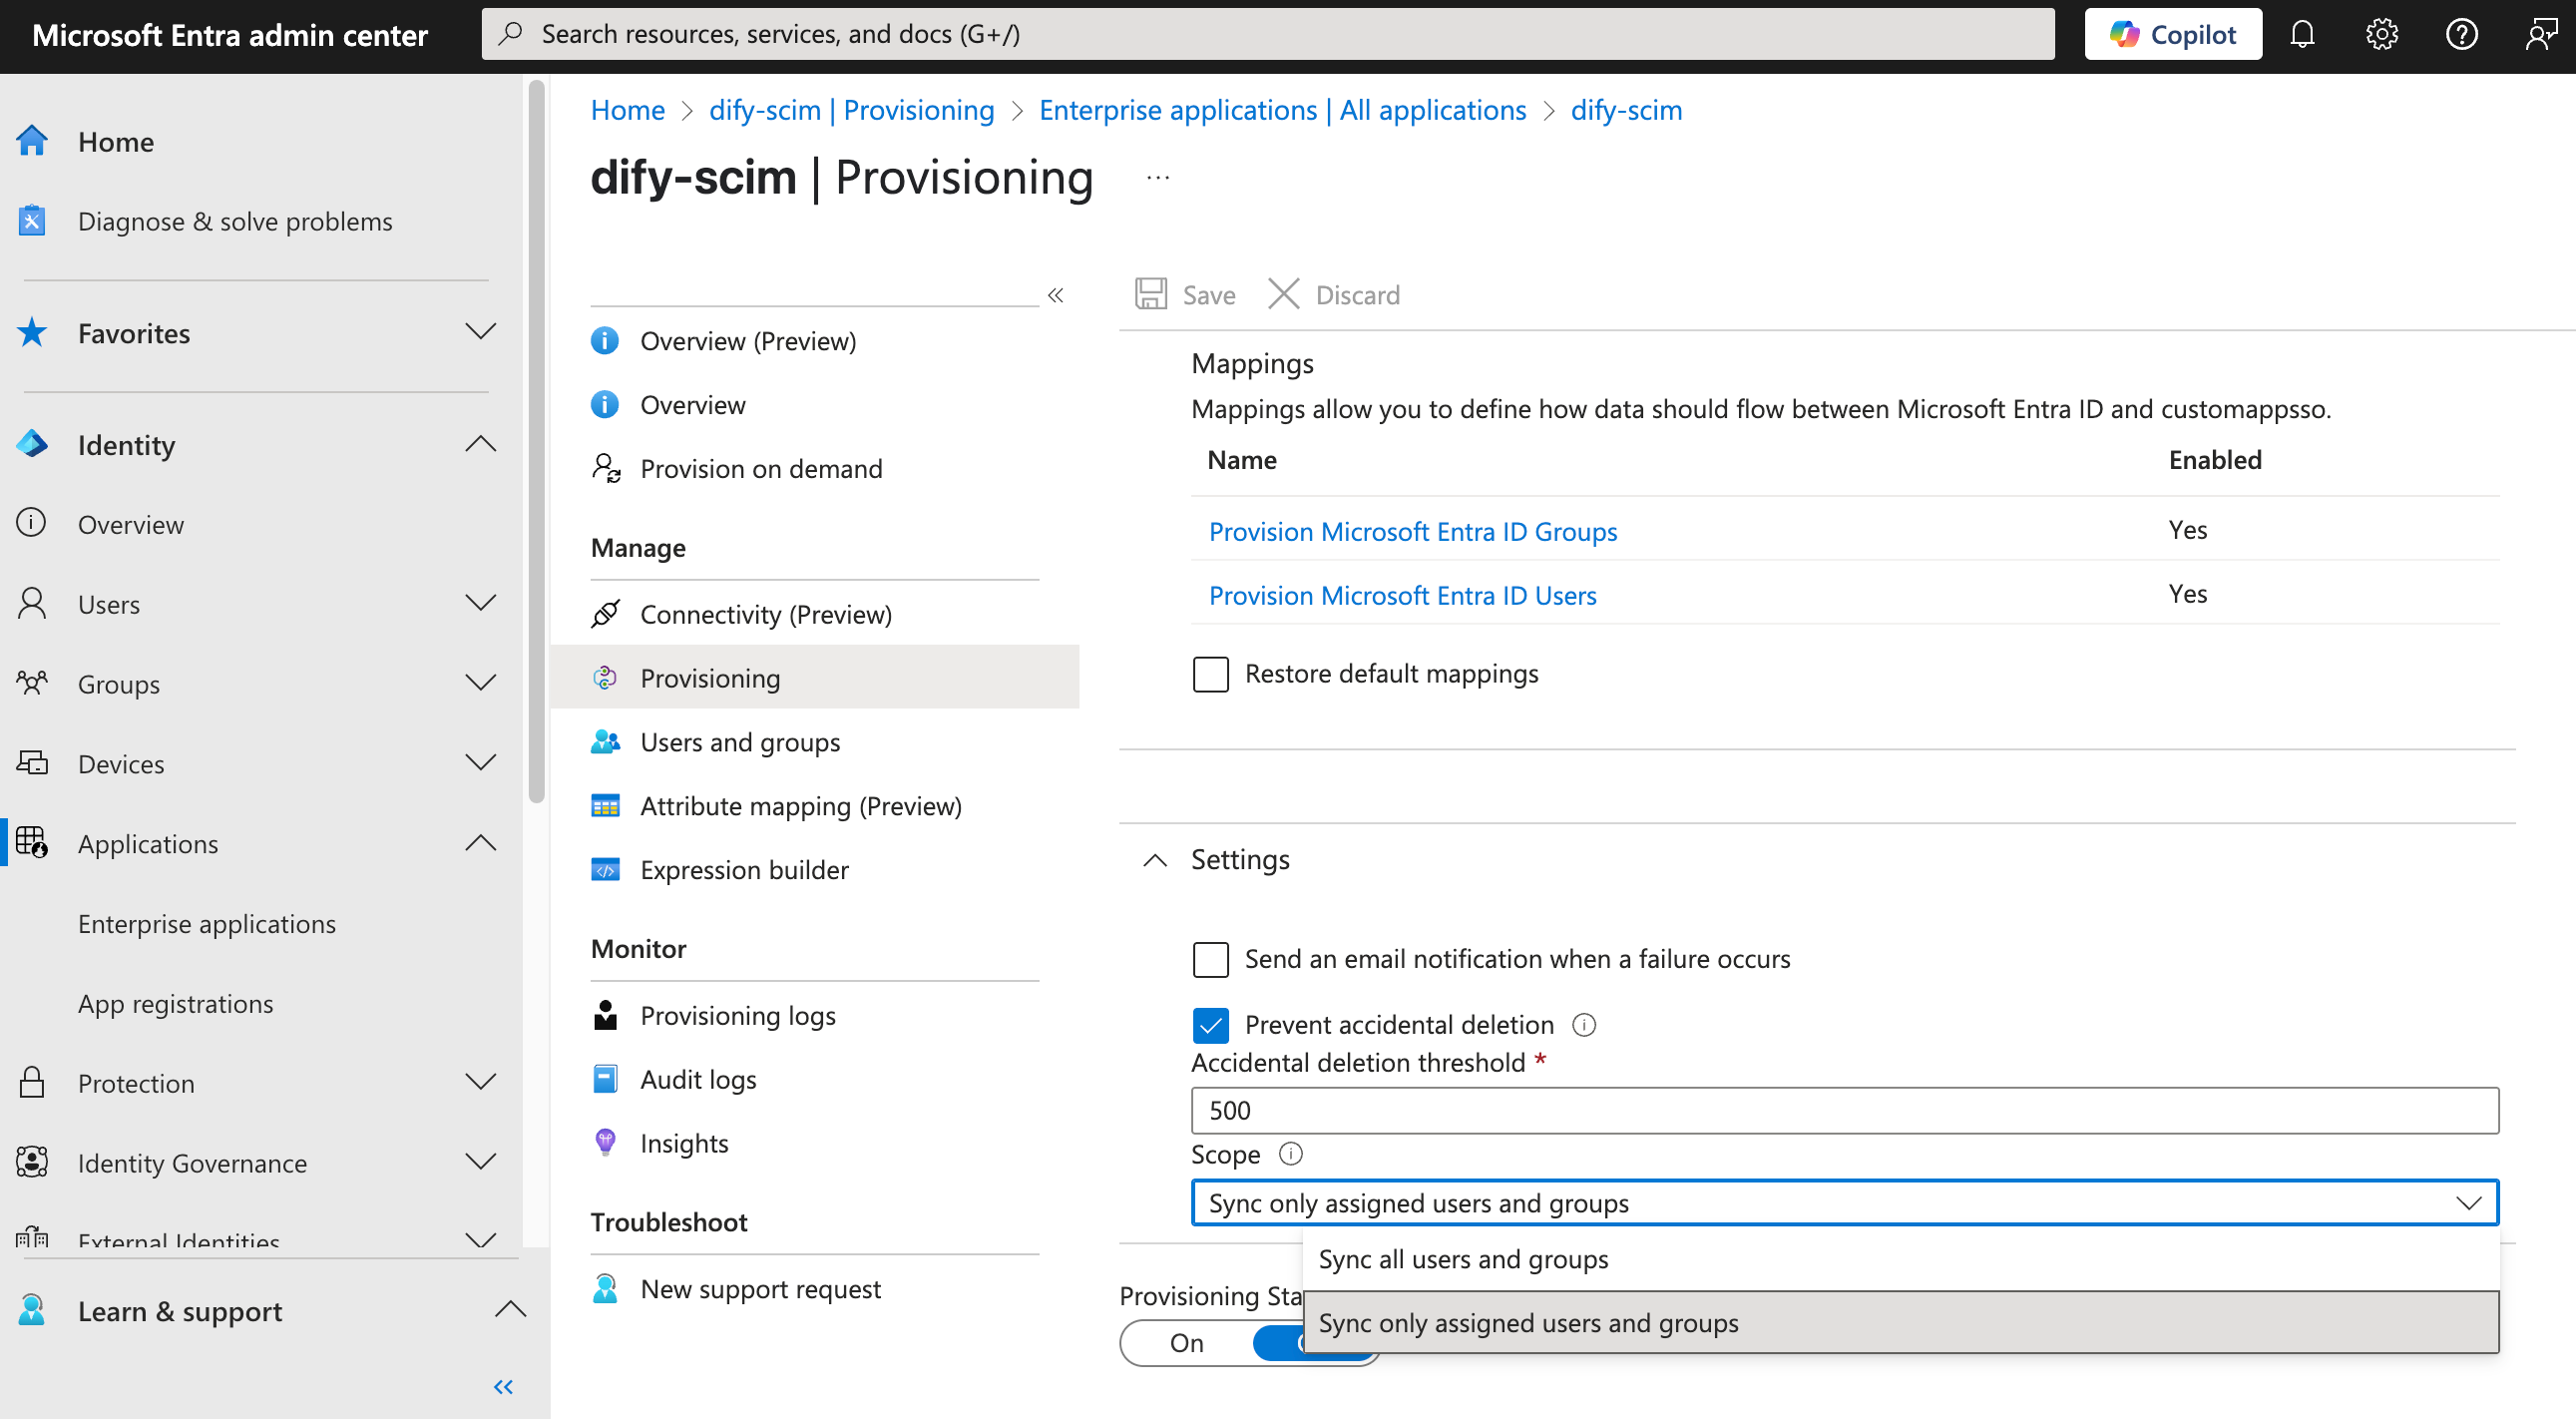
5. Start Provisioning
- Return to the main Provisioning page
- Under Settings, choose your sync scope:
- “Sync only assigned users and groups” (best for selective sync)
- “Sync all users and groups” (for organization-wide sync)
- Click Save
- Click Start provisioning
First-time sync can take 20 minutes to several hours, depending on your directory size.
6. Sync User Groups
To include groups in the sync:- Create a group in Azure Entra ID
- In your Dify application, click Users and groups
- Add the groups you want to sync
Enable SCIM in Dify
Once Azure is configured:- Go to the Dify admin dashboard
- Navigate to Members → click the menu button → Automatic synchronization → Enable
Sync isn’t instant. Azure controls the sync schedule. Check your provisioning logs in Azure for sync history.