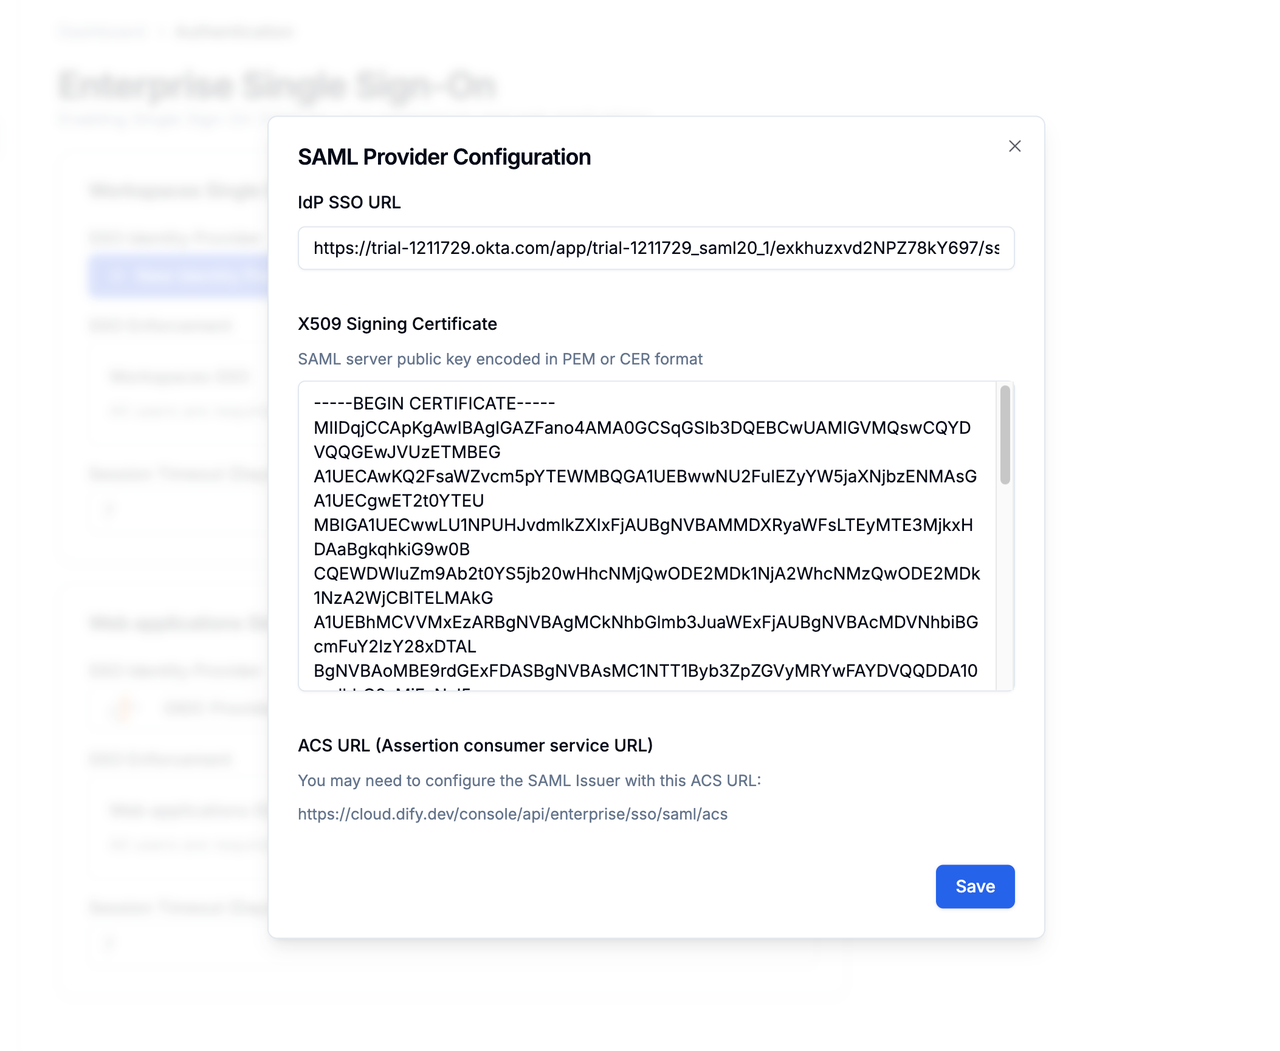
1. Create a new application in Okta
- Access the Okta admin dashboard
- Navigate to the Applications page
- Click the “Create App Integration” button
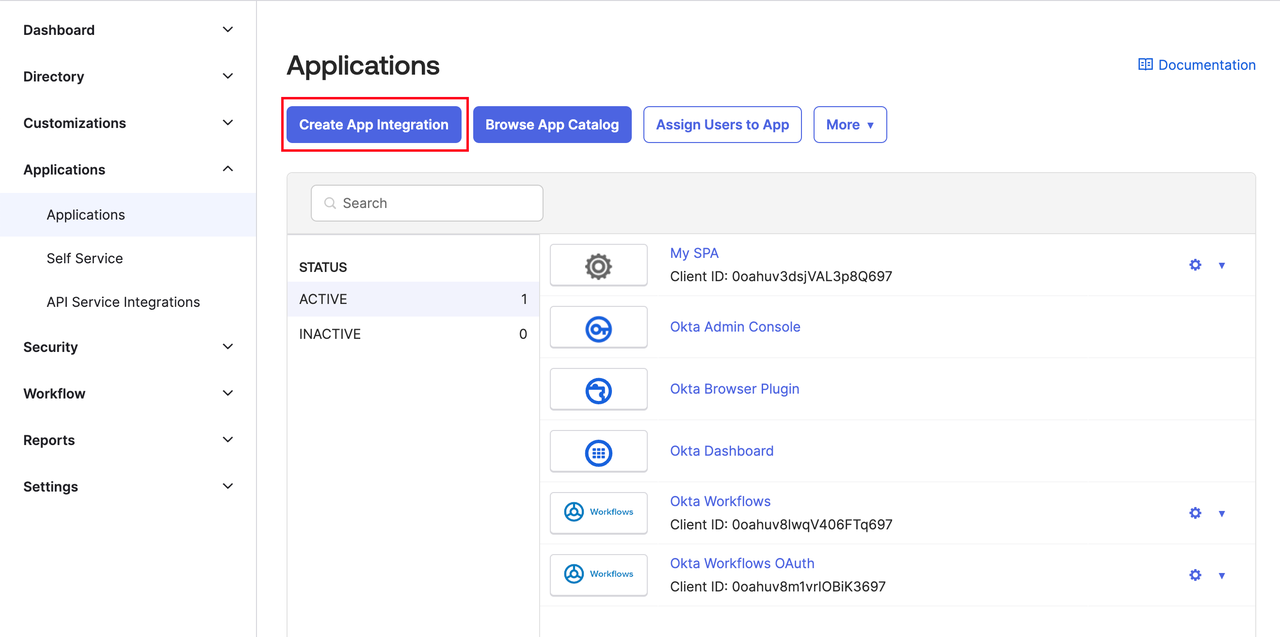
- Select “SAML 2.0” as the application type
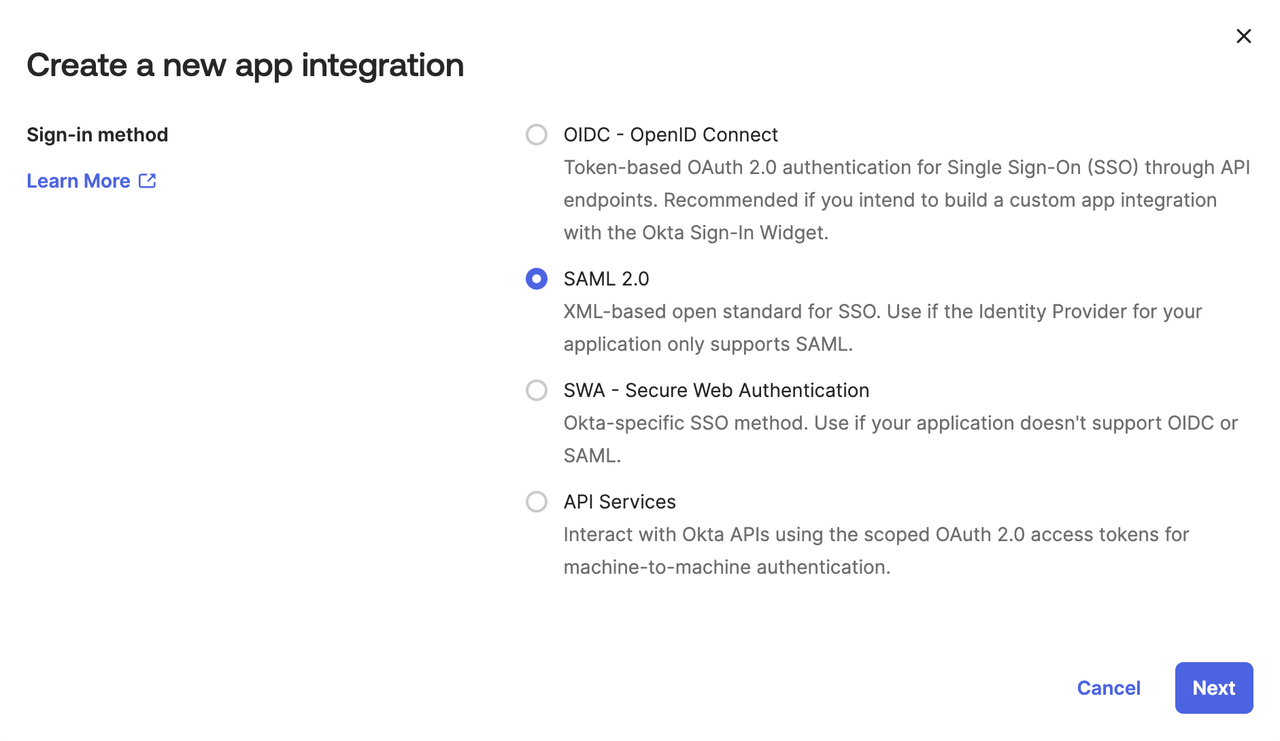
- Click Next to access the Configure SAML page
- Wait before filling in the parameters and open a new browser tab
2. Configure the Okta application
-
Copy the Dify Enterprise Version’s Callback URL:
- Click on the Authentication page of the Dify Enterprise dashboard
- Tap ”+ New Identity Provider → New OIDC Provider”
- View the Callback URL
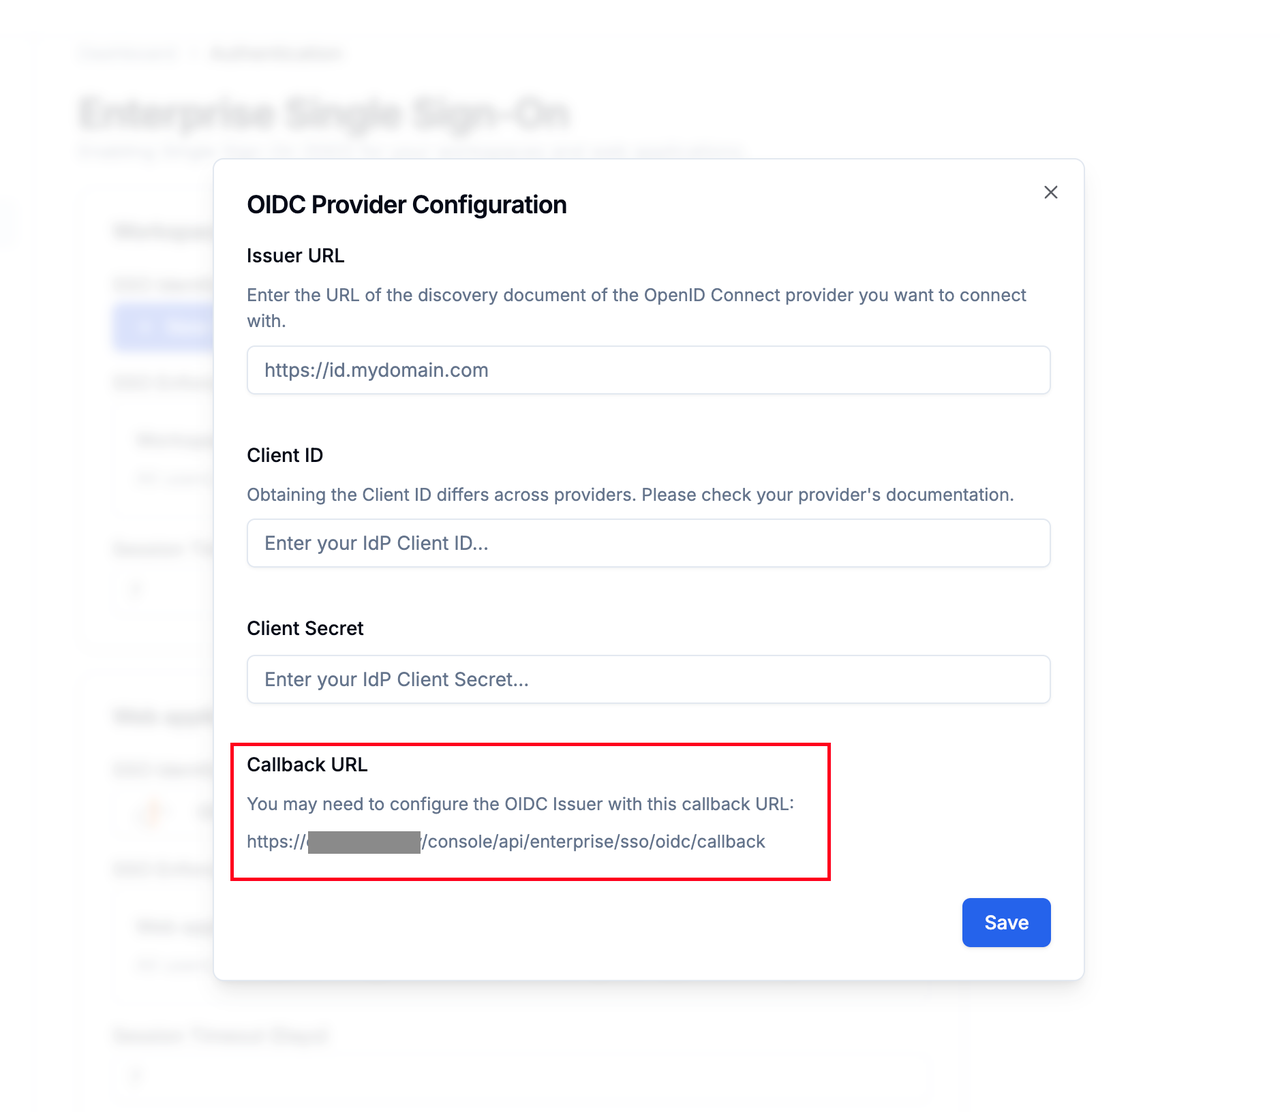 It typically follows this format:
-
Configure Okta:
Paste it into the Single sign-on URL and Audience URI (SP Entity ID) fields on the Configure SAML page.
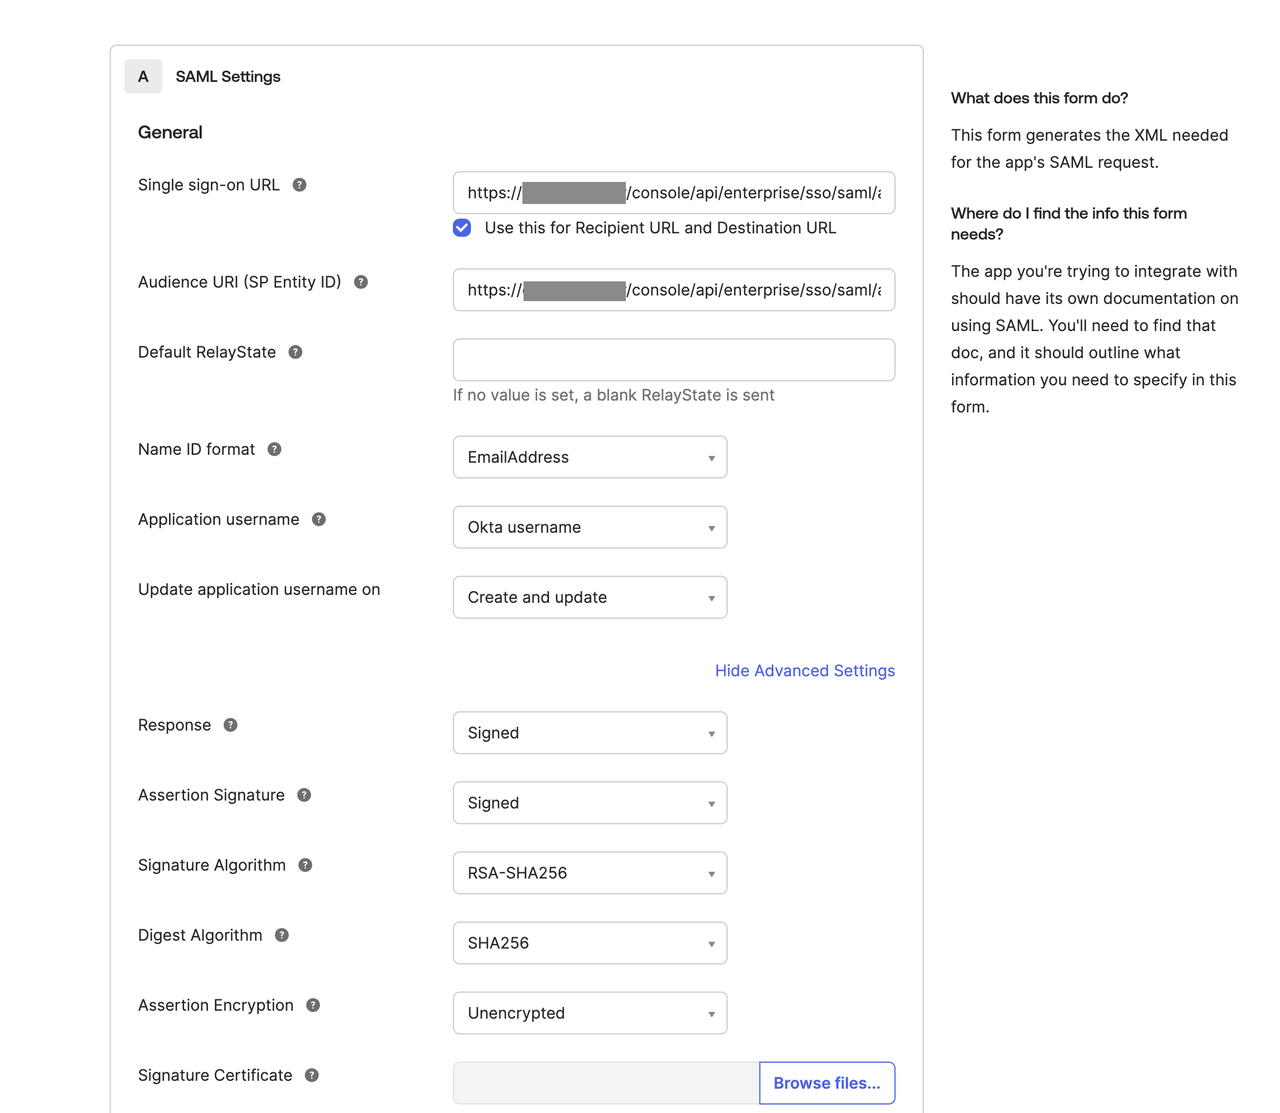 After filling in the URL, continue with the following settings:
- Set the Name ID format to EmailAddress
- Under “Show Advanced Settings”, verify that both the response and assertion signatures are set to Signed Click the “Next” button to complete the setup.
3. Complete the configuration on Dify
-
Gather information from Okta:
- Go to the “Sign On” page of your Okta application and find:
- Sign-on URL
- Signing certificate
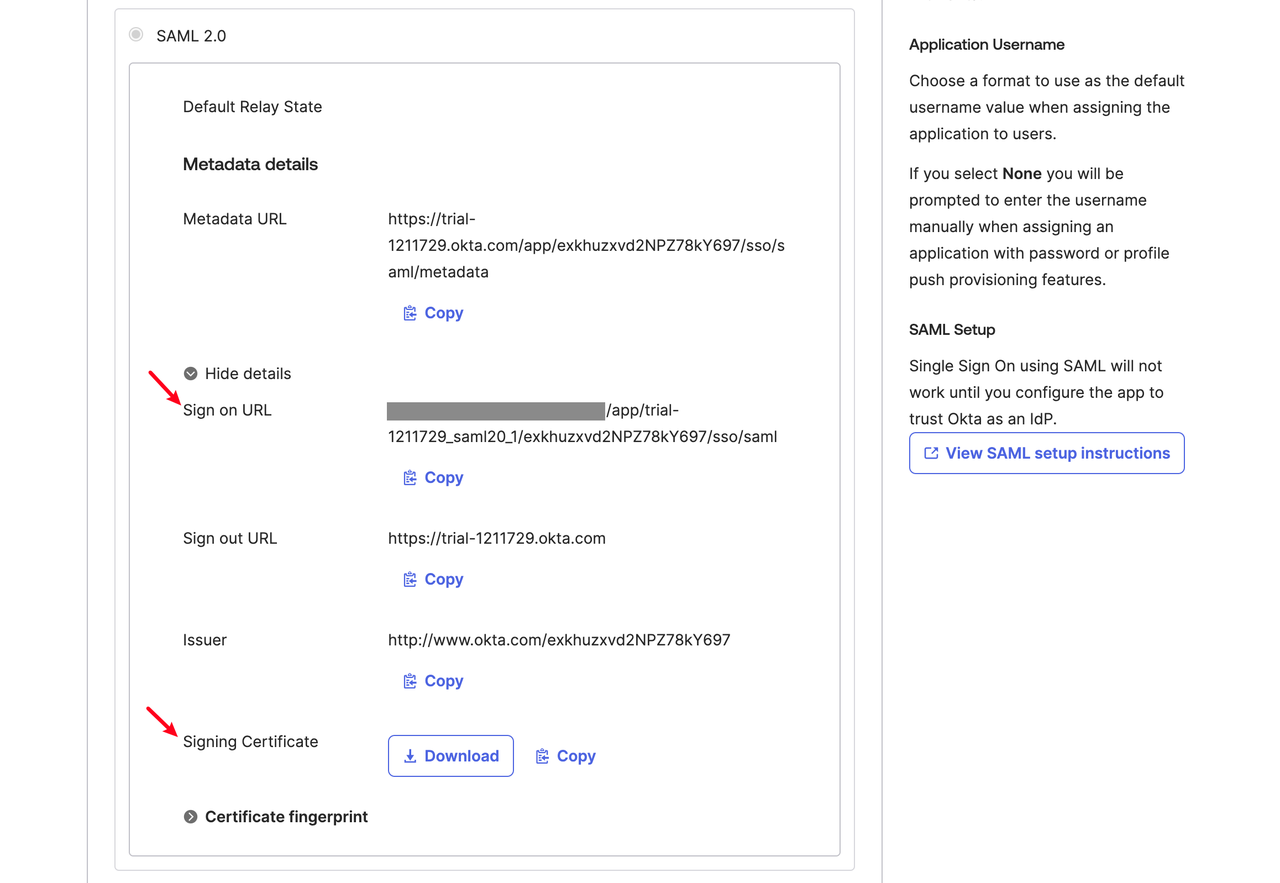
- Go to the “Sign On” page of your Okta application and find:
-
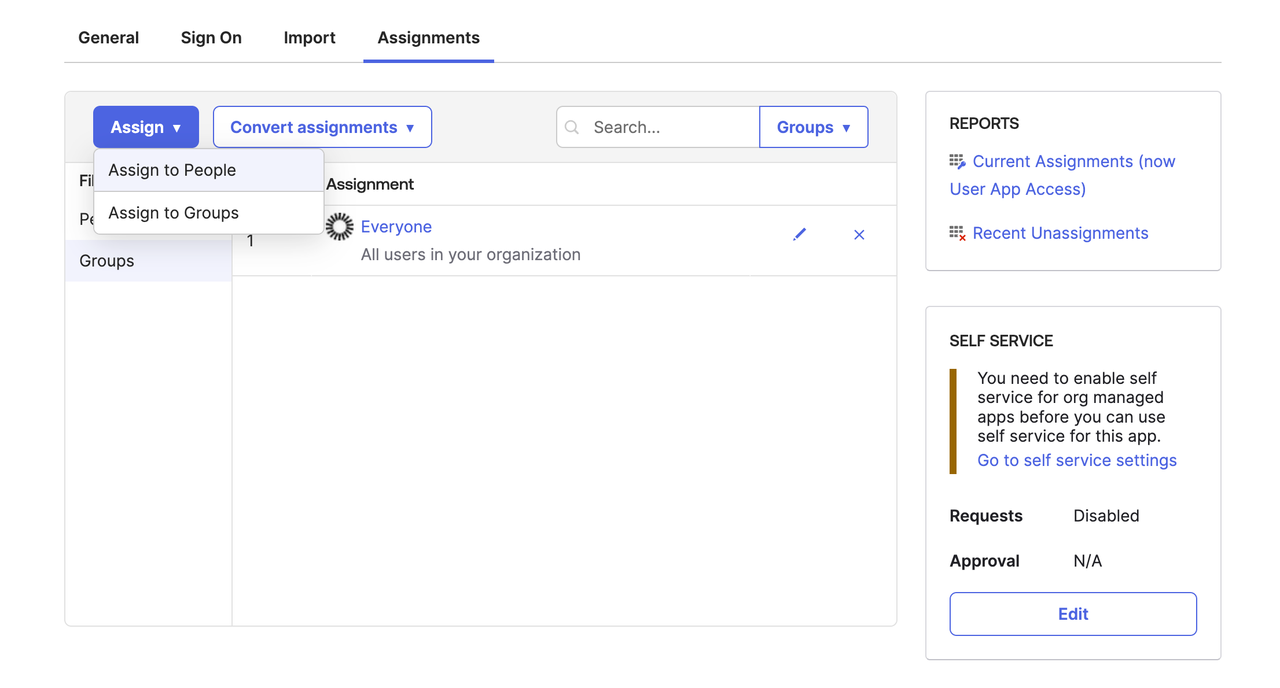
Assign members:
- On the “Assignments” page, assign the members who are allowed to use SSO login
-
Configure Dify:
- Return to the Authentication page of the Dify Enterprise
- Tap ”+ New Identity Provider → New SAML Provider”
- Fill in the information obtained from Okta