

Create and Configure Your Okta Application
1. Log into Okta Admin Console
Go to your Okta admin portal and navigate to Applications → Create App Integration.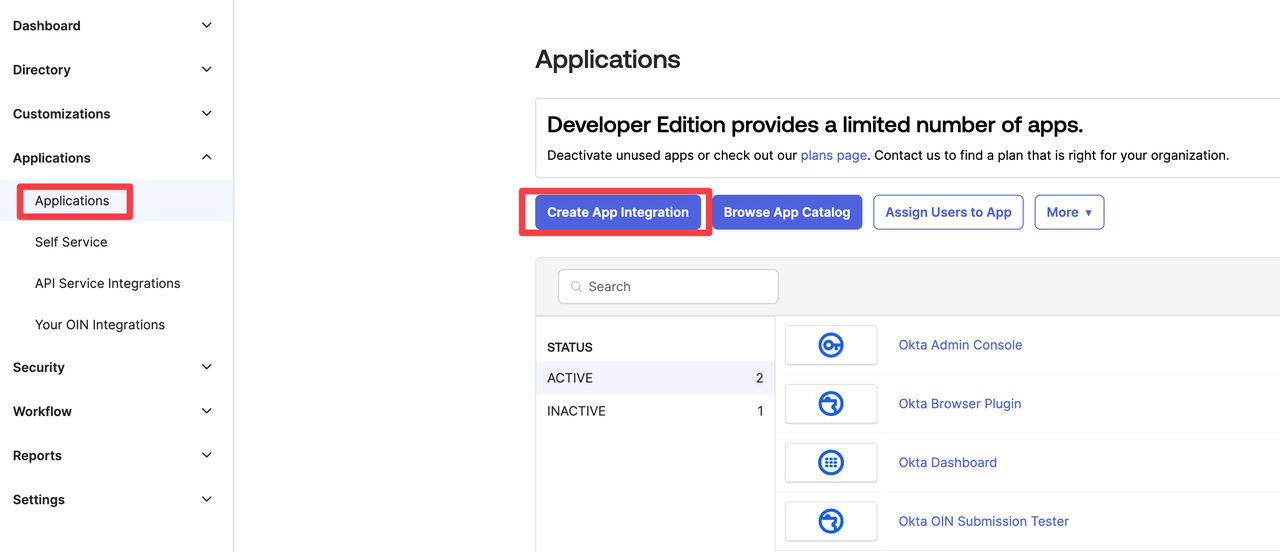
2. Create the App Integration
- Click Create App Integration
- Configure the app:
- Platform: Web Application
- Sign-on method: SAML 2.0
- Click Create
- Enable SCIM:
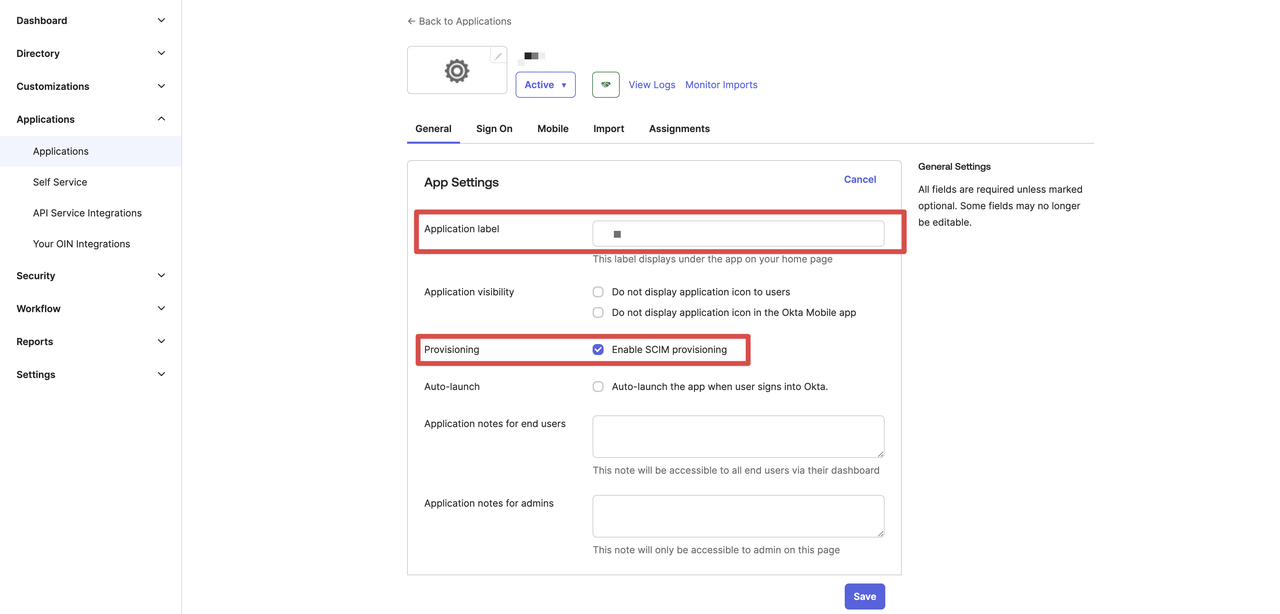
- In the General tab, find App Settings
- Click Edit
- Update the Application label if needed
- Enable SCIM provisioning
- Click Save
3. Set Up SCIM Connection
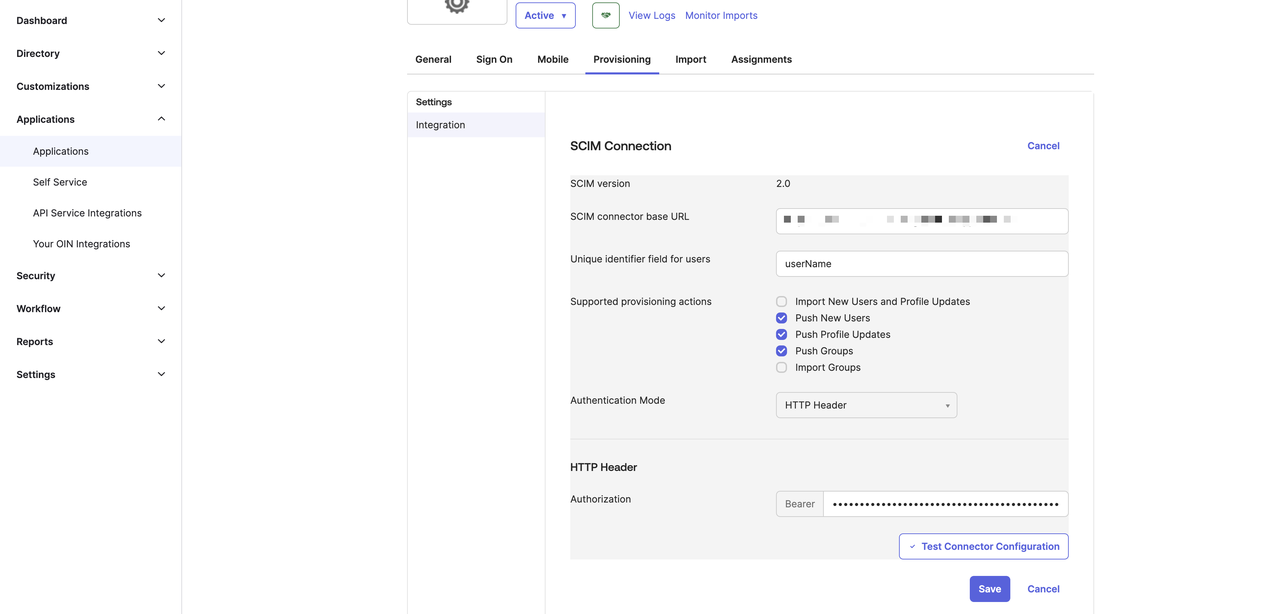
- Go to the Provisioning tab
- Click Configure API Integration
- Check Enable API integration
- Enter your SCIM details:
- SCIM 2.0 base URL: Your SCIM endpoint URL
- OAuth Bearer Token: Your SCIM authentication token
- Enable Import User and Import Group based on your needs
- Click Test API Credentials
- After a successful test, click Save
4. Configure Provisioning Options
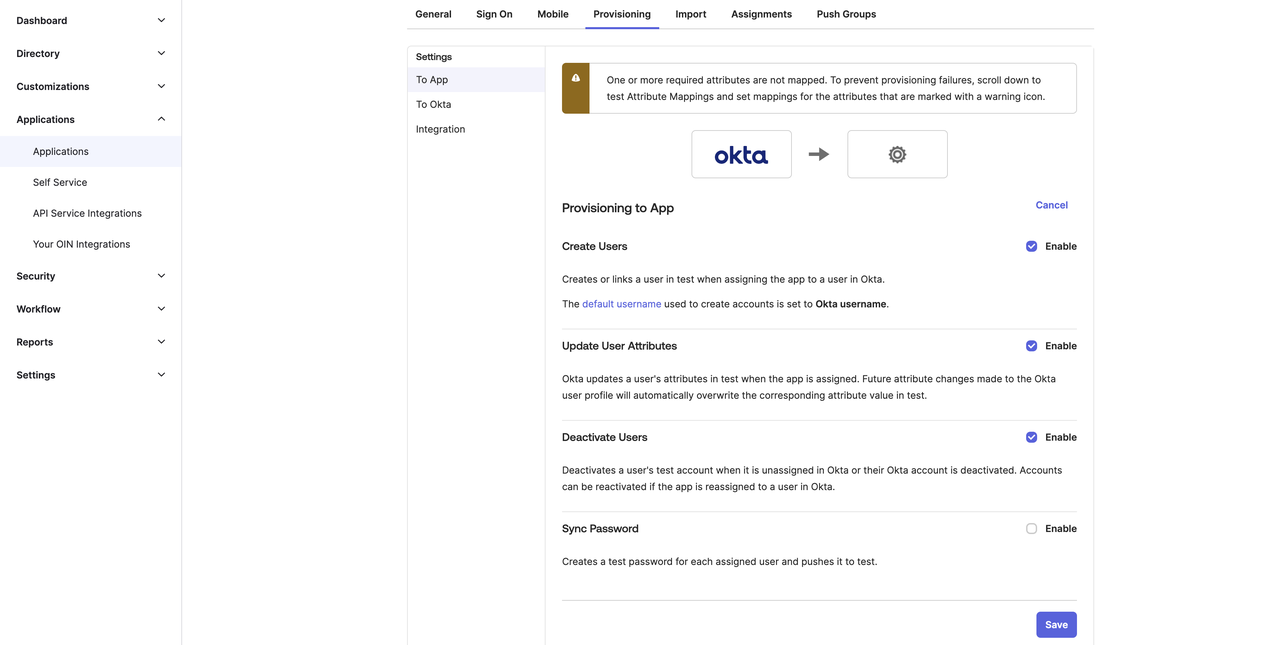
- In the Provisioning tab, find the “To App” section and click Edit
- Enable these features as needed:
- Create Users: Adds new Dify users when assigned in Okta
- Update User Attributes: Keeps user info synchronized
- Deactivate Users: Sets user status to “disabled” in Dify when deactivated in Okta
- Click Save
5. Assign Users and Groups
To assign users:- Go to the Assignments tab
- Click Assign and choose users or groups to sync with Dify Enterprise
- Click Save
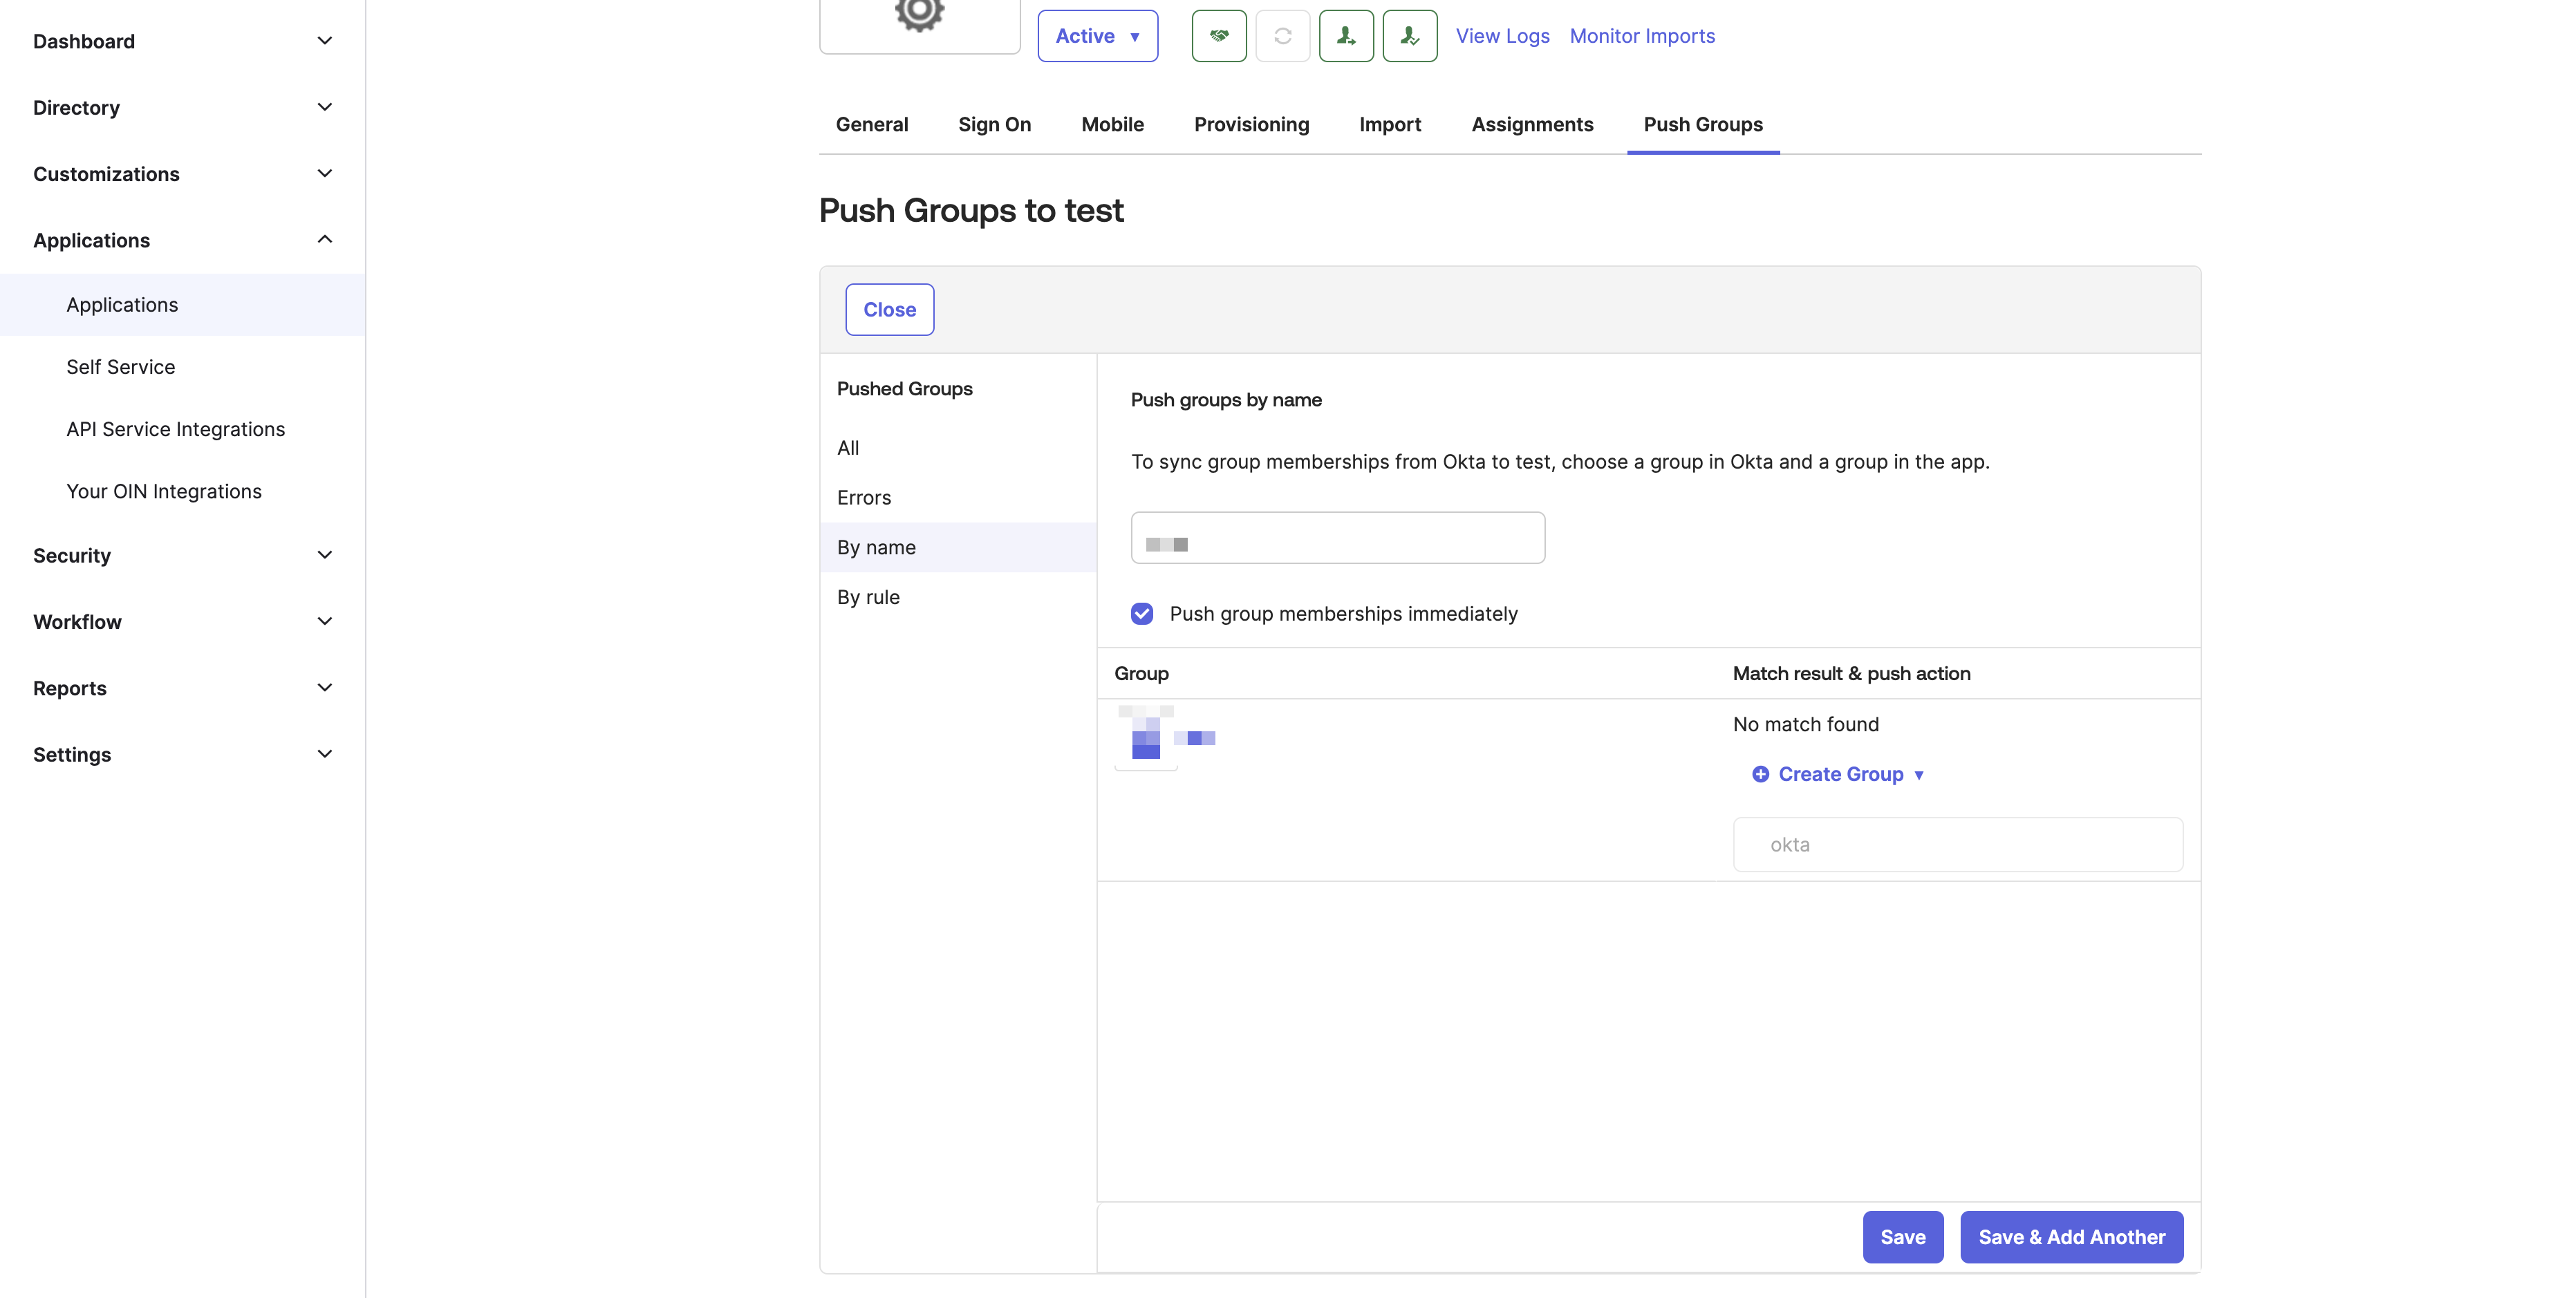
- Click Push Groups
- Select the groups you want to sync to Dify Enterprise
- Click Save
Enable SCIM in Dify
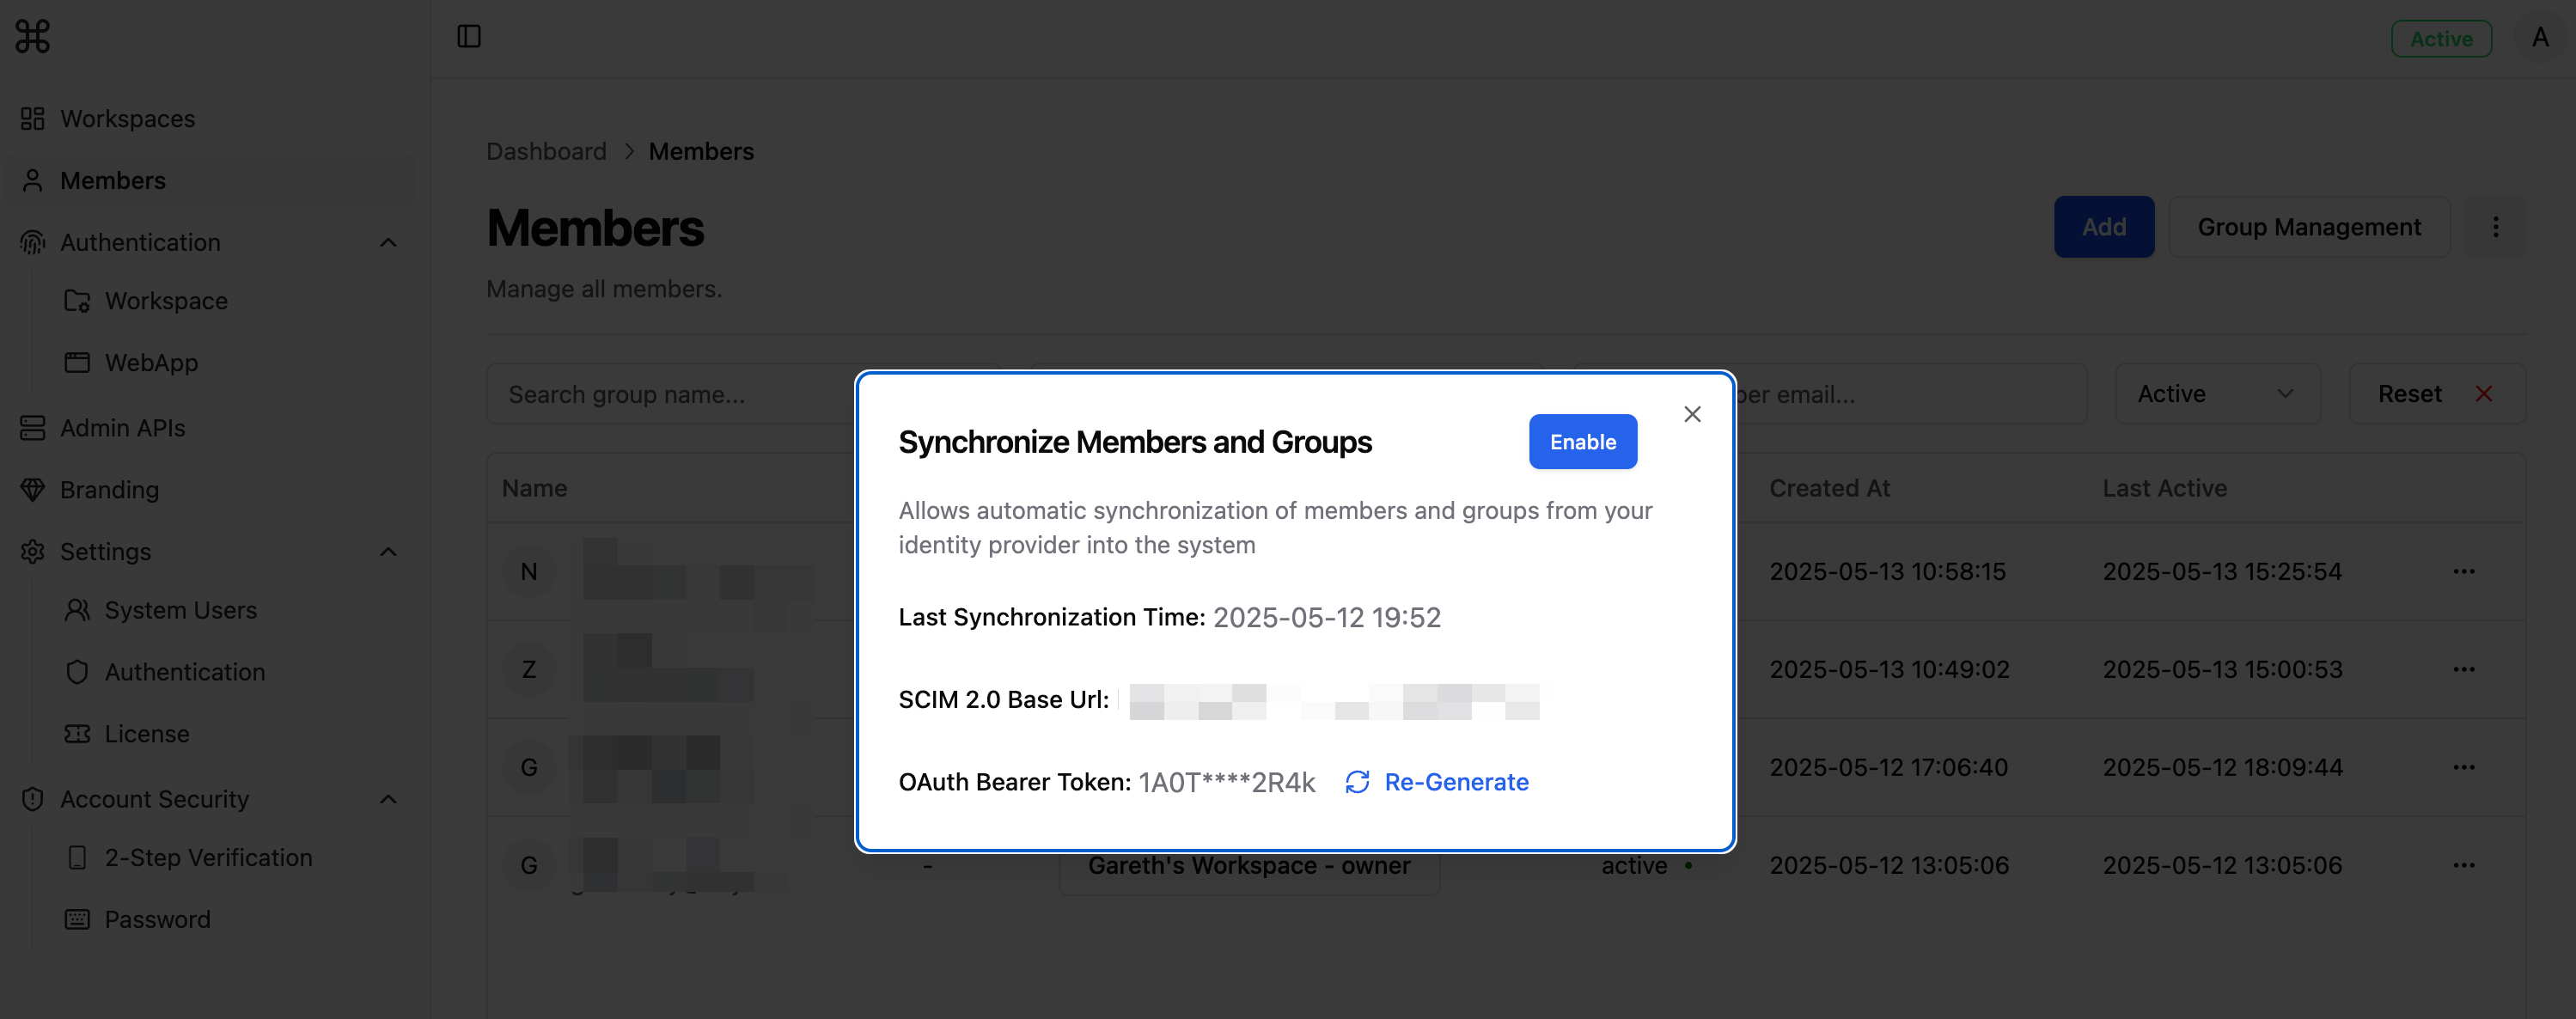
Once Okta is configured:- Go to the Dify admin dashboard
- Navigate to Members → click the menu button → Automatic synchronization → Enable
Sync isn’t instant. Okta controls the sync schedule. Check your provisioning logs in Okta for sync history.