

Notion connects through the Notion data source plugin. See Connect the Notion Data Source below.
Authorization Verification
- When creating a knowledge base and selecting the data source, choose Sync from Notion and follow the prompts to connect.
- Alternatively, you can go to Settings — Data Source and connect Notion on its card.
Import Notion Data
After completing the authorization verification, go to the create dataset page, click Sync from Notion Content, and select the authorized pages you need to import.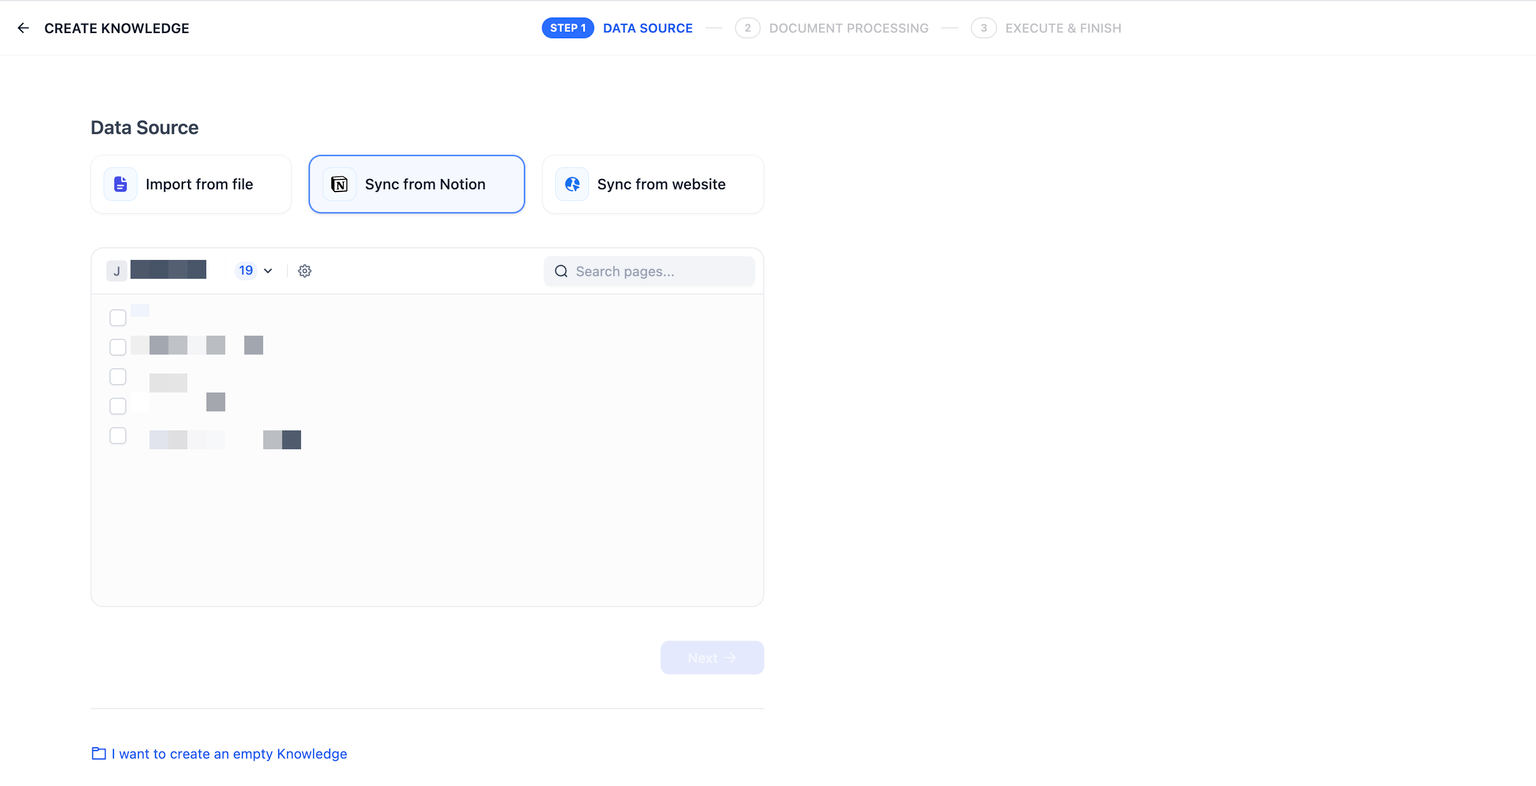
Chunking and Cleaning
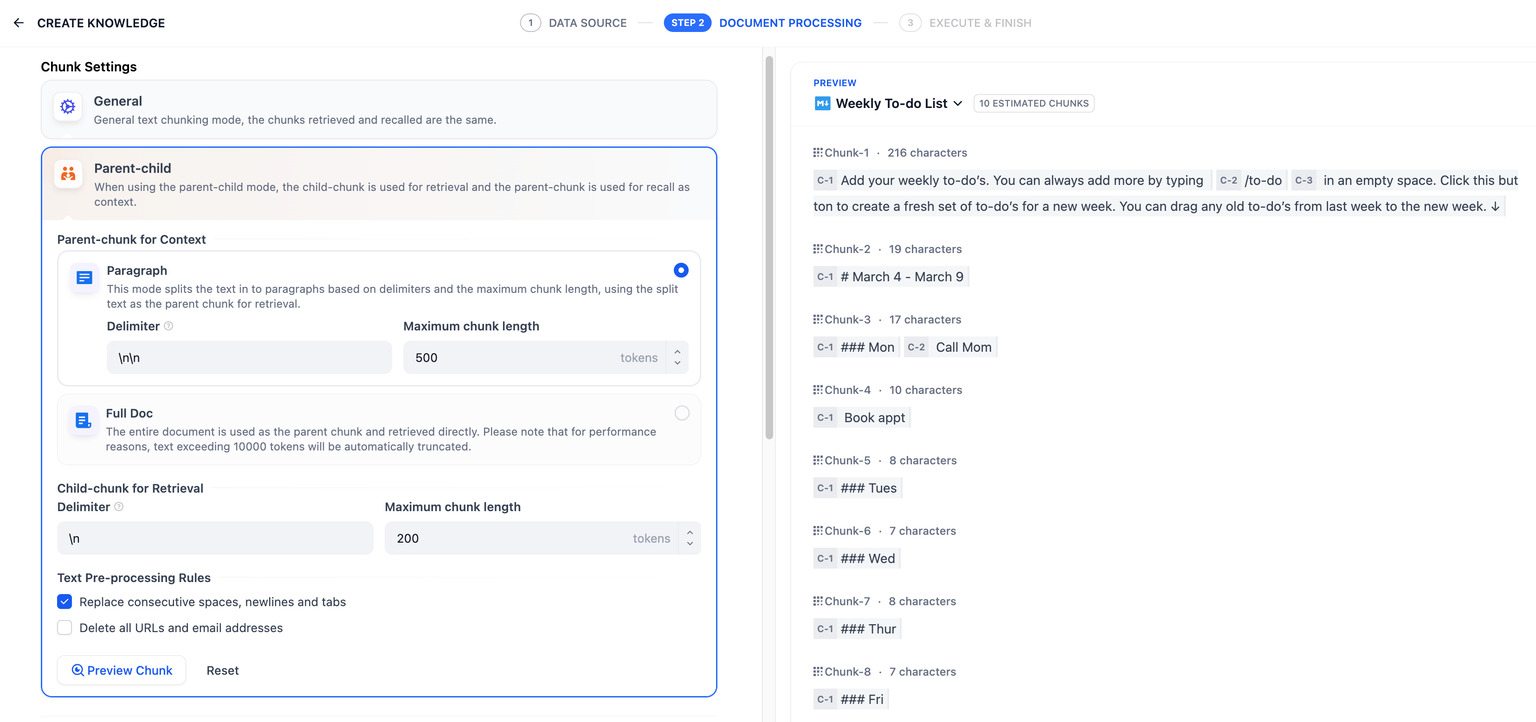
Next, choose a chunking mode and indexing method for your knowledge base, then save it and wait for the automatically processing. Dify not only supports importing standard Notion pages but can also consolidate and save page attributes from database-type pages.Images and files cannot be imported, and data from tables will be converted to text.
Synchronize Notion Data
If your Notion content has been updated, you can sync the changes by clicking the Sync button for the corresponding page in the document list of your knowledge base. Syncing involves an embedding process, which will consume tokens from your embedding model.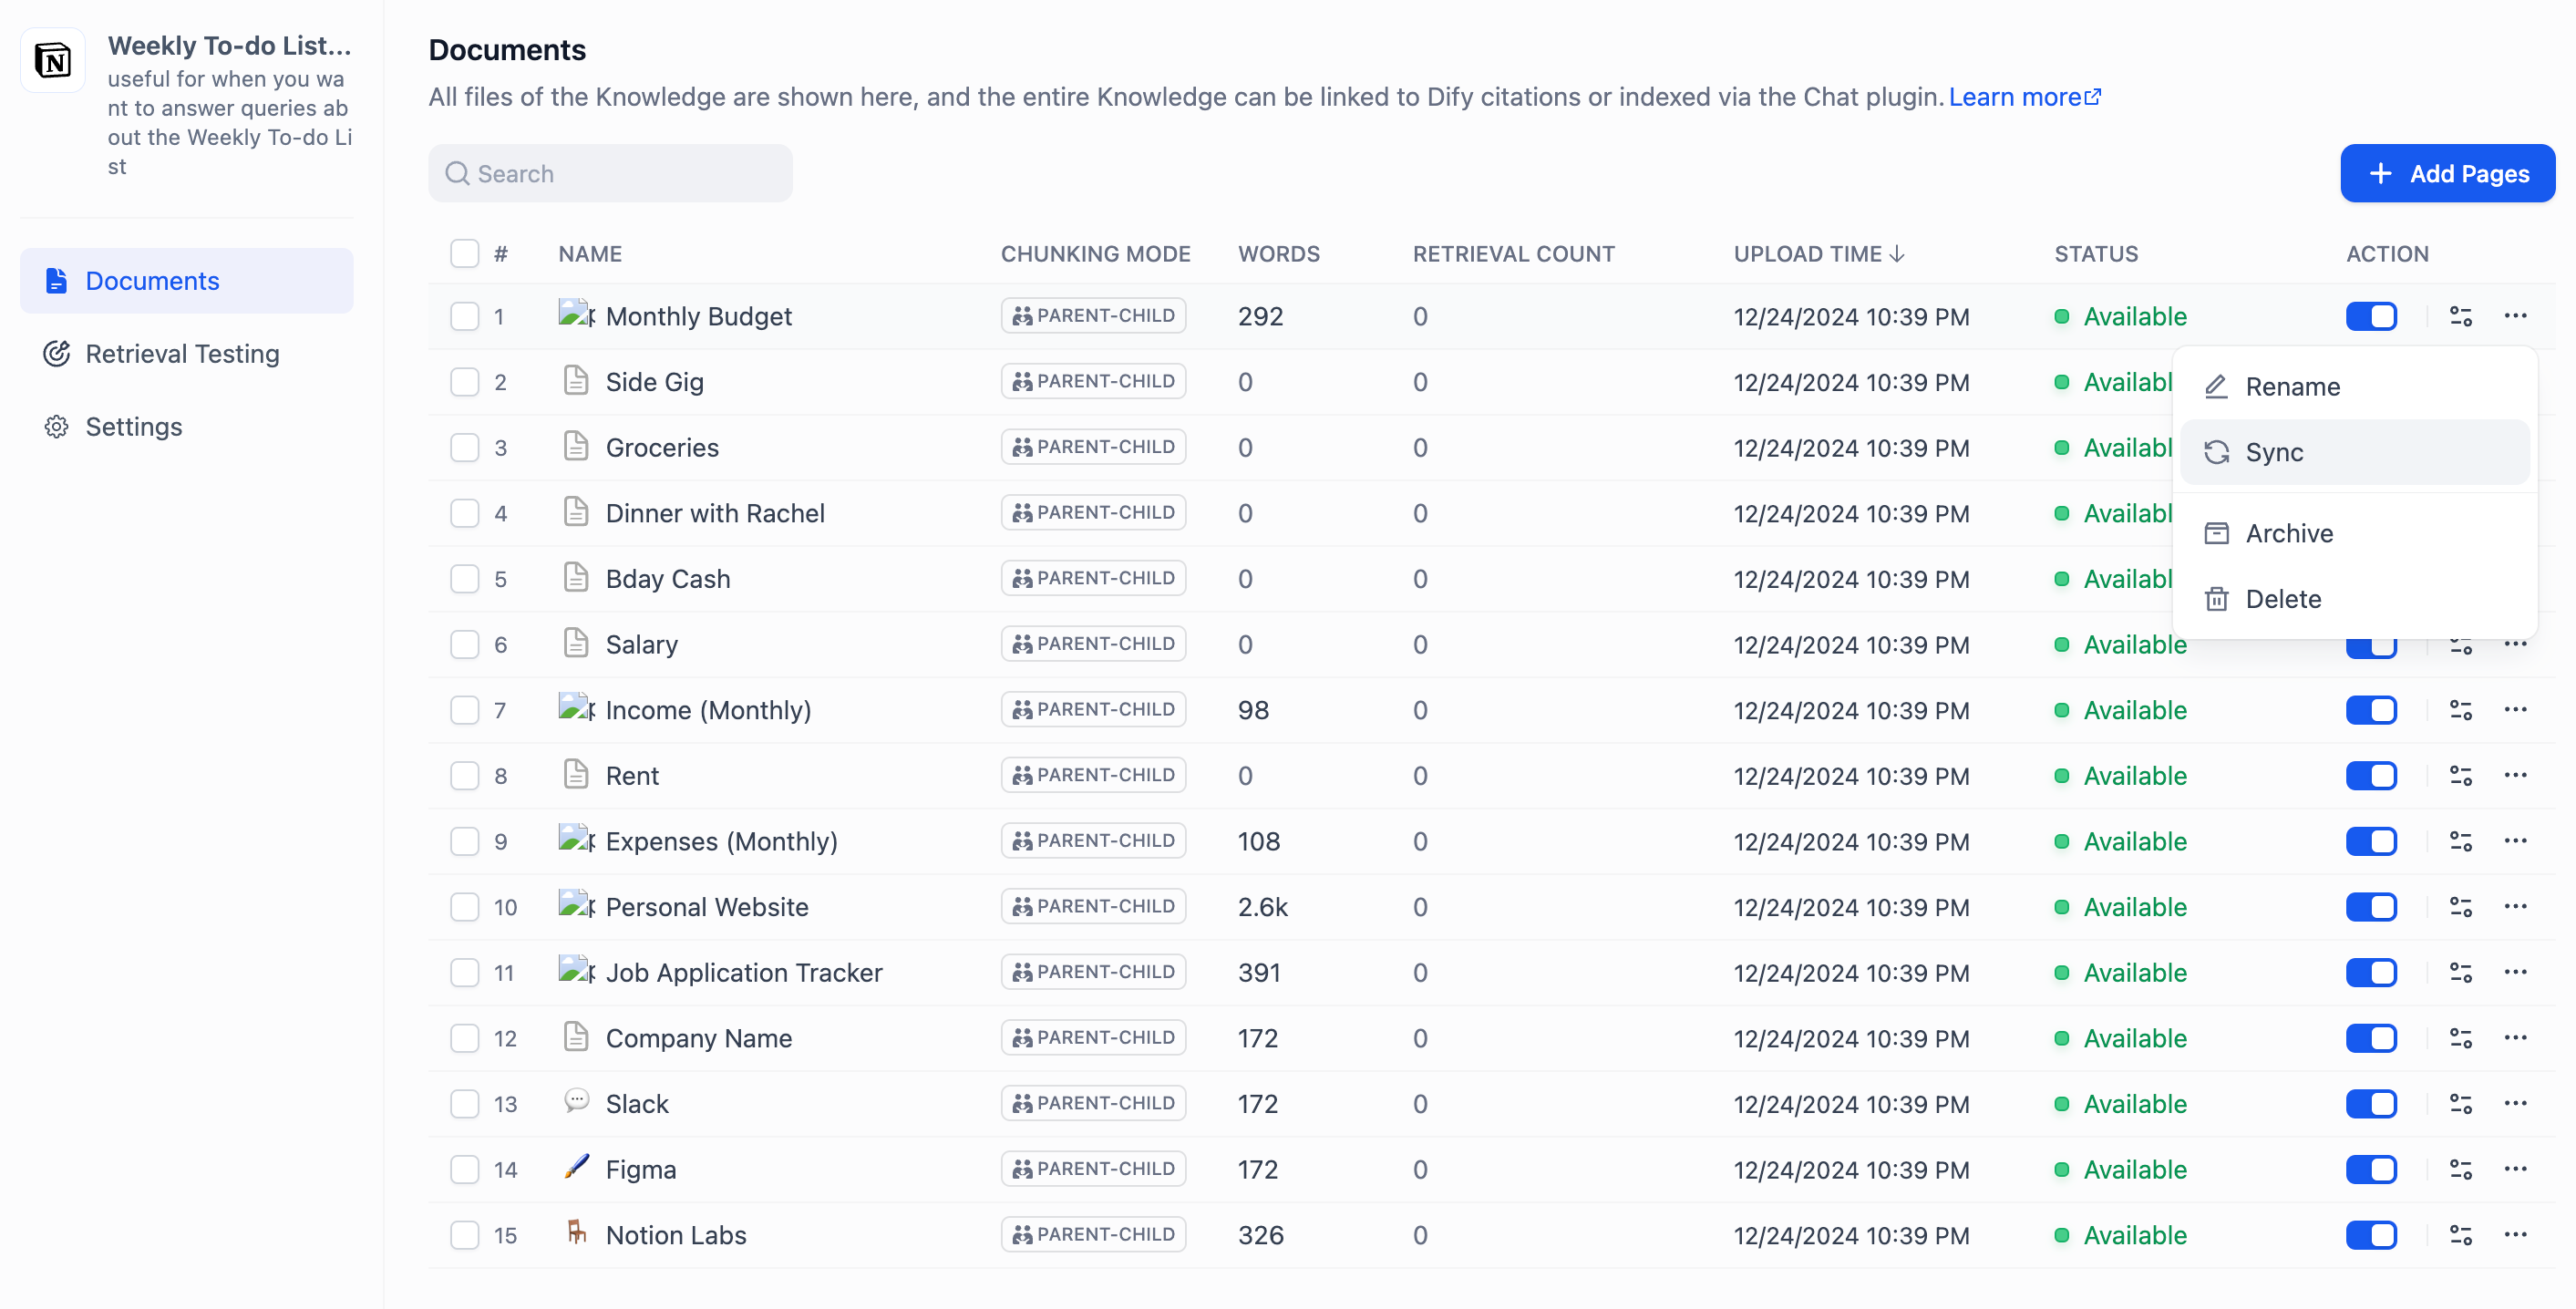
Connect the Notion Data Source
Notion connects through the Notion data source plugin (langgenius/notion_datasource). If the Notion card does not appear under Settings — Data Source, install the plugin from the Dify Marketplace first.
The Notion card offers two credential options:
- OAuth: click Add OAuth and complete the authorization in the Notion window that opens.
- API key: create an internal integration on the Notion integration settings page, copy the secret under Secrets, then click Add API Key on the Notion card and paste it. For details on Notion integrations, refer to the official Notion documentation.