

1. Create a New Application in Okta
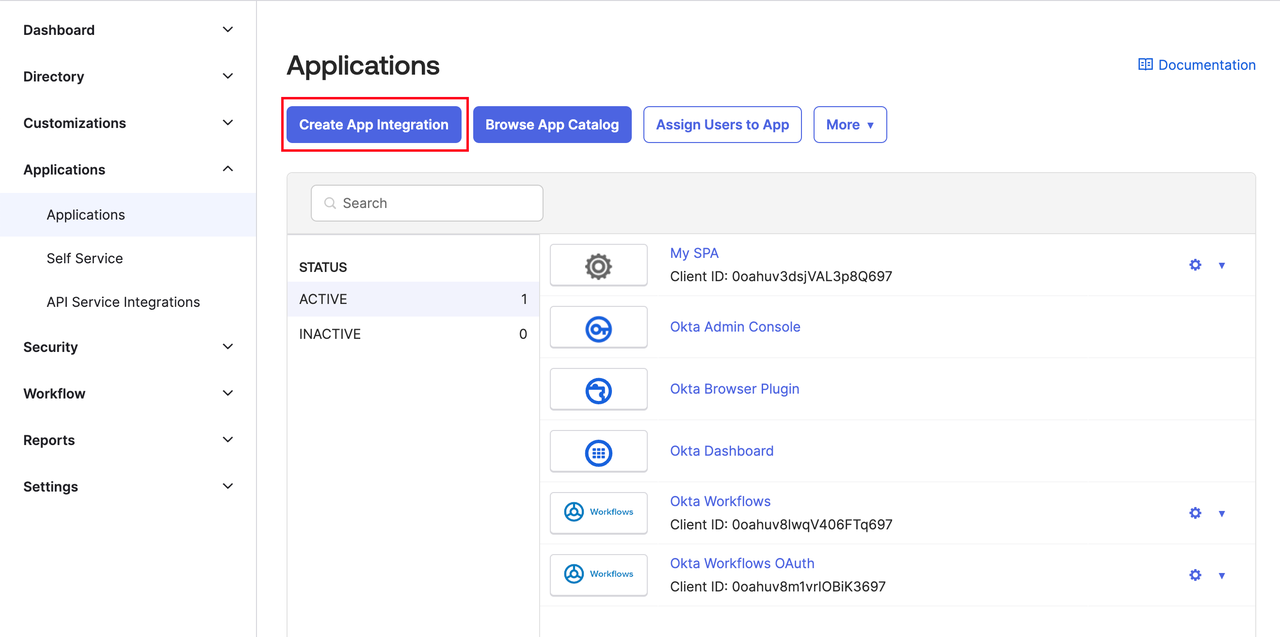
- Access the Okta administrator backend page, navigate to the Applications page, and click the Create App Integration button.
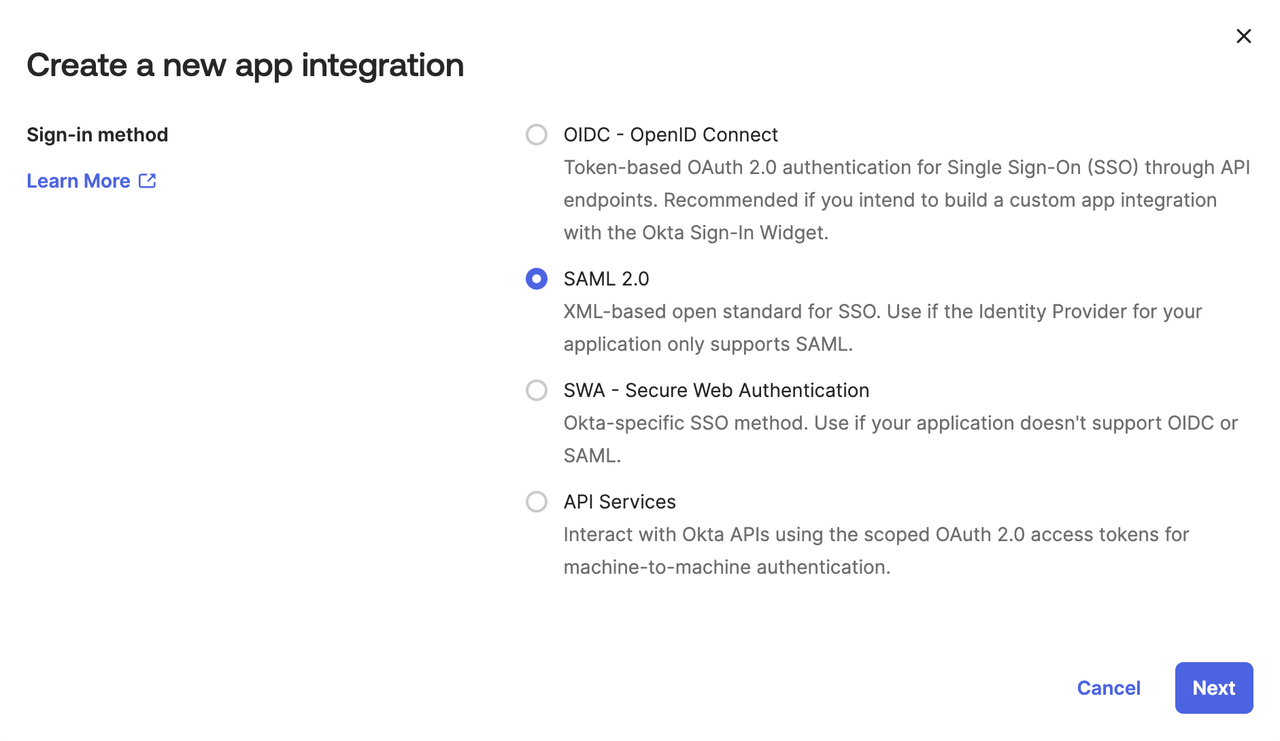
- Select “SAML 2.0” application type.
- After clicking Next, you will be navigated to the Configure SAML page, where you need to fill in some parameters. Please wait a moment and open a new browser tab, follow the instructions below to get the necessary information, then continue filling.
2. Configure Okta Application
System administrators need to fill the Dify Enterprise Callback URL into the Okta application.- Workspace
- WebApp Members (For Internal Users)
- WebApp External Users (For External Users)
Click Admin Backend → Authentication → Members → SSO Identity Provider → New Identity Provider → New SAML Provider, and get the Callback URL at the bottom. It usually follows this format:
It usually follows this format: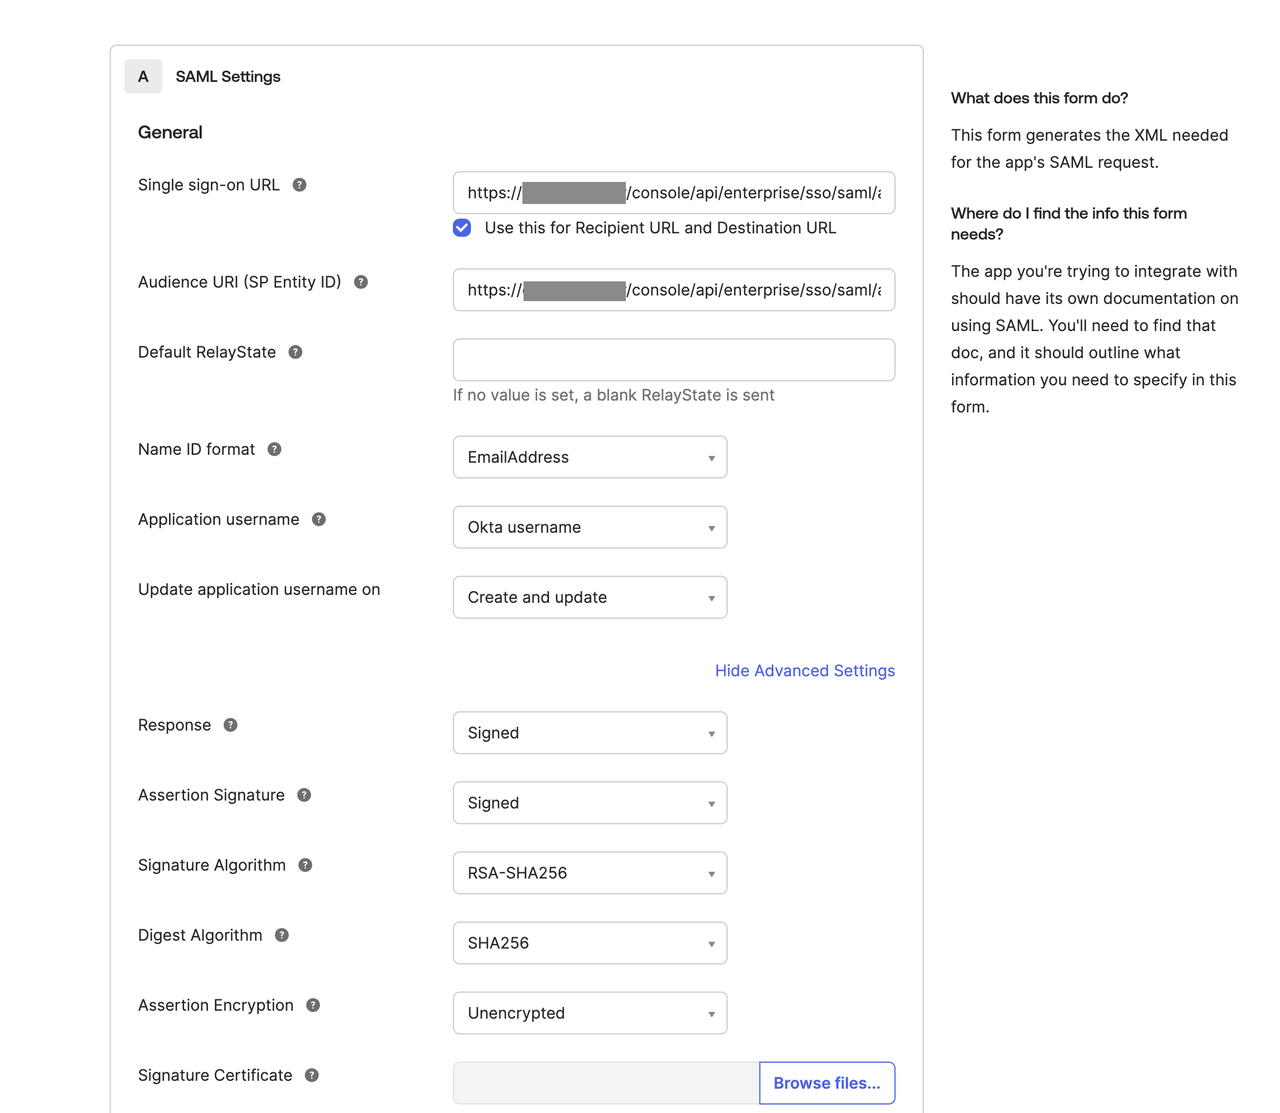 After filling in the URL, continue to complete the following settings:
- Set Name ID format to EmailAddress
- Under “Show Advanced Settings”, verify that response and assertion signatures are set to Signed
- Click the “Next” button to complete the setup.
3. Complete Configuration on Dify
-
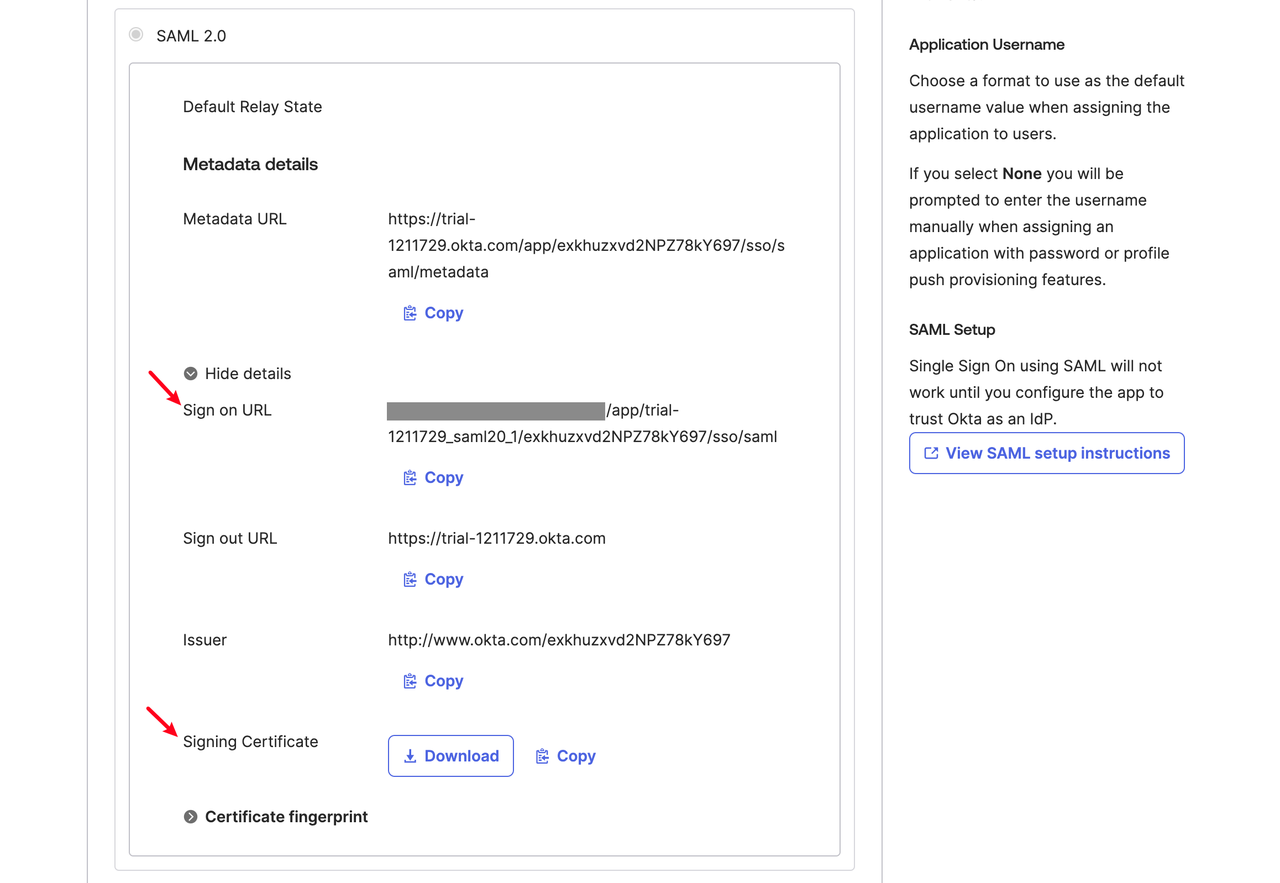
First go to the “Sign On” page of the Okta application and find the following information:
- Sign-on URL
- Signing certificate
-
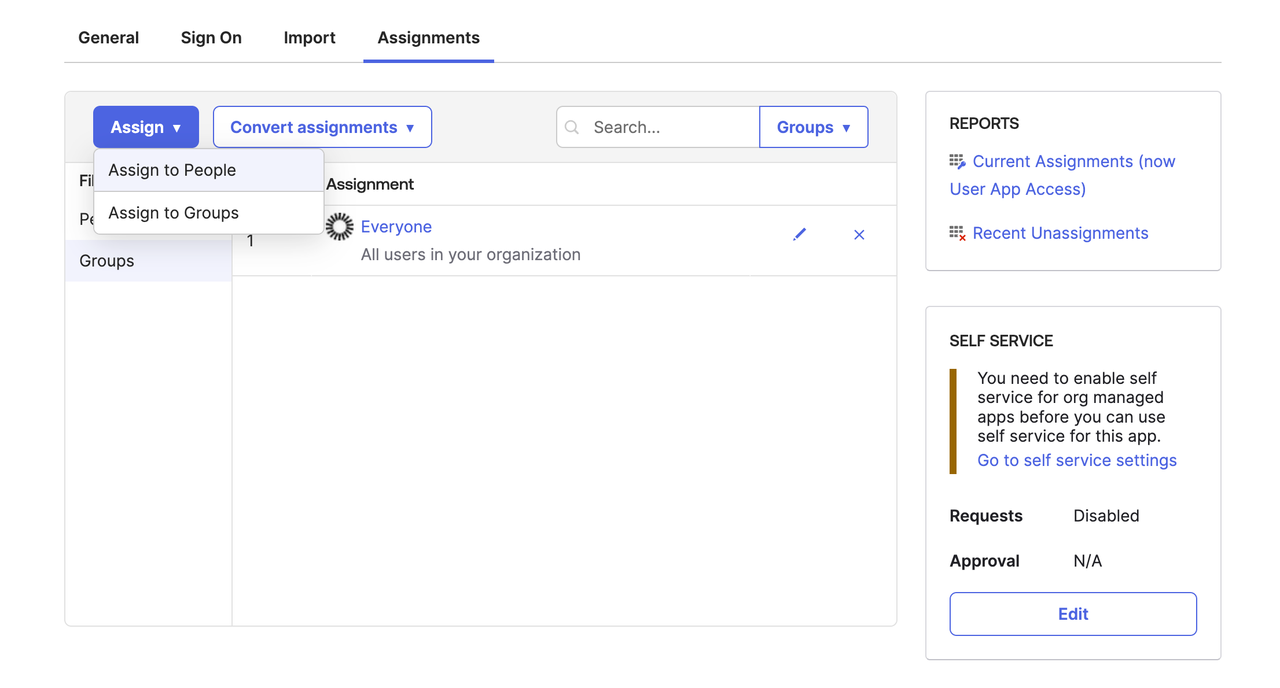
Then go to the “Assignments” page to assign members who are allowed to use SSO login.
-
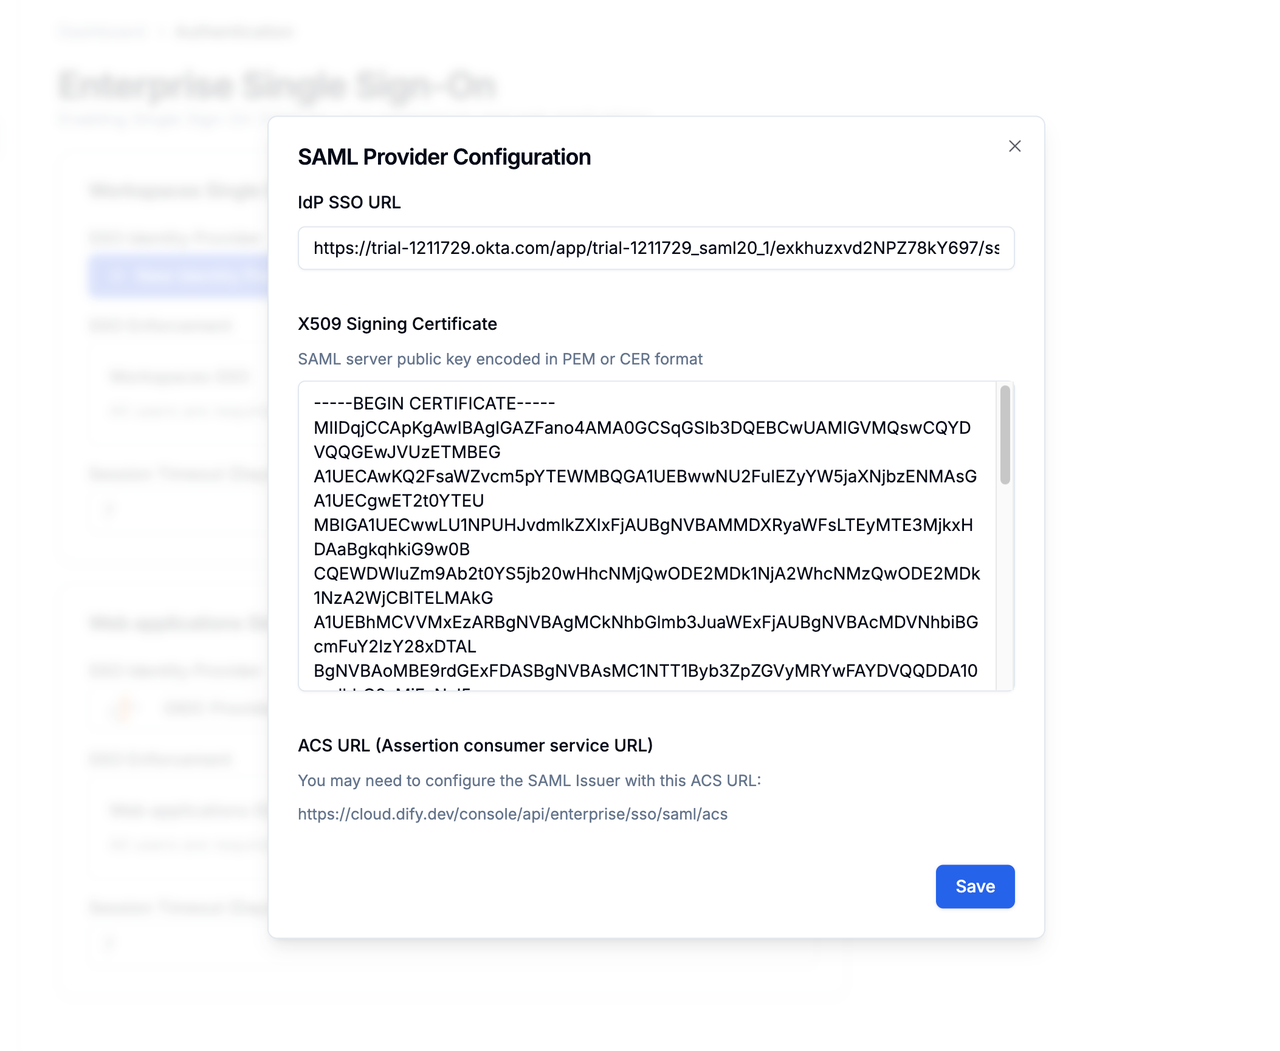
Finally, return to the Authentication page of Dify Enterprise, click ”+ New Identity Provider → New SAML Provider”, then fill in the information obtained above to complete the configuration.
When filling in the X509 Signing Certificate, please refer to the following format:
4. Enable SSO Mandatory Authentication (Optional)
System administrators can enable SSO Enforcement options for the following two scenarios to enable mandatory authentication:- Workspace: Requires authorization when logging into Dify Enterprise Workspace.
- WebApp: Requires verification when using applications created by the current Dify Enterprise.