1. Create a New Application in Azure
Access the Azure administrator backend page, navigate to the Applications page, and click New application.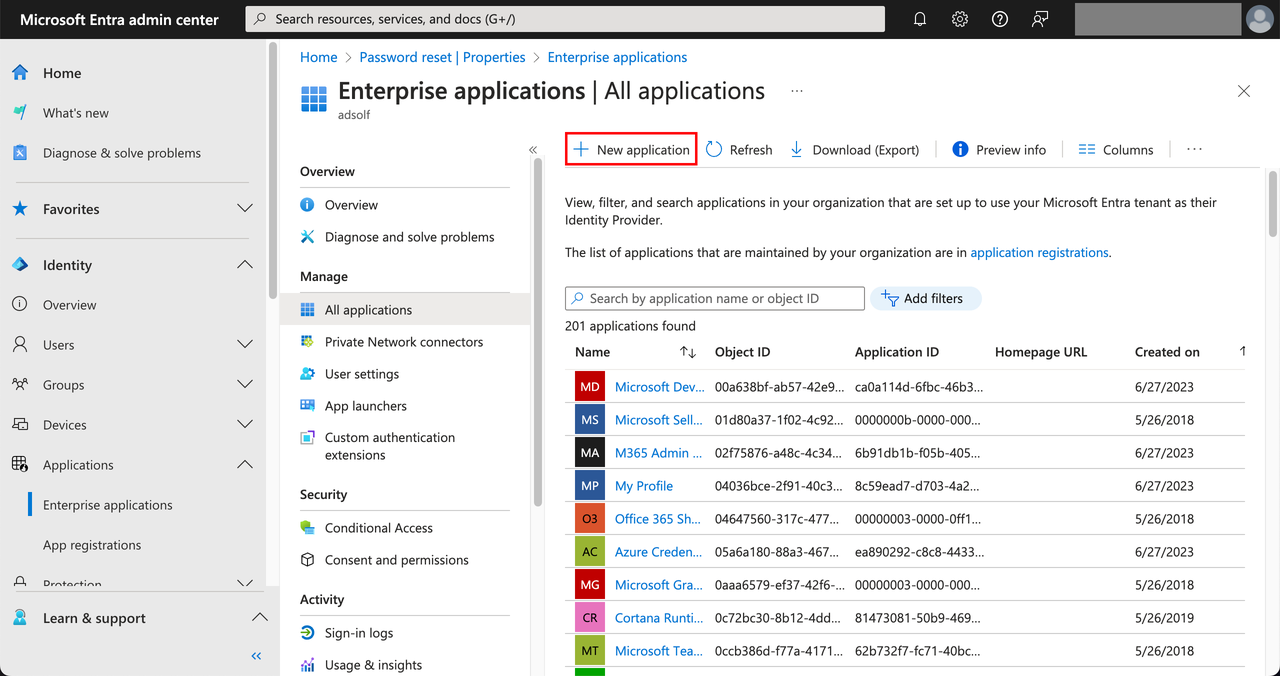 Select Create your own application, enter an application name such as “dify”, then select Integrate any other application you don’t find in the gallery (Non-gallery), then click Create.
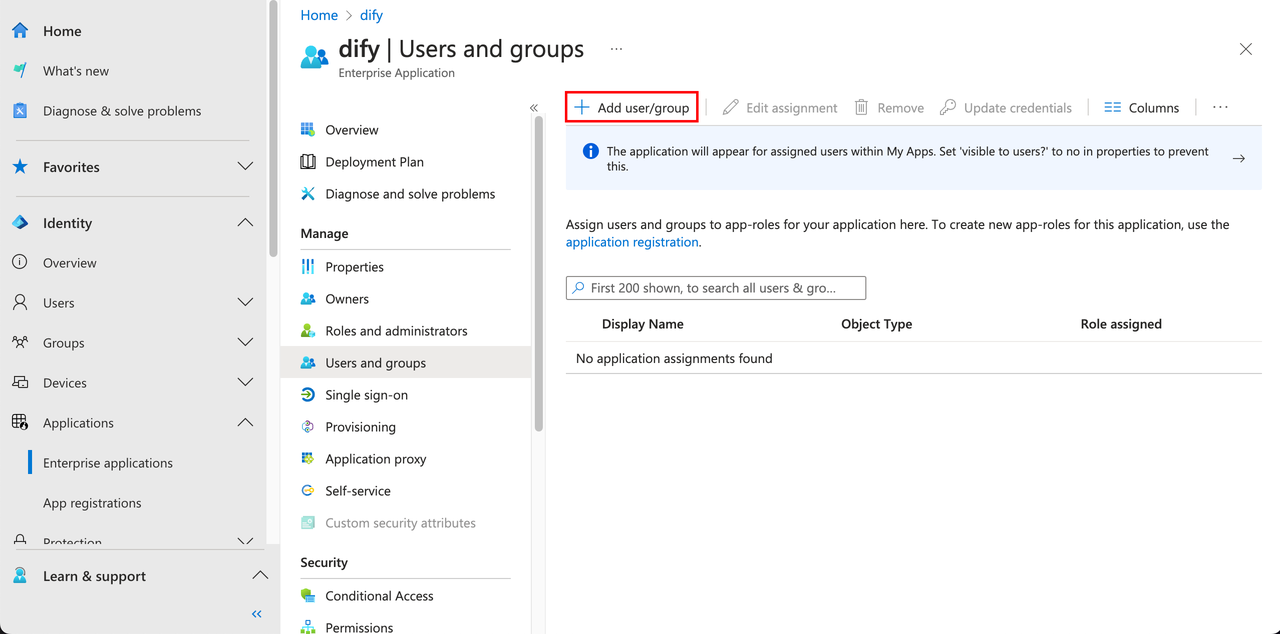
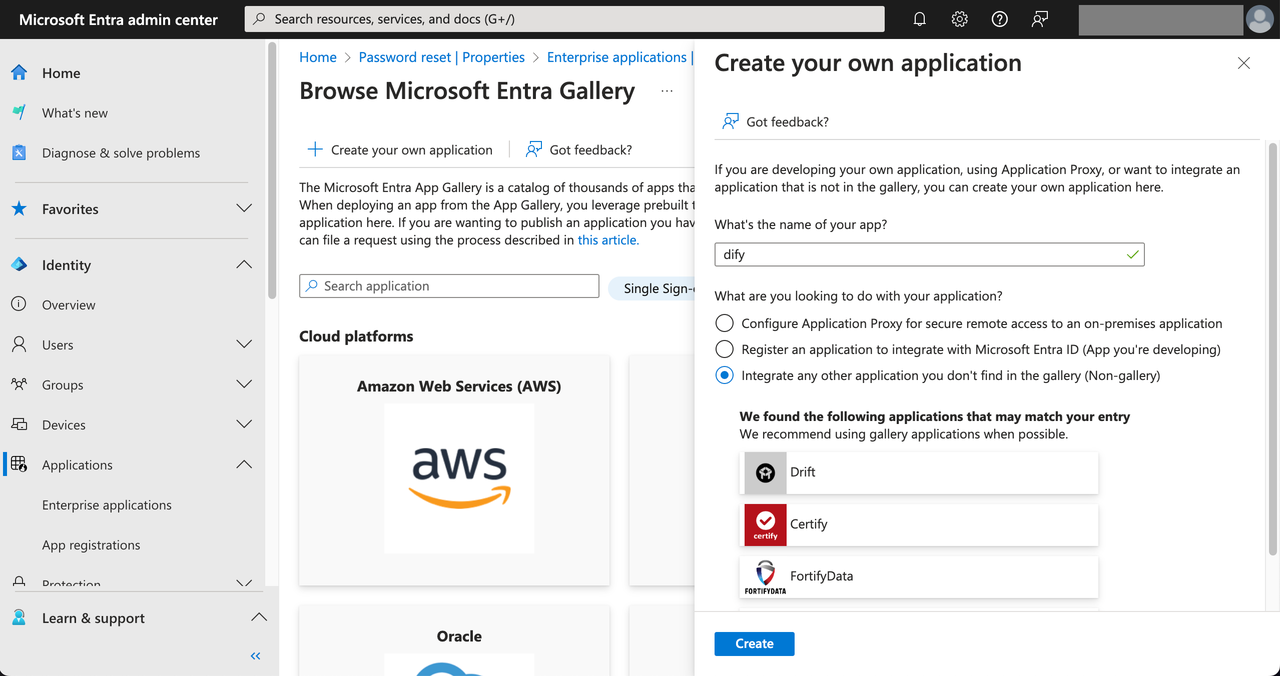 Next, you need to assign visible members to this application. Only authorized Azure members will be allowed to log in to Dify Enterprise. Select Users and groups on the left side of the application, then click Add user/group.
2. Configure the Application
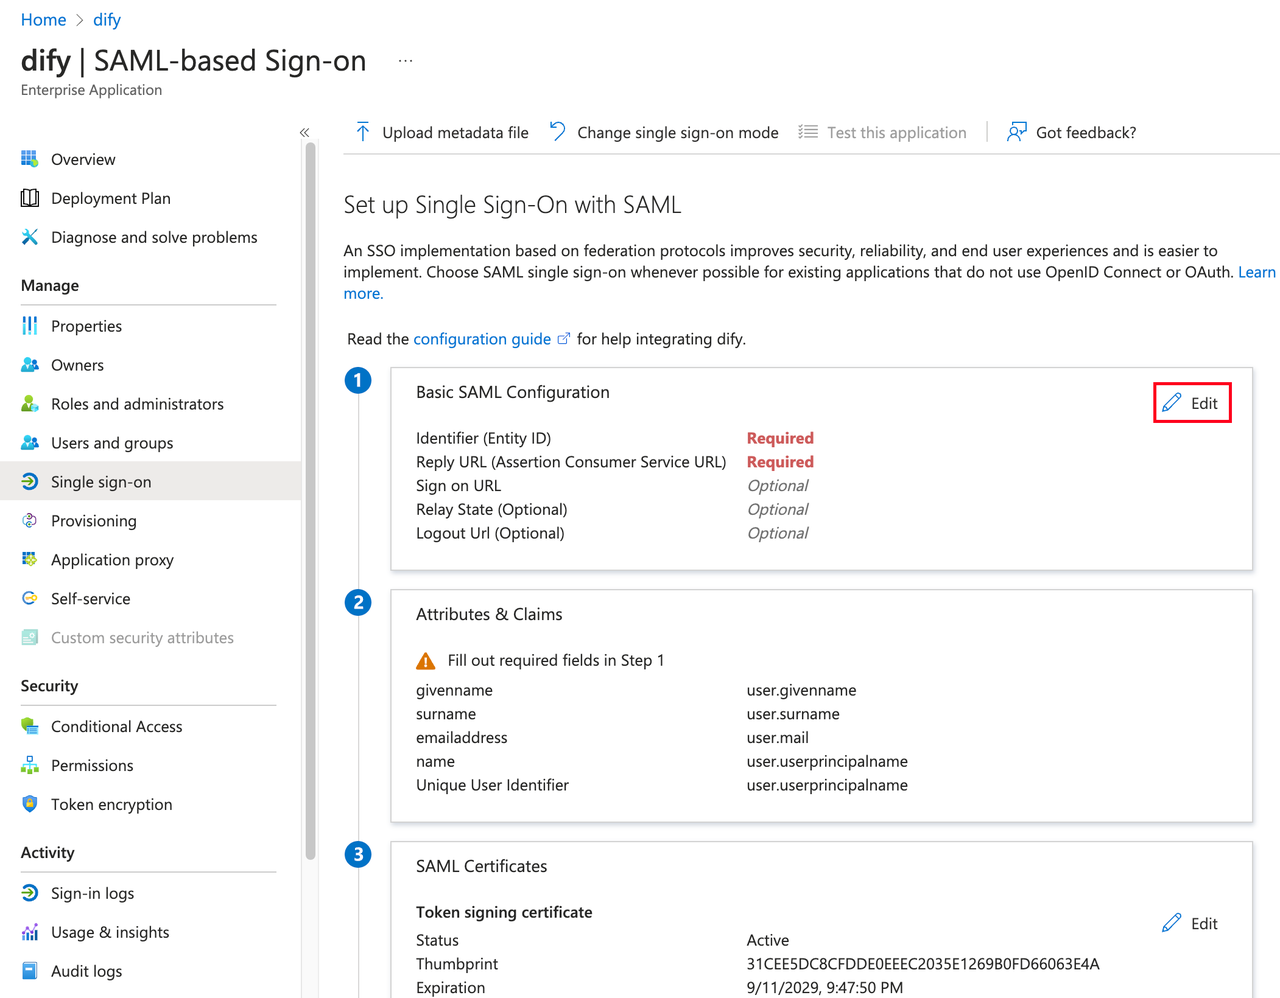
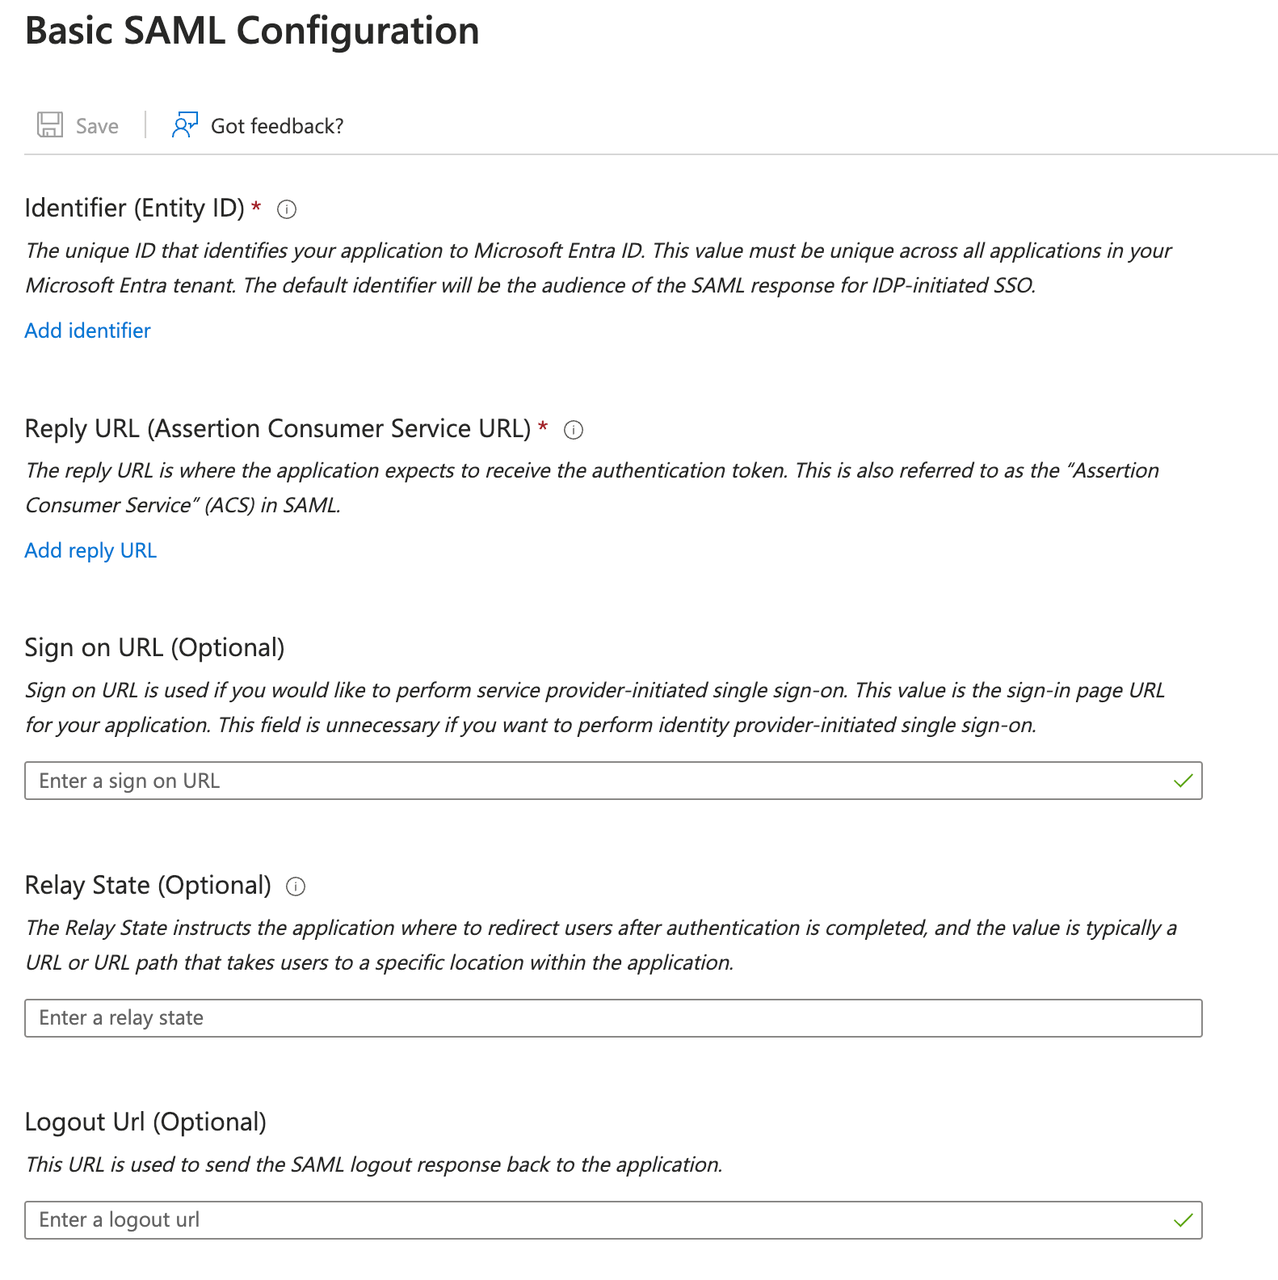
Click the Single sign-on option under Manage on the left side of the application, then select the SAML option.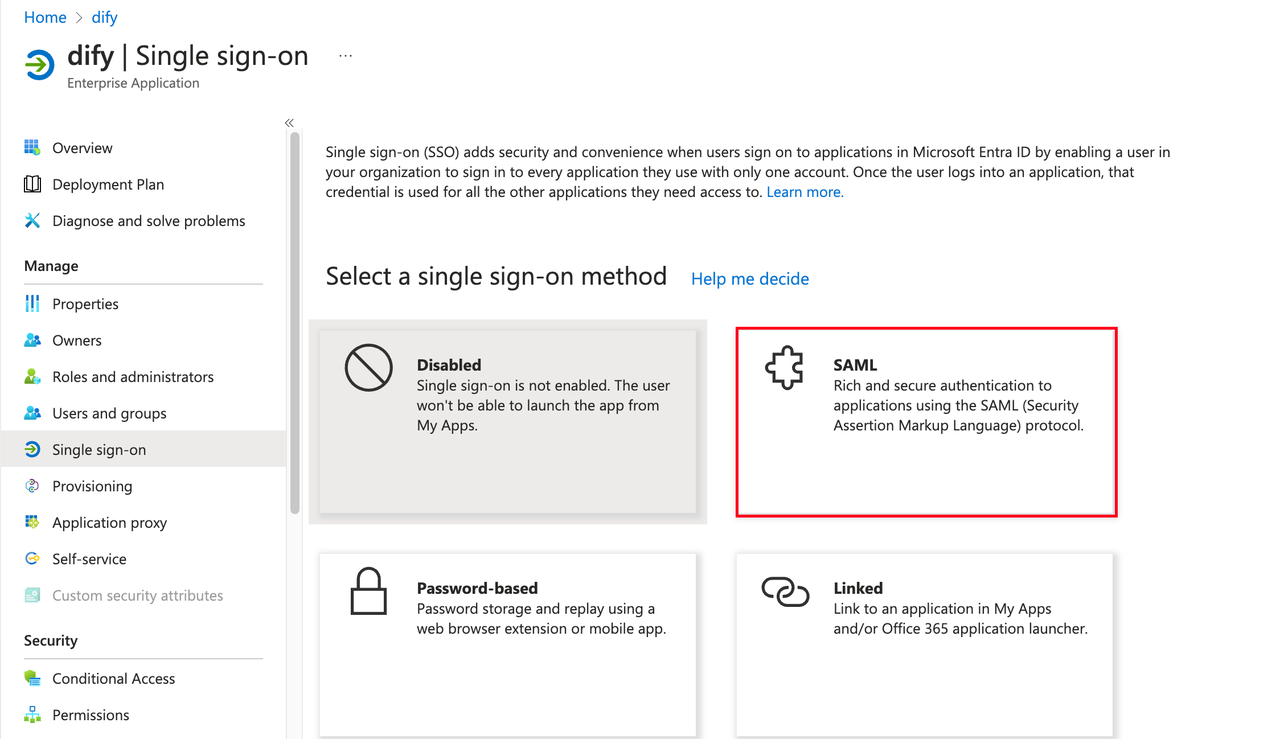 Edit the SAML configuration and fill in the Dify Enterprise ACS URL in the Entity ID and Reply URL fields.
- Workspace
- Web App Members (For Internal Users)
- WebApp External Users (For External Users)
Click Admin Backend → Authentication → Members → SSO Identity Provider → New Identity Provider → New SAML Provider, and get the Callback URL at the bottom.It usually follows this format:
Advanced Configuration: Edit Attributes and Claims
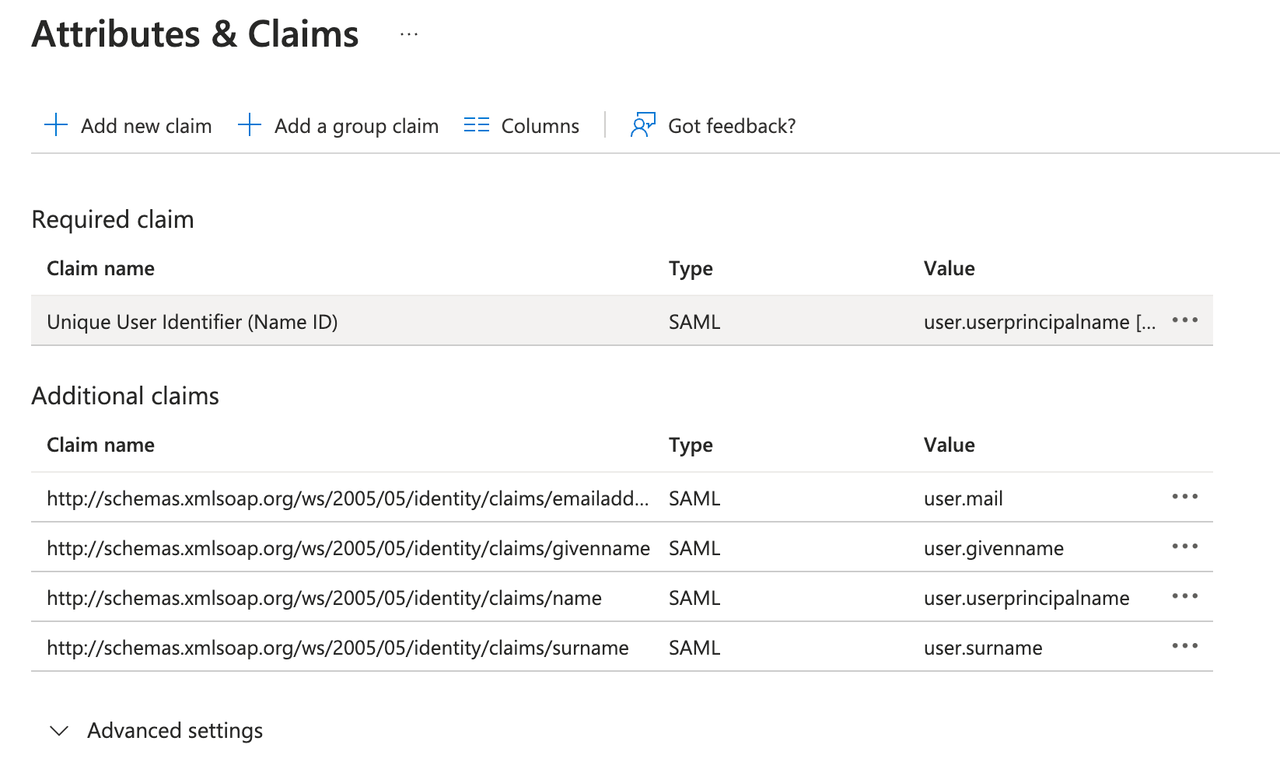
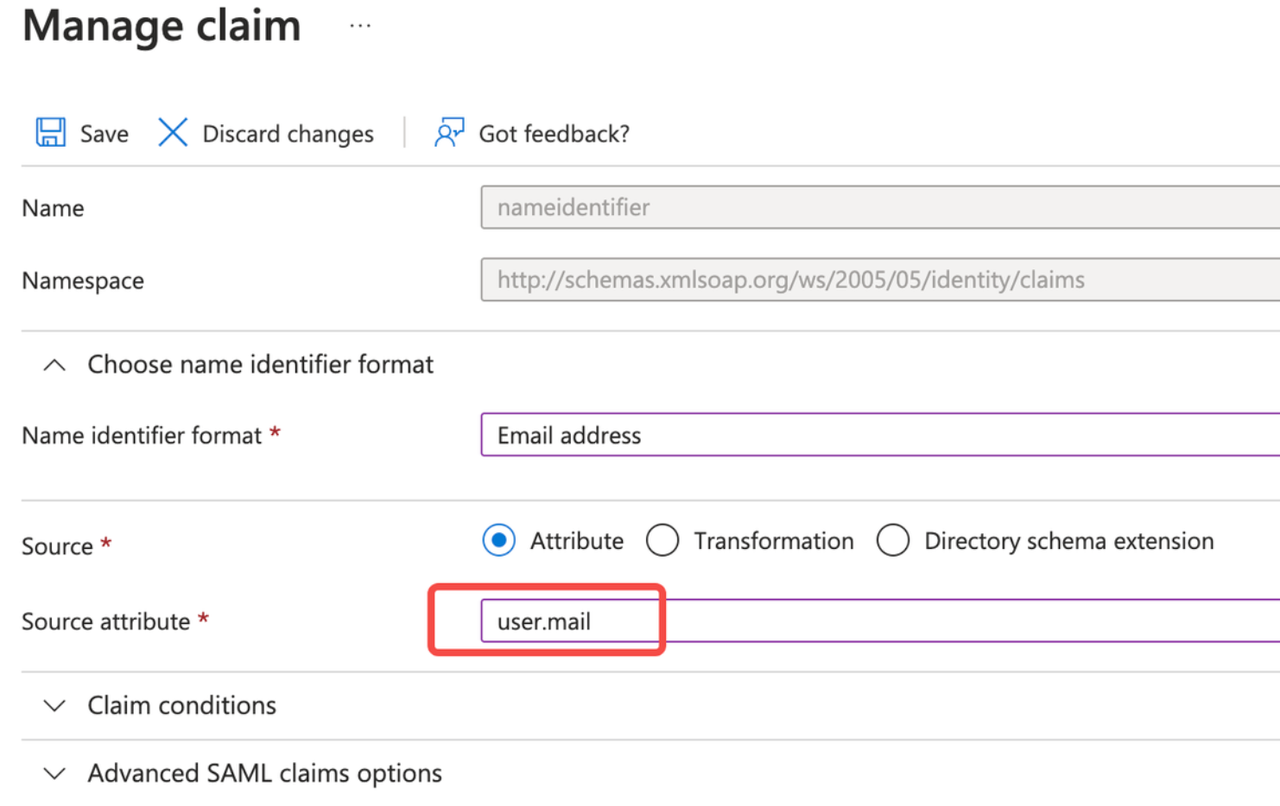
- Click Unique User Identifier (Name ID) under Required claim.
- Change the source attribute to
user.mail.
3. Complete Dify Enterprise Backend Configuration
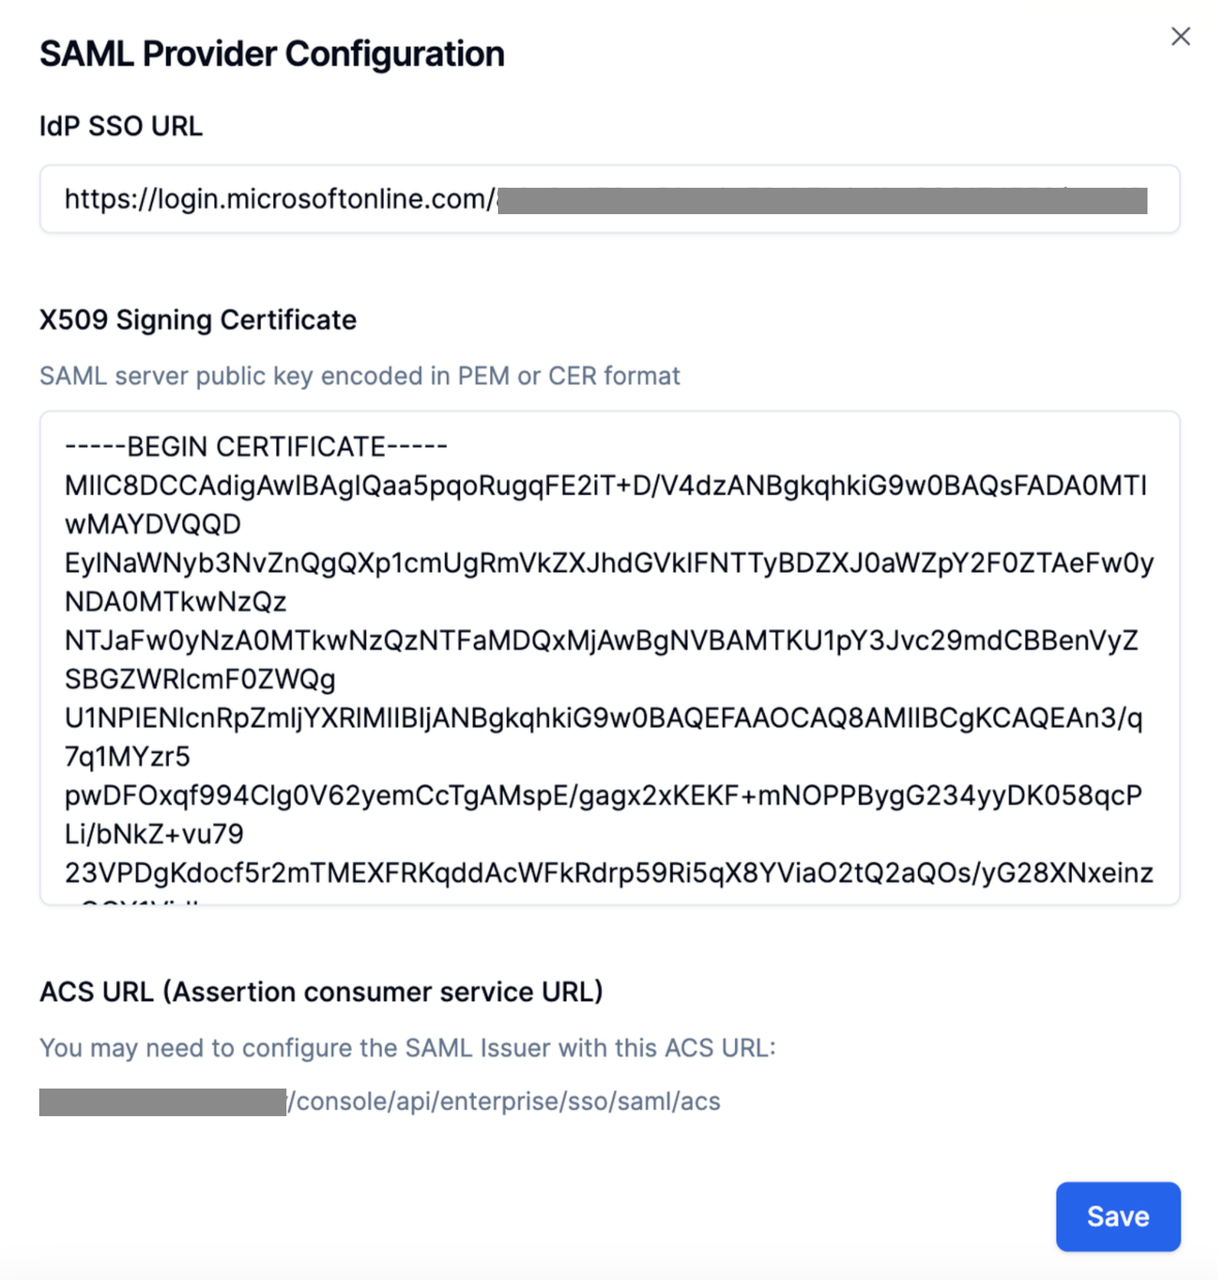
System administrator clicks on the Authentication page of Dify Enterprise, click ”+ New Identity Provider → New SAML Provider”,- Workspace
- WebApp Members (For Internal Users)
- WebApp External Users (For External Users)
Click Admin Backend → Authentication → Members → SSO Identity Provider → New Identity Provider → New SAML Provider, and get the Callback URL at the bottom. It usually follows this format:
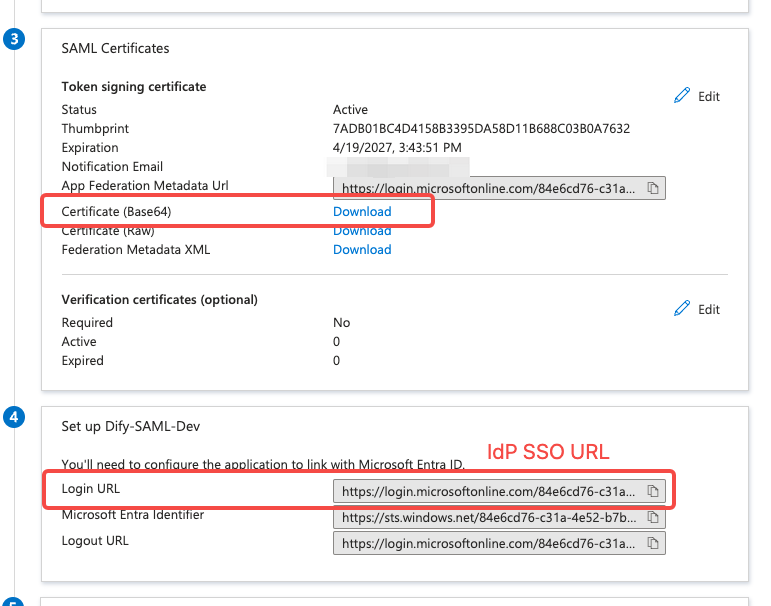
- Fill in the Login URL from the Azure application in the IdP SSO URL field;
- Fill in the content from the downloaded Certificate file in the X509 Signing Certificate field;
It usually follows this format: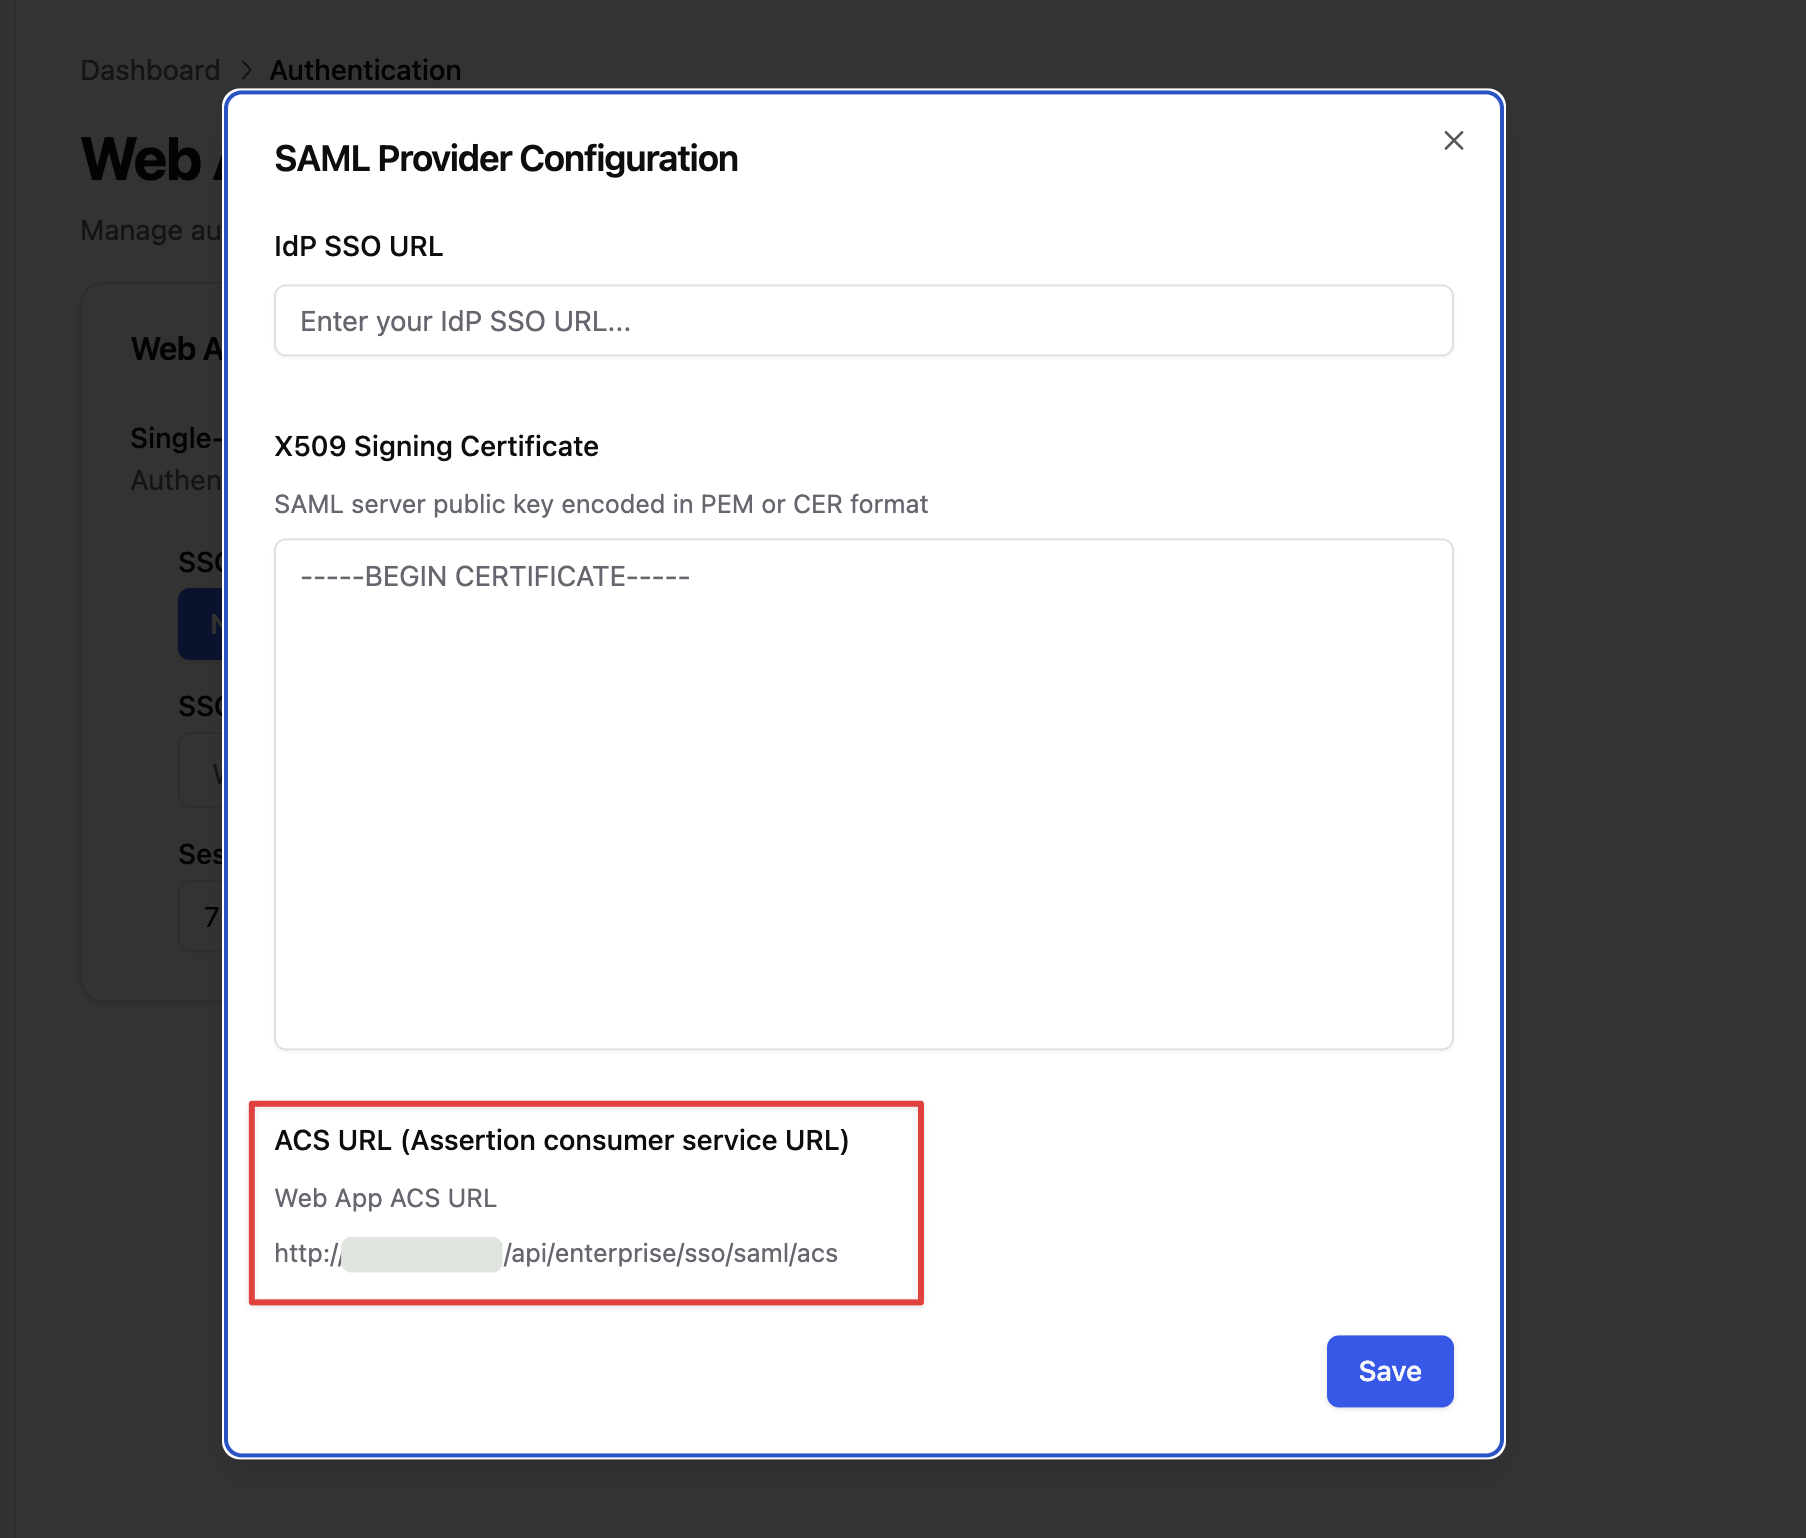
4. Enable SSO Authentication
After completing the basic SSO configuration, system administrators can enable SSO authentication for internal members and external users separately to unify identity authentication processes.For Internal Users
If you want only members who have passed enterprise identity authentication to access the Dify workspace and Web App, click Authentication → Members and enable the SSO authentication toggle.- Workspace: Requires authorization when logging into the Dify Enterprise workspace.
- Web App: Requires verification when using applications created by the current Dify Enterprise.
For External Users
If you want to enable authentication for external users of Web Apps (such as customers and partners) to ensure that only trusted users can access applications, click Authentication → Web App and enable the SSO authentication toggle.- Fill in the Login URL from the Azure application in the IdP SSO URL field;
- Fill in the content from the downloaded Certificate file in the X509 Signing Certificate field;