> ## Documentation Index
> Fetch the complete documentation index at: https://enterprise-docs.dify.ai/llms.txt
> Use this file to discover all available pages before exploring further.
# Sync Members
> Automatically sync organization members through SCIM protocol. Version ≥ v2.7.0
## Overview
Dify Enterprise Edition supports automatic synchronization of your organization's existing structure through the [SCIM](https://scim.cloud/) (System for Cross-domain Identity Management) protocol, making it easier for admins to manage large teams efficiently.
* Standard SCIM 2.0 protocol support
* Automatic user and organization structure sync
* Works with major identity providers
* Real-time member updates
## Before You Start
To enable automatic synchronization, make sure you have:
1. Dify EE system administrator permissions
2. Access to your organization's identity provider backend
3. Understanding of your current identity provider type
## Setup Guide
### 1. Get Your SCIM Configuration
In the enterprise dashboard, go to **Members** → **Sync Settings** from the left sidebar.
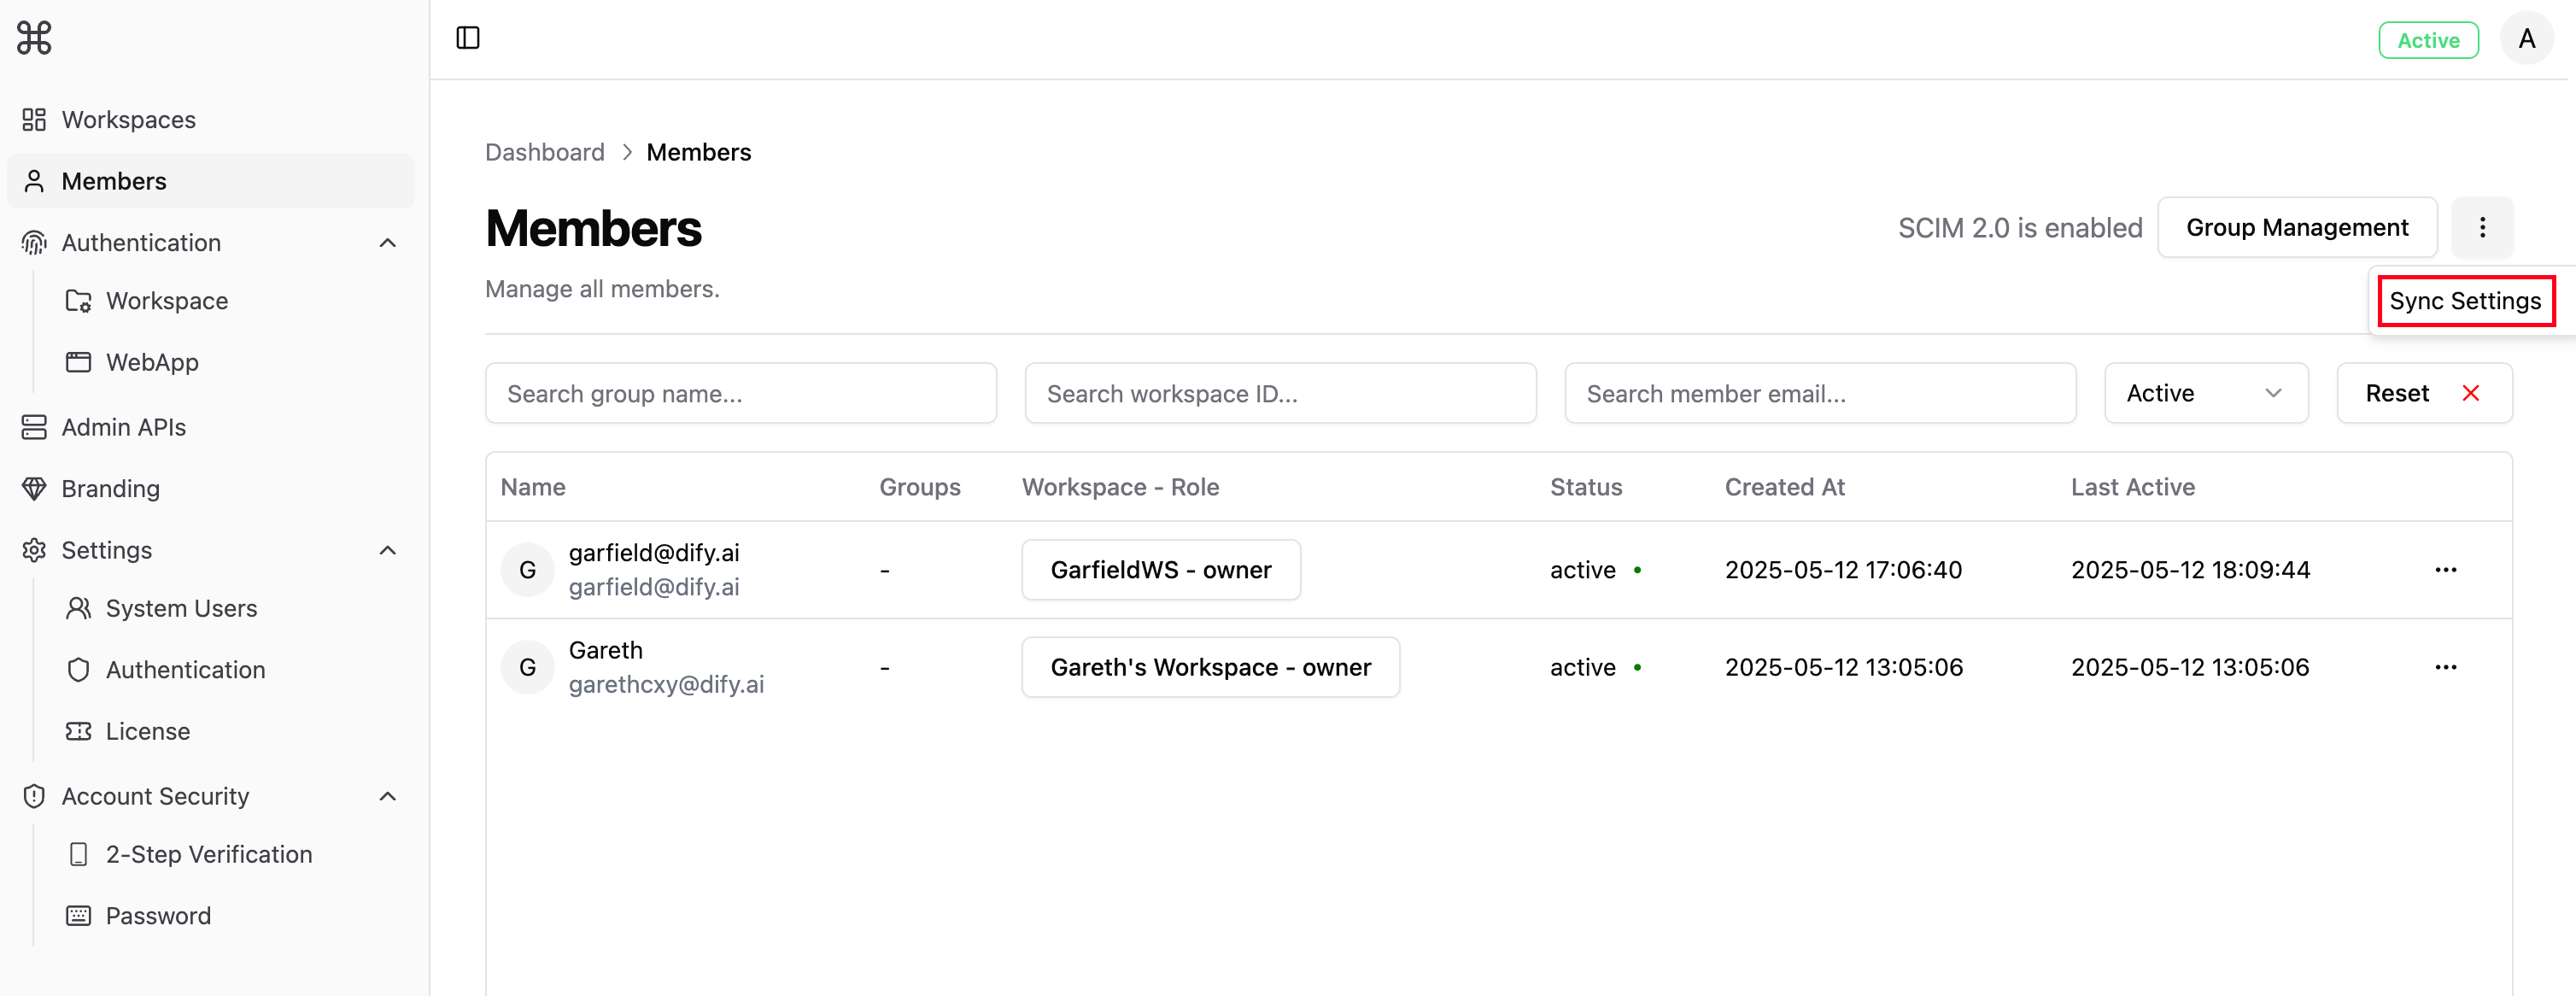 Find and copy the `SCIM 2.0 Base URL` shown on the page. You'll need this for your identity provider setup.
* Click **Get Token**
* The system generates an OAuth Bearer Token
This token appears only once. Copy and save it immediately in a secure location. If you lose it, you'll need to generate a new one.
Keep these items safe for the next steps:
* SCIM Base URL
* OAuth Bearer Token
### 2. Connect Your Identity Provider
Select your identity provider below for specific setup instructions:
Set up member sync with Azure AD
Set up member sync with Okta
## How SCIM Maps to Dify
Here's how SCIM resources work with Dify features:
| SCIM Resource Type | Maps to Dify | What You Can Do | Notes |
| ------------------ | -------------------------------- | -------------------------- | ----------------------------------------------------------------------- |
| User | Member (email, username, status) | Create, Update, Deactivate | Deactivating changes user status to "Disabled" but keeps their data |
| Group | Group (name, members) | Create, Update, Delete | Deleting a group removes it permanently along with member relationships |
## Key Things to Know
Once you enable SCIM sync, your identity provider becomes the single source of truth for user and group management. To learn about API limitations, check out the [Admin APIs](/en/3.6.x/administer/admin-apis) documentation.
### What Changes When SCIM is Active
**With SCIM enabled:**
* All user and group management happens through your identity provider
* Admin APIs become read-only
* Self-registration is disabled
**With SCIM disabled:**
* Full Admin API access returns
* All user management features work normally
### If You Need to Make Manual Changes
Sometimes you might need to use Admin APIs directly:
1. Temporarily turn off SCIM
2. Make your API changes
3. Turn SCIM back on and check sync status
This can cause sync conflicts. Use with caution.
For more details about Admin APIs, please check the [Admin APIs](/en/3.6.x/administer/admin-apis) documentation.
Find and copy the `SCIM 2.0 Base URL` shown on the page. You'll need this for your identity provider setup.
* Click **Get Token**
* The system generates an OAuth Bearer Token
This token appears only once. Copy and save it immediately in a secure location. If you lose it, you'll need to generate a new one.
Keep these items safe for the next steps:
* SCIM Base URL
* OAuth Bearer Token
### 2. Connect Your Identity Provider
Select your identity provider below for specific setup instructions:
Set up member sync with Azure AD
Set up member sync with Okta
## How SCIM Maps to Dify
Here's how SCIM resources work with Dify features:
| SCIM Resource Type | Maps to Dify | What You Can Do | Notes |
| ------------------ | -------------------------------- | -------------------------- | ----------------------------------------------------------------------- |
| User | Member (email, username, status) | Create, Update, Deactivate | Deactivating changes user status to "Disabled" but keeps their data |
| Group | Group (name, members) | Create, Update, Delete | Deleting a group removes it permanently along with member relationships |
## Key Things to Know
Once you enable SCIM sync, your identity provider becomes the single source of truth for user and group management. To learn about API limitations, check out the [Admin APIs](/en/3.6.x/administer/admin-apis) documentation.
### What Changes When SCIM is Active
**With SCIM enabled:**
* All user and group management happens through your identity provider
* Admin APIs become read-only
* Self-registration is disabled
**With SCIM disabled:**
* Full Admin API access returns
* All user management features work normally
### If You Need to Make Manual Changes
Sometimes you might need to use Admin APIs directly:
1. Temporarily turn off SCIM
2. Make your API changes
3. Turn SCIM back on and check sync status
This can cause sync conflicts. Use with caution.
For more details about Admin APIs, please check the [Admin APIs](/en/3.6.x/administer/admin-apis) documentation.