> ## Documentation Index
> Fetch the complete documentation index at: https://enterprise-docs.dify.ai/llms.txt
> Use this file to discover all available pages before exploring further.
# Configuring OAuth2 with Okta
This document will use Okta as the SSO identity provider to demonstrate how to enable OAuth2 authorization protocol for Dify Enterprise.
By enabling this feature, the enterprise login page will use a unified identity authentication entry to enhance security. For enterprise internal users, there's no need to enter complex passwords - they can log in using organizational accounts to pass verification, simplifying the login process.
> This document will mention internal users and external users. The following distinctions are made:
> Internal members: Members registered within the Dify Enterprise workspace or added through the admin backend.
> External users: Members not within Dify Enterprise
## 1. Create a New Application in Okta
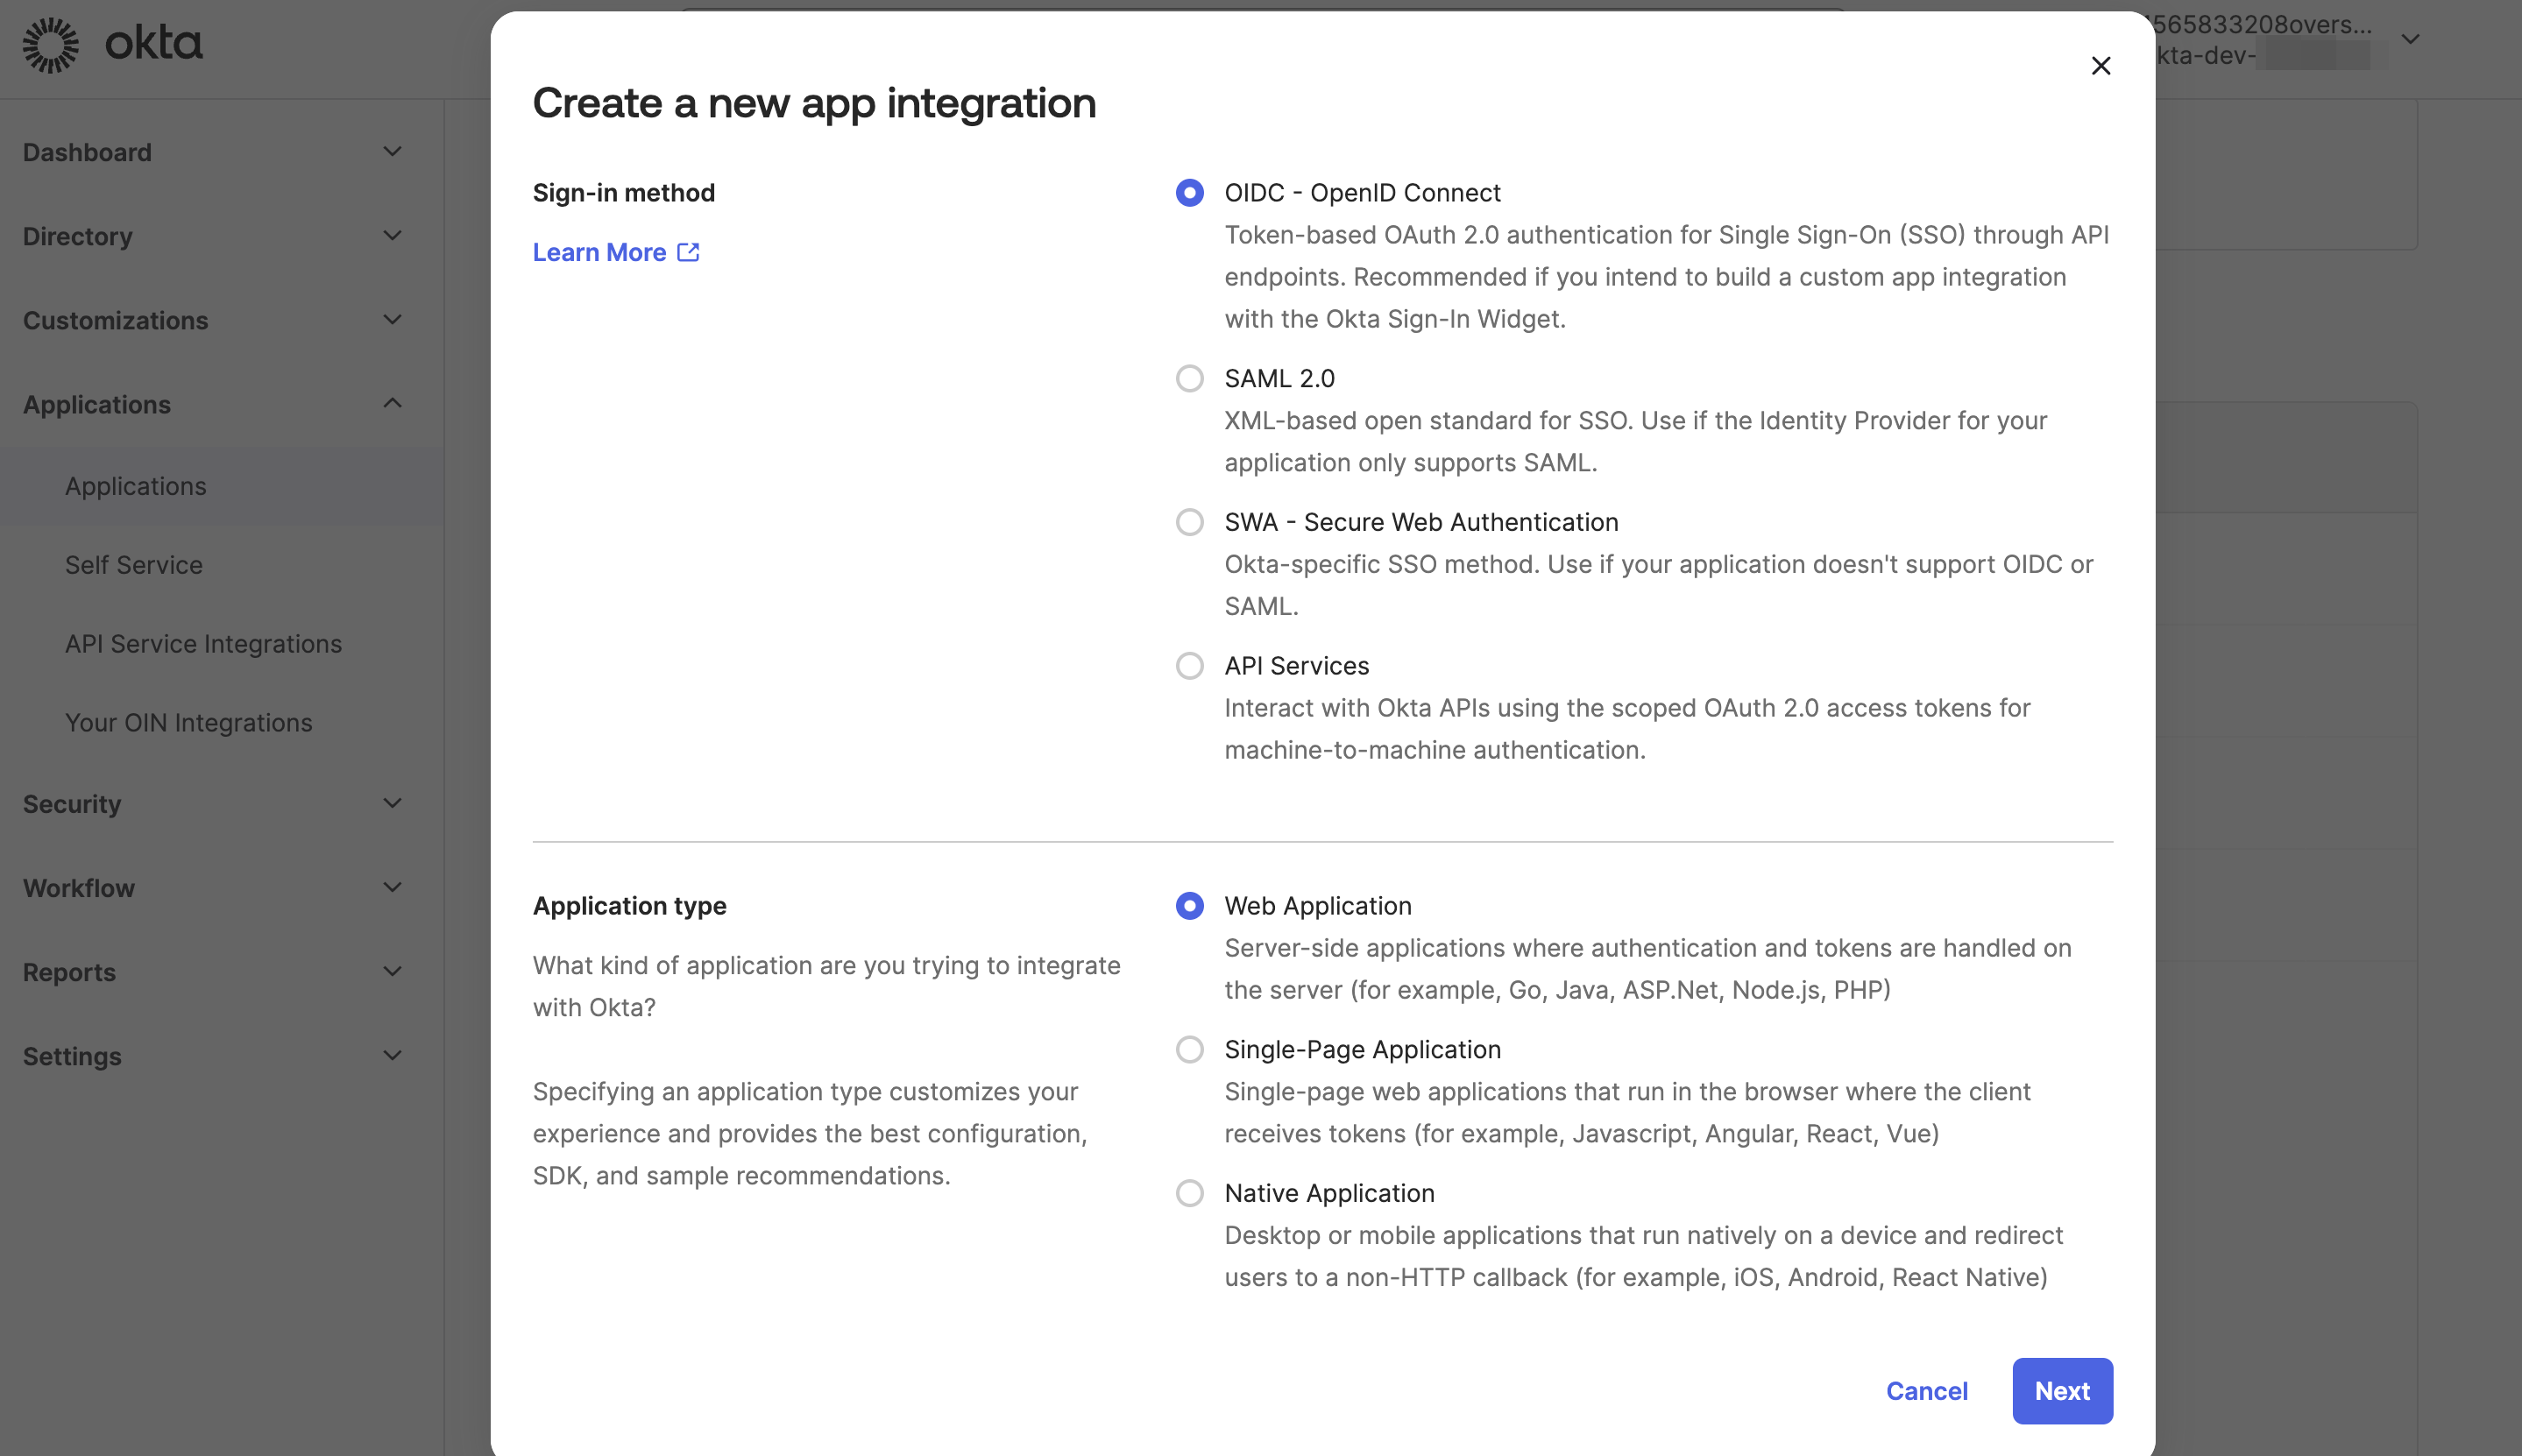
1. Access the Okta administrator backend page, navigate to the Applications page. Click the Create App Integration button, select OIDC login method and Web Application application type.
2. Fill in the application name according to the page prompts and define the authorization scope according to requirements.
* The `Sign-in redirect URIs` field needs to be filled with the Dify Enterprise Callback URL. Please refer to [the section below](#2-obtaining-callback-url) for how to obtain it.
* Leave the `Sign-out redirect URIs` field empty.
## 2. Obtaining Callback URL
According to the required SSO scope to be enabled, **Callback URLs differ**. System administrators need to fill the Dify Enterprise Callback URL into the corresponding GitHub OAuth2 application to complete the creation process.
Click **Admin Backend** → **Identity Authentication** → **Member** → **SSO Identity Provider** → **New Identity Provider** → **New OAuth2 Provider**, and view the Workspace Callback URL at the bottom.
It usually follows this format:
```bash theme={null}
https://[your-dify-enterprise-url]/console/api/enterprise/sso/oauth2/callback
```
Click **Admin Backend** → **Identity Authentication** → **Member** → **SSO Identity Provider** → **New Identity Provider** → **New OAuth2 Provider**, and view the Workspace Callback URL at the bottom.
It usually follows this format:
```bash theme={null}
https://[your-app-url]/api/enterprise/sso/members/oauth2/callback
```
Click **Admin Backend** → **Identity Authentication** → **Web App** → **SSO Identity Provider** → **New Identity Provider** → **New OAuth2 Provider**, and view the Web App Callback URL at the bottom.
It usually follows this format:
```bash theme={null}
https://[your-app-url]/api/enterprise/sso/oauth2/callback
```
2. Paste it into the **Sign-in redirect URIs** field in the Okta App and save the application.
## 3. Enable OAuth2 Authentication
### 3.1 Obtain Key Information from Okta Application
1. Go to the "General" page of the Okta application and copy the information from the following fields for subsequent configuration:
* Client ID
* Client secret
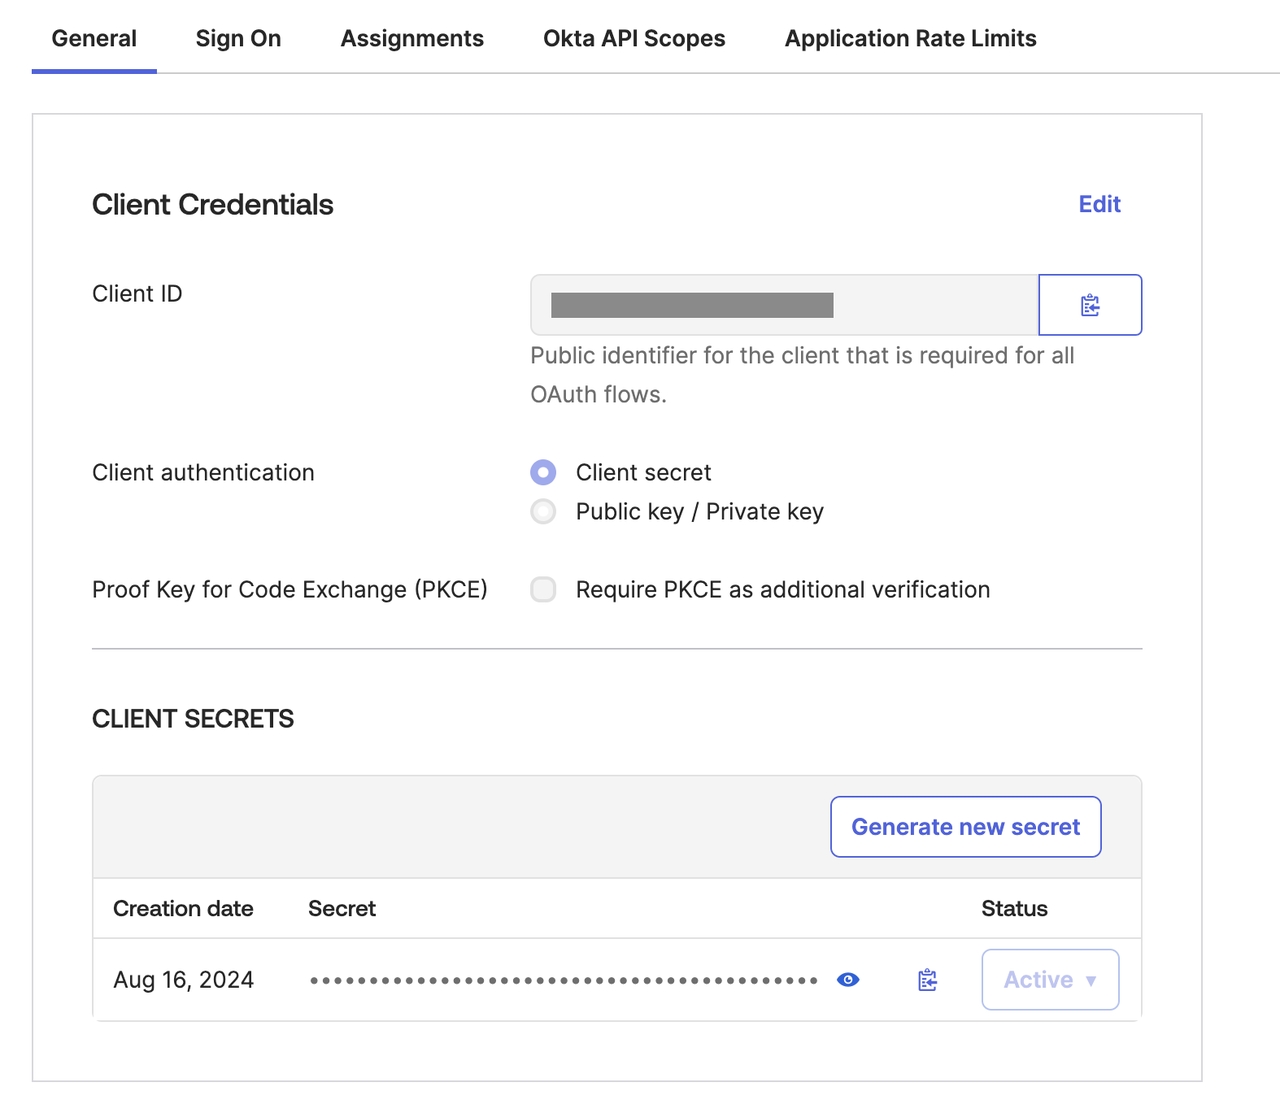
2. (Optional) Check **Proof Key for Code Exchange (PKCE) → Require PKCE as additional verification** then click **Save**. After checking this option, Okta will enforce verification of the `code_verifier` when exchanging authorization codes for tokens, reducing the risk of authorization code interception attacks.
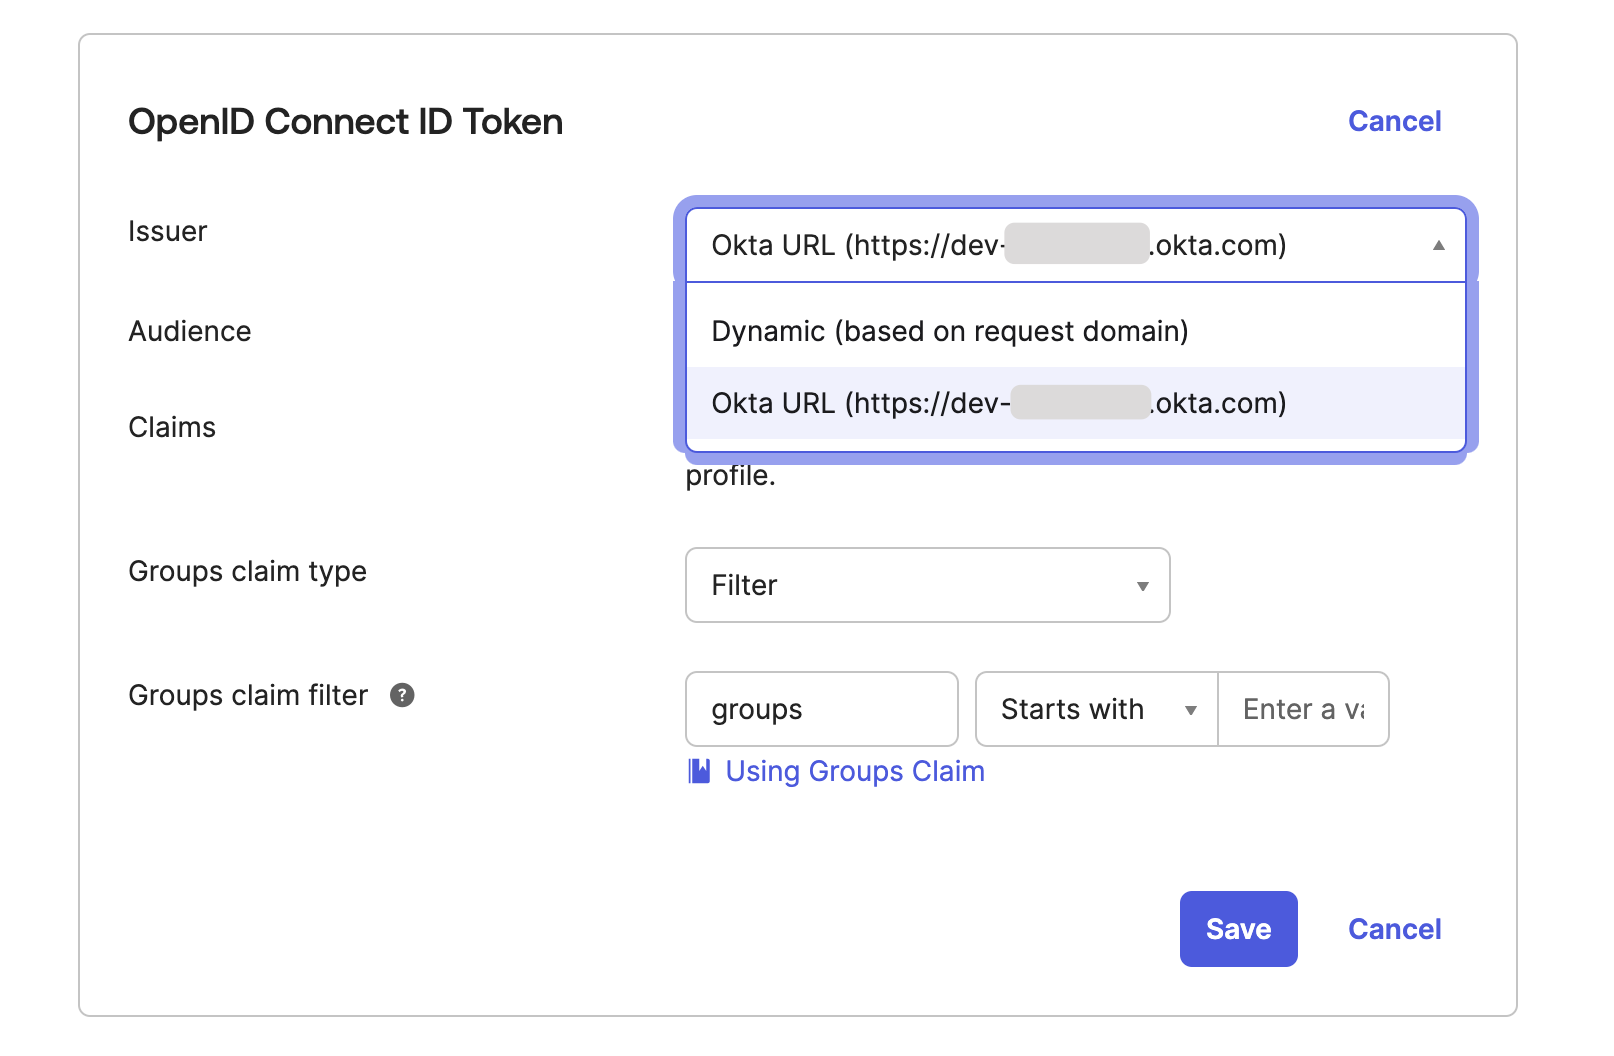
3. Switch to the "Sign On" page and set the **Issuer** to a fixed link.
### 3.2 Configure OAuth2 Authentication
Access the Dify Enterprise Authentication page, click **+ New Identity Provider → New OAuth2 Provider**, and fill in the following information according to the prompts:
* **Client ID**
* **Client Secrets**
* If PKCE verification is enabled in the Okta application, you need to enable the **PKCE Additional Verification** switch in the window
The basic information of different OAuth2 providers varies, please refer to the official documentation of each provider. The following information is for reference only and can be adjusted according to actual needs.
* **Authorization Endpoint**: `https://your-okta-issuer-url/v1/authorize`
* **Token Endpoint**: `https://your-okta-issuer-url/v1/token`
* **User Info Endpoint**: `https://your-okta-issuer-url/v1/userinfo`
* **Scopes**: `openid,profile,email`
> How to obtain `your-okta-issuer-url`: **Security → API → Authorization Servers → Issuer URI**. For more information on how to obtain more field information through Okta App, please refer to [Use of the Issuer](https://support.okta.com/help/s/article/What-is-theIssuerlocated-under-the-OpenID-Connect-ID-Token-app-settings-used-for?language=en_US).
## 4. Enable SSO Mandatory Authentication (Optional)
System administrators can enable **SSO Enforcement** options for the following two scenarios to enable mandatory authentication:
* **Workspace**: Requires authorization when logging into Dify Enterprise Workspace.
* **WebApp**: Requires verification when using applications created by the current Dify Enterprise.
After enabling, accessing the corresponding scenarios will prompt for access authorization.